
Using AUGVR
See what the audio is doing. Seven views, a meter panel that stays beside them, and a strip of meters for the corner of the screen. Every control of the plugin and the app, in the order a session reaches for them.
Downloading and installing are covered in the Quick Start.
The window
AUGVR shows what the audio is doing: its spectrum, its waveform, its stereo image, its level and its loudness. It never changes the sound. In a DAW the plugin passes the audio through untouched and adds no latency.
The window has three parts. The header along the top chooses what is shown, the display fills the middle with one of seven views, and the meter panel stays at the right whichever view is on screen. What is set once and then left alone is in the Config drawer.
FIG.1AUGVR / Overview
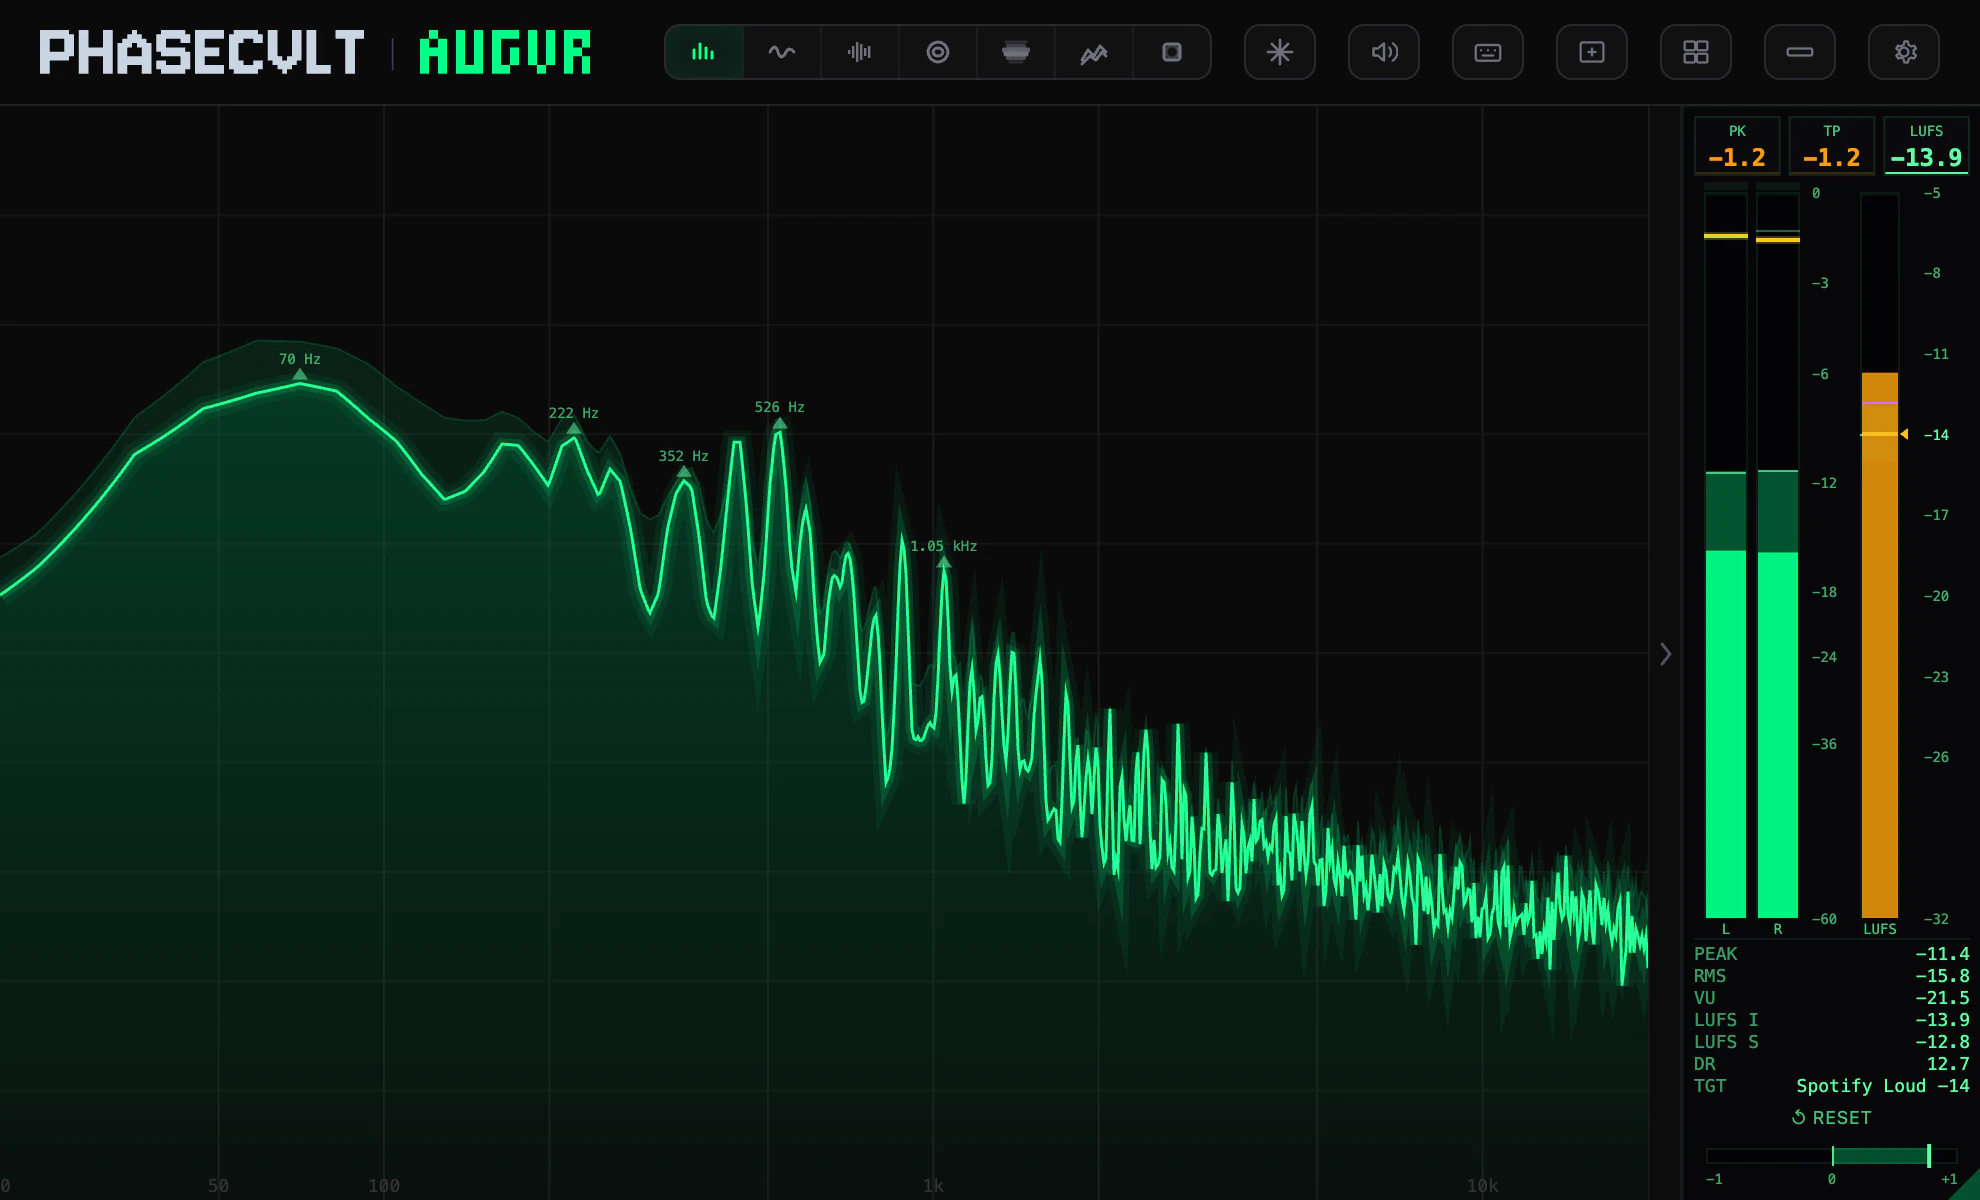
The app on macOS, in the Spectrum view, with the theme it starts in.
- 01PHASECVLTClick the mark to open About. See Updates, About and help.
- 02View selectorSeven buttons, one for each view. The lit one is on screen.
- 03FreezeHolds the display on its last picture. See Freeze and zoom.
- 04App buttonsIn the app: Input Source, Keyboard Shortcuts, New instance, Workspaces and Mini mode, in that order. The plugin has only Keyboard Shortcuts here.
- 05ConfigThe gear opens the drawer: theme, options of each view, display settings. See Config.
- 06DisplayThe view chosen in the header, here Spectrum. Scope, Waveform, Lissajous, Spectrogram and Shader add a toolbar along the bottom of the window.
- 07Meter panelLevel, loudness and stereo correlation, beside every view. See The meters.
- 08Collapse tabClick the narrow tab to fold the meter panel away and give its width to the display. Click again to bring it back.
- 09Resize gripDrag the corner to resize the window.
Plugin and app
AUGVR comes in two forms. The plugin, AU and VST3 on macOS and VST3 on Windows, is inserted in a DAW and shows the track it sits on. The app, PhaseCvlt AUGVR, runs on its own and listens to an input that you choose. Both have the same views, meters and Config.
FIG.2AUGVR / Header, plugin and app


The app's header has four more buttons than the plugin's, for the things only the app does. On Windows it also ends in Minimize, Maximize and Close; on macOS the app has a menu bar instead, described in Shortcuts and menus.
| The plugin | The app | Covered in | |
|---|---|---|---|
| Seven views, Freeze, meters, Config | Yes | Yes | Spectrum to Config |
| Where the sound comes from | The track, bus or master it is inserted on | An input of its own: a device, the computer's own sound, or a DAW | Getting sound in |
| Sidechain input | Yes | No | Sidechain |
| Mini mode | No | Yes | Mini mode |
| Several windows, workspaces | No | Yes | Windows and workspaces |
Resizing the window
Drag the grip in the lower right corner, marker 09 in FIG.1. The window starts out at 990 × 600 px, which is also its smallest size, and grows to 4096 × 2560 px. The display takes the extra room; the meter panel keeps its width.
In the app the window has no title bar, so the header does that work, and each window comes back at the size you left it.
- Drag the empty part of the header, between the marks and the buttons, to move the window. Double-click there to maximize the window, and again to bring it back.
- On macOS the window has no buttons of its own. Close it with Close Window, ⌘W, in the Instance menu.
- On Windows the header ends in Minimize, Maximize, which reads Restore Down while the window is maximized, and Close.
A first pass
A first session usually goes like this.
- Get sound in. In a DAW, insert AUGVR on a track and press play. In the app, play something on the computer, or click Input Source for another source. See Getting sound in.
- Choose a view with the seven buttons in the header, or with the keys 1 to 7, and move the pointer over the display to read the value under it. See Spectrum, Scope, Waveform, Lissajous, Spectrogram, Waterfall and Shader.
- Read the meter panel: level on the two bars, loudness on the third. Click the value on the TGT row to choose a loudness target, and RESET before a pass you want measured from its start. See The meters.
- Press F, or click Freeze, to hold the picture. In every view but Lissajous, turn the mouse wheel to zoom in and drag to move around. Press F again to carry on. See Freeze and zoom.
- Open Config with the gear to choose a theme and to set the options of each view. See Config.
- In the app, shrink the window to a strip of meters, and save the windows you have arranged as a workspace. See Mini mode and Windows and workspaces.
Getting sound in
AUGVR draws whatever reaches it. In a DAW that is decided by where you insert the plugin. The app has no track to sit on, so it has an input of its own and three kinds of source to choose from.
In a DAW
Insert AUGVR as an effect on a track, a bus or the master. It shows the signal at that point of the chain, so put it after the processing you want to see. It works on mono and on stereo tracks, and the audio leaves it exactly as it arrived. On a mono track it shows the signal as two equal channels, centred, the way the app shows a mono source: the two level bars read the same and the Lissajous figure is a vertical line. Its loudness is measured as one channel: see The meters.
The plugin has no input settings: the routing belongs to the host. It does have an optional second input for a sidechain signal, which the Scope and the Waveform can draw behind the main one. See Sidechain.
In the app
The first time it starts, the app listens to system audio: whatever the computer is playing. On macOS, system audio needs macOS 14.4 or later; on an earlier version the app starts on the computer's default input instead. After that it opens with the input it had when you quit. Each window of the app has an input of its own, and a new window starts on the input of the window it was opened from.
To choose another source, click Input Source in the header. A window titled Choose Audio Input opens. What it sets applies to the AUGVR window it was opened from.
FIG.3AUGVR / Input Source

- 01Input SourceThe speaker icon. Opens Choose Audio Input.
- 02ConfigThe INPUT section at the top of the drawer has the same command, CHOOSE…, and OPEN for Audio Diagnostics.
On macOS the same window also opens from the menu bar, with Audio Input… in the Audio menu. In mini mode it opens from Instance in the Options window.
A line at the top of the window says what can be chosen. Below it are these controls.
| Control | What it sets |
|---|---|
| Audio device type: | The kind of source. The three kinds are described below. |
| Input: | The device of that kind. |
| Active input channels: | Tick boxes, one for each stereo pair of the device. The ticked pair is the one AUGVR shows. A single channel, such as the one input of a mono microphone, has a box of its own: AUGVR shows it centred and measures its loudness as one channel. |
| Sample rate: | The sample rate the device runs at. |
| Audio buffer size: | The buffer size the device runs at. |
| Control Panel, Reset Device | Two buttons, shown only for a device that has a control panel of its own. The first opens it; the second resets the device, which some interfaces need after a change made there. |
Every change applies at once. There is no OK button: close the window with its close button, with Esc or, on macOS, with ⌘W. The other AUGVR windows can be used while it is open. If a device cannot be opened, a message says why.
Several windows can listen to the same device, each to the channels ticked in it. While another window uses the device, a line at the top of Choose Audio Input says so, as in Shared with 1 other window. Its sample rate and buffer size stay as they are while it is shared. Sample rate: and Audio buffer size: then offer only the values the device runs at.
When the app has heard nothing for a few seconds, a card appears over the display. It goes away by itself as soon as sound arrives.
FIG.4AUGVR / No audio detected
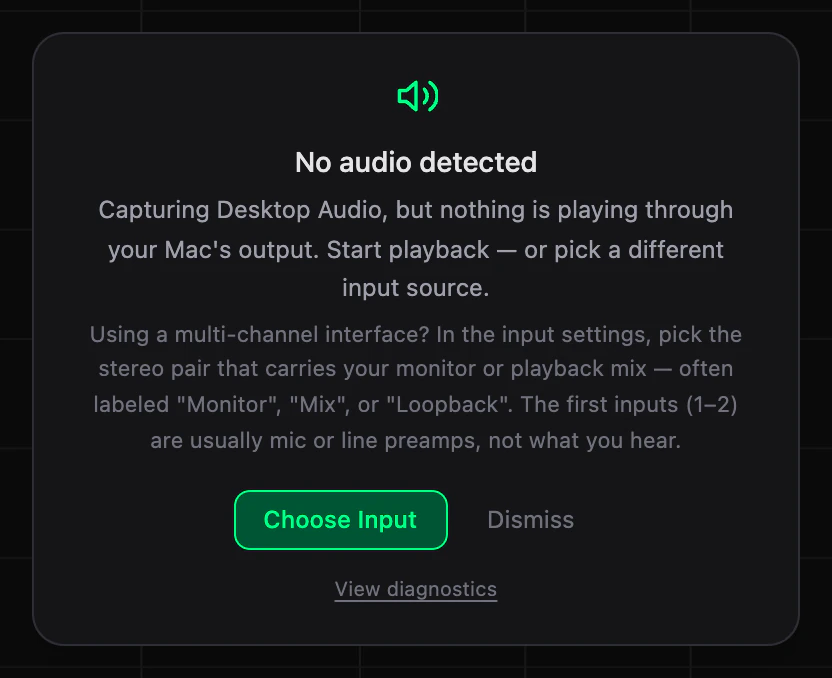
- 01Choose InputOpens Choose Audio Input.
- 02DismissHides the card. It can return once sound has come back and stopped again.
- 03View diagnosticsOpens Audio Diagnostics. See If nothing shows.
Three kinds of source
The first two controls choose the source: Audio device type: sets the kind, Input: the device. This is what to select for each kind.
| Source | Device type | Input |
|---|---|---|
| A microphone or an audio interface | macOS: CoreAudio Windows: Windows Audio, or another of the Windows types in the list | The device, by its own name |
| System audio | macOS 14.4 or later: ScreenCaptureKit Windows: WASAPI Loopback | macOS: Desktop Audio (System) Windows: Default Output Capture (Loopback) |
| A DAW, through AUGVR Server | AUGVR Server | AUGVR Server (Plugin) |
System audio is whatever plays through the computer's default output: a player, a browser, a game, a call. The app's own texts call it Desktop Audio. In the list it goes by the names in the table, which are not the same on macOS and on Windows.
On macOS, system audio needs macOS 14.4 or later. On macOS 13 and on 14 before 14.4, ScreenCaptureKit is not in the list and macOS asks no question about system audio. To show what a DAW plays there, use AUGVR Server.
AUGVR Server, a small companion plugin, brings a DAW into the app directly. Its steps are at the end of this section.
Permission on macOS
macOS asks before an app may listen. There are two separate permissions, one for microphones and interfaces and one for system audio, and macOS asks for each of them once; the one for system audio only on macOS 14.4 or later. The question for system audio reads AUGVR captures system audio for visualization. No screen content is recorded. Allow it and every window set to system audio starts listening; nothing else has to be done.
A permission that was refused is not asked for again. If it was system audio, a card titled System audio recording is off appears over the display straight away.
- Click Open System Settings on the card. System Settings opens on Privacy & Security > Screen & System Audio Recording.
- Under System Audio Recording Only, find PhaseCvlt AUGVR and switch it on.
- Return to the app, open Choose Audio Input and select Desktop Audio (System) again.
On Windows the app asks for no permission.
Multi-channel interfaces
AUGVR shows one stereo pair. On an interface with more than two inputs, the pair ticked to begin with is the first one, 1 + 2, and on most interfaces those are the microphone or line inputs, not what you hear.
Under Active input channels:, tick the pair that carries your monitor or playback mix. It is often labelled Monitor, Mix or Loopback. With such a device selected, the window adds a paragraph that says the same.
From a DAW into the app: AUGVR Server
AUGVR Server is a second plugin, in the same installer and the same formats as AUGVR. Inserted on a track, it passes the audio through unchanged, with no latency, and gives the app a copy to show. Use it to look at one track or bus of a session, or when system audio does not carry what the DAW plays.
- In the DAW, insert AUGVR-Server on the track, bus or master you want to see, after the processing you want to see.
- Start the app.
- Click Input Source. Set Audio device type: to AUGVR Server and Input: to AUGVR Server (Plugin). The Server's window now reads Connected to AUGVR Standalone.
- Play in the DAW. The app shows the track.
The Server has nothing to set. Its small window shows the two marks, a status line with a coloured dot beside it, and two lines of help underneath.
| Status | Meaning |
|---|---|
| Disconnected | The app is not listening to the Server. The help under it reads Open the AUGVR standalone app and pick "AUGVR Server (Plugin)" as the input. |
| Connected to AUGVR Standalone | The app has this input selected and is listening. |
| Waiting for AUGVR Standalone | The app is not listening any more. |
| A status in orange | The Server could not set up its link to the app. The line under it gives the message of the system. |
A few limits apply.
- One Server at a time. The app has a single AUGVR Server input, so a second Server, in the same session or in another DAW, gives unreliable results.
- Mono or stereo. The Server works on mono and stereo tracks. A mono track is shown centred, as two equal channels, and its loudness is measured as one channel.
- One computer. The DAW and the app run on the same machine.
- The DAW has to be running. The app hears the Server only while the DAW is passing audio through it.
More than one window of the app can listen to the same Server. A window that does follows the DAW: it takes on the session's sample rate, and its Scope locks to the DAW's tempo and transport. A window on any other input reads the tempo from its own audio, even while AUGVR Server is in use. See Scope.
How the controls behave
The window is built from a few kinds of control. Each kind works the same way wherever it appears, and every one of them acts at once: nothing has to be confirmed or saved.
The view selector and tooltips
The seven joined buttons in the header choose the view. They carry icons only, so each one has a tooltip. The keys 1 to 7 select the same views, in the order of the buttons: Spectrum, Scope, Waveform, Lissajous, Spectrogram, Waterfall, Shader.
FIG.5AUGVR / View selector with a tooltip
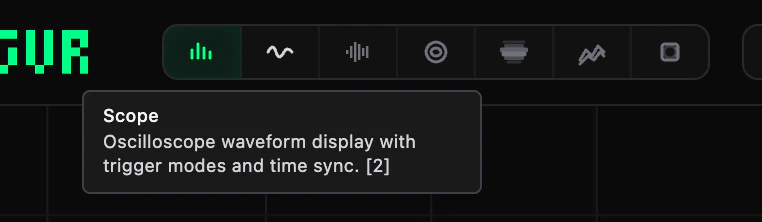
- 01Active viewThe lit button is the view on screen. Click another button, or press its key, to change.
- 02TooltipRest the pointer on a button for a moment. The tooltip gives the name of the view, a line on what it shows and, in square brackets, its key.
The rest of the window explains itself in the same way.
- Icon buttons in the header show their name, with their key or shortcut where they have one. Freeze reads Freeze [F].
- A small ? sits at the right end of each section title in Config. Rest the pointer on it to read what the section is for.
- Many labels carry an explanation of their own: the names of the sliders in the toolbars, the three readouts at the top of the meter panel, the names of its value rows, and some of the rows in Config.
Toolbars
Five views have a toolbar along the bottom of the window: the Scope, the Waveform, the Lissajous, the Spectrogram and the Shader. This one belongs to the Scope, in the plugin; the others are made of the same parts.
FIG.6AUGVR / A view toolbar

- 01Drop-downThe current choice beside a small ▼, here the time division.
- 02Slider labelThe name of the slider, with a tooltip that says what it does.
- 03SliderDrag the handle.
- 04ValueThe current value, in the slider's own units.
- 05Segmented switchA row of names with one lit, here the channels the Scope draws.
- 06Toggle buttonA name that is lit while it is on, here SC, the sidechain overlay. The app has no sidechain input and leaves it out.
Sliders
- Drag the handle. The value beside the slider follows.
- ↺ appears to the right of the value as soon as it differs from the default. Click it to go back.
- Double-click the name of the slider to do the same.
That is how the sliders in the toolbars work. The sliders in Config have no reset of their own; RESET DEFAULTS at the foot of the drawer is the way back. See Config.
Switches, drop-downs and toggles
- Segmented switch. Click a name to select it; the selected one is lit. In Config the same kind of choice is a row of small buttons, and the selected one has a coloured outline.
- Drop-down. Click it to open the list, then click an entry. The list of the Scope's time division opens above the toolbar, and so does the list of shaders of the Shader view; a click anywhere outside closes it and changes nothing.
- Toggle. Click to switch it. In a toolbar it is a name that lights up. In Config it is either a small sliding switch, on when its knob is at the right, or a button that reads ON or OFF.
A dimmed entry cannot be chosen in the current state. The tempo divisions of the Scope, for example, are dimmed while no tempo is known.
The mouse wheel
Over the display, the wheel with a modifier key changes the scale of three views.
| View | Gesture | What it changes |
|---|---|---|
| Scope | Cmd or Ctrl and the wheel | Vertical zoom, the same value as the Zoom slider: 0.1x to 3.0x. It switches Auto Gain off. |
| Scope | Option and the wheel, Alt on Windows | The length of time across the display, 5 to 340 ms. It applies while the time division is Free. |
| Waveform | Cmd or Ctrl and the wheel | Vertical zoom, 1x to 10x. |
| Lissajous | Cmd or Ctrl and the wheel | The size of the figure, 1x to 4x. |
Add Shift to Cmd or Ctrl for finer zoom steps: 0.1x instead of 0.5x on the Scope and the Waveform, 0.05x instead of 0.25x on the Lissajous.
On a Mac keyboard, Cmd is the ⌘ key and Option is the ⌥ key; the menus print the symbols.
While the display is frozen, the wheel on its own zooms into the held picture. See Freeze and zoom.
Keys and keyboard focus
The views, Freeze and the zoom of a frozen display have single keys, with no modifier. They are listed in Shortcuts and menus and in the Keyboard Shortcuts dialog, which opens with the keyboard button in the header or with ?.
- Click on the display first. The keys do nothing while a slider or a text field has the keyboard, and a slider keeps it after you have dragged it. A click on the display gives the keys back.
- Config and dialogs switch the keys off for as long as they are open. Esc closes a dialog.
- In a DAW, Esc hands the keyboard back to the host when no dialog is open, so the transport keys work again without a click in the host's own window. The plugin's Keyboard Shortcuts dialog lists it as Release focus to DAW; in the app, which has no host, it lists Esc as Close the open dialog.
Spectrum
The Spectrum view (key 1) shows how much level the signal holds at each frequency at this moment. Frequency runs from 20 Hz at the left to 20 kHz at the right on a logarithmic axis; level runs from -100 dB at the bottom to 0 dB at the top, with a grid line every 10 dB.
FIG.7AUGVR / Spectrum
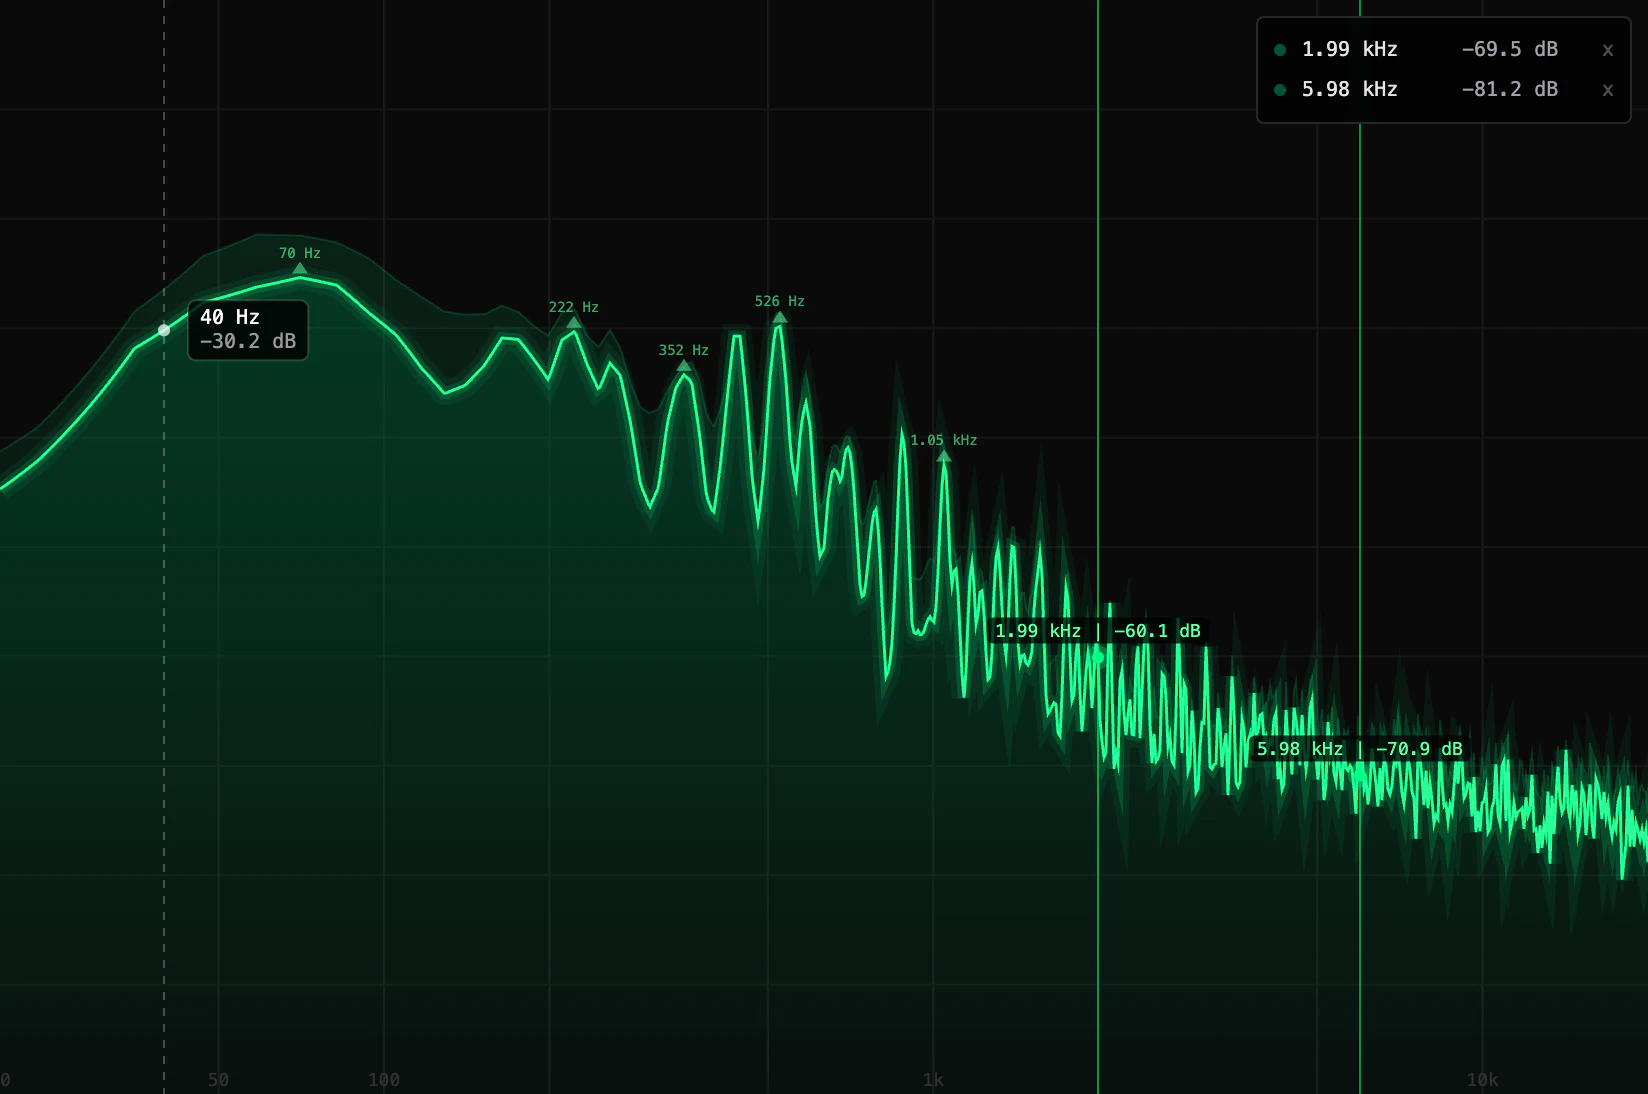
- 01SpectrumThe filled trace: the level at each frequency. It follows a rise quickly and falls at the rate set by Decay.
- 02Hold traceThe fainter trace behind it falls more slowly, at the rate set by Hold, so recent peaks stay readable.
- 03Auto peakA small triangle with its frequency above each of the strongest peaks. They are not markers and cannot be clicked.
- 04Pointer readoutMove the pointer over the display: a dashed line, a dot on the trace and a box with the frequency and the level at that point.
- 05MarkerA line placed with a click. Its dot rides the trace and its label gives the frequency and the level, as in 1.00 kHz | -23.4 dB.
- 06Marker listOne row per marker. It appears with the first marker.
- 07Frequency captions50, 100, 1k and 10k along the lower edge. The axis runs from 20 Hz at the left edge to 20 kHz at the right. Vertical grid lines stand at 50, 100, 200 and 500 Hz and at 1, 2, 5 and 10 kHz.
The view has no toolbar. You read it with the pointer, mark it with clicks, and set its four options in Config, under SPECTRUM. The level axis carries no numbers: the pointer readout and the markers give the levels.
Markers
A marker keeps one frequency in view while the music moves. You can place as many as you need.
FIG.8AUGVR / Marker list
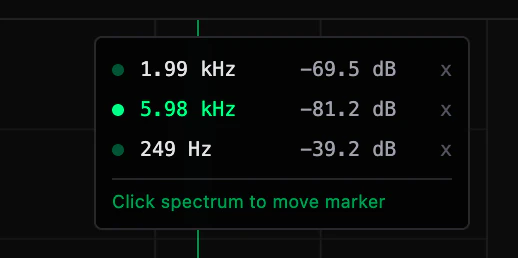
- 01Marker rowThe frequency of the marker and a level. The level is read when the list is drawn again, which happens when a marker is added, moved, selected or removed. The label on the display is the one that follows the signal.
- 02Row being movedLit, with the hint Click spectrum to move marker under the list.
- 03xRemoves the marker.
- Add. Click the display at the frequency you want.
- Move. Click the marker's row in the list, then click the display at the new frequency. Click the same row again instead to leave the marker where it is.
- Remove. Click the x at the end of its row.
A marker cannot be dragged, and a frequency cannot be typed. With Snap to Peak on, a click that adds or moves a marker lands on the loudest point close to where you clicked, so it sits on the peak itself.
When the view is frozen, the pointer readout, the markers and the auto peaks keep working on the held picture. While a frozen picture is zoomed in, the markers and the auto peaks move with it, the pointer readout and the captions along the lower edge follow the zoom, and a click does not place or move a marker. See Freeze and zoom.
Settings
| Setting | Where | Range | Default |
|---|---|---|---|
| Snap to Peak | Config, SPECTRUM | on, off | off |
| Auto Peaks | Config, SPECTRUM | on, off | on |
| Decay | Config, SPECTRUM | 100 to 2000 ms | 800 ms |
| Hold | Config, SPECTRUM | 500 to 5000 ms | 2000 ms |
| Markers | On the display | any number | none |
Decay sets how long the main trace takes to fall once a sound has passed; Hold does the same for the trace behind it. A short Decay shows every hit, a long one a steadier picture.
The four options are remembered. Markers are not: each time the plugin or the app is loaded, the display starts with none.
Scope
The Scope (key 2) is an oscilloscope: it draws the waveform itself over a short stretch of time, so you can see the shape of a hit or how the two channels line up. Time runs from left to right and amplitude is vertical, with full scale at +1.00 and -1.00.
FIG.9AUGVR / Scope
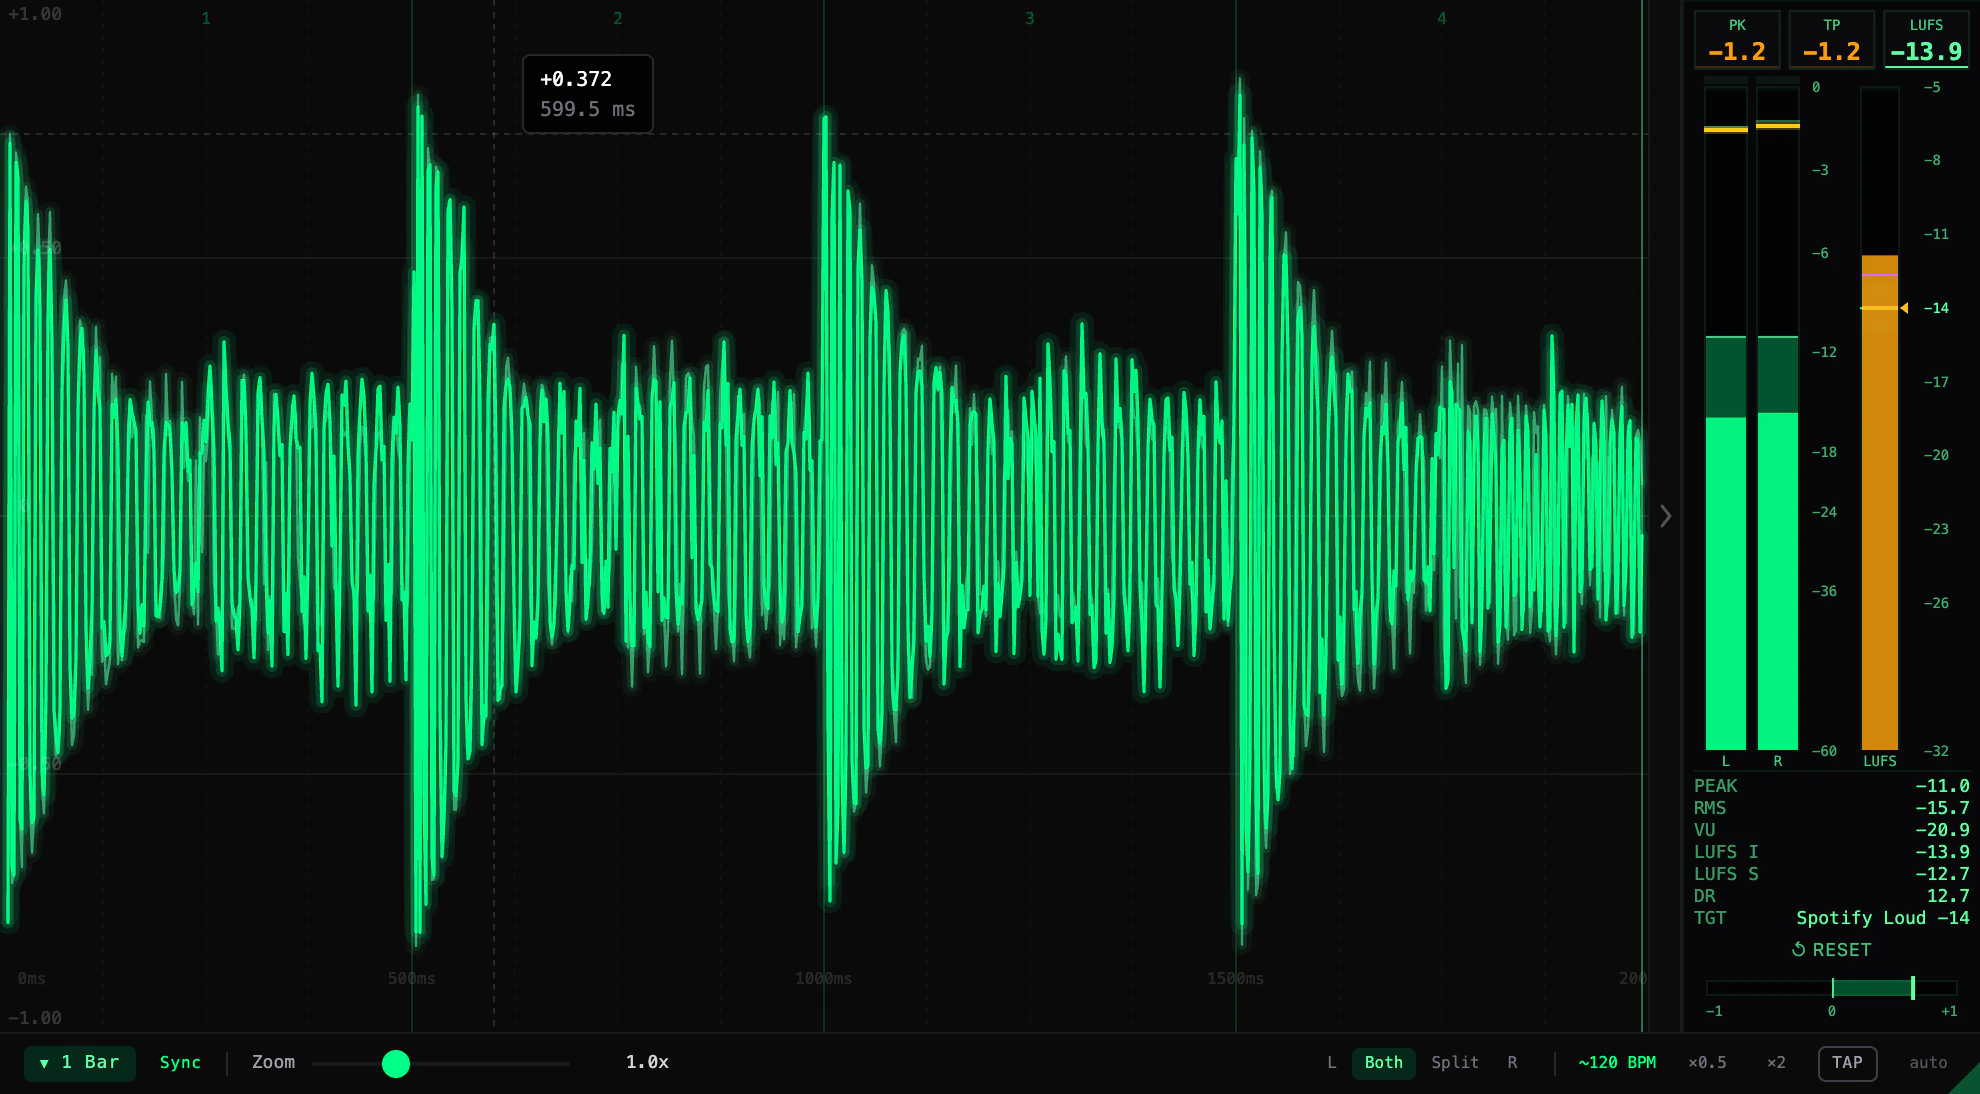
- 01Left channelDrawn in the main colour of the theme.
- 02Right channelDrawn dimmer, behind the left one, while the channel switch is on Both. It shows where the two channels differ.
- 03Beat numbersWith a note length, beats 1 to 4 run along the top over beat and bar lines. On a long span they are left out.
- 04Amplitude scaleFive values from the top of the display to the bottom. They follow the zoom.
- 05Time scaleThe time the display spans, in milliseconds.
- 06Pointer readoutMove the pointer over the display for a crosshair and a box with the amplitude and the time at that point. The amplitude is that of the left channel, or of the right when the switch is on R.
- 07Time divisionHow much time the display spans: a note length tied to the tempo, or Free.
- 08SyncLit while the display is locked to the tempo.
- 09ZoomVertical zoom, 0.1x to 3.0x. It magnifies the picture and leaves the audio alone.
- 10Channel switchL, Both, Split or R.
Time division and sync
The button at the left of the toolbar shows the current division. Click it to open the list: three columns, STRAIGHT, TRIPLET and DOTTED, each running from 1/128 to 32 Bars, and Free at the bottom. Triplet and dotted lengths carry a T or a D, as in 1/8 T. The default is 1/4, one beat.
With a note length, the display spans exactly that length at the current tempo and stays locked to the song position. A line sweeps from left to right once per length and the trace is redrawn as it passes, so a part that repeats every bar stands still at 1 Bar. The word Sync beside the button is lit while the lock holds.
A note length needs a tempo. In the plugin the tempo is the host's; for the app, see Tempo in the app below. While no tempo is known, the note lengths in the list are dimmed, Sync stays dark and the Scope runs as it does on Free.
Free ignores the tempo. The display shows the most recent stretch of signal, 100 ms long until you change it with the wheel, and the triggers in Config can hold a repeating waveform steady.
Transport stoppedWith a note length, the trace is written only while the transport plays. When it stops, the picture stays as it was. To watch a signal with the transport stopped, choose Free.
Zoom and channels
Zoom magnifies the trace vertically, and the amplitude scale follows: at 2.0x the top of the display is +0.50.
The switch at the right of the toolbar chooses what is drawn.
- L or R. One channel alone.
- Both. Left and right on one axis, the right one dimmer. This is the default.
- Split. Left in the upper half and right in the lower, each around its own centre line and lettered L and R. The amplitude scale is not shown.
FIG.10AUGVR / Channel modes
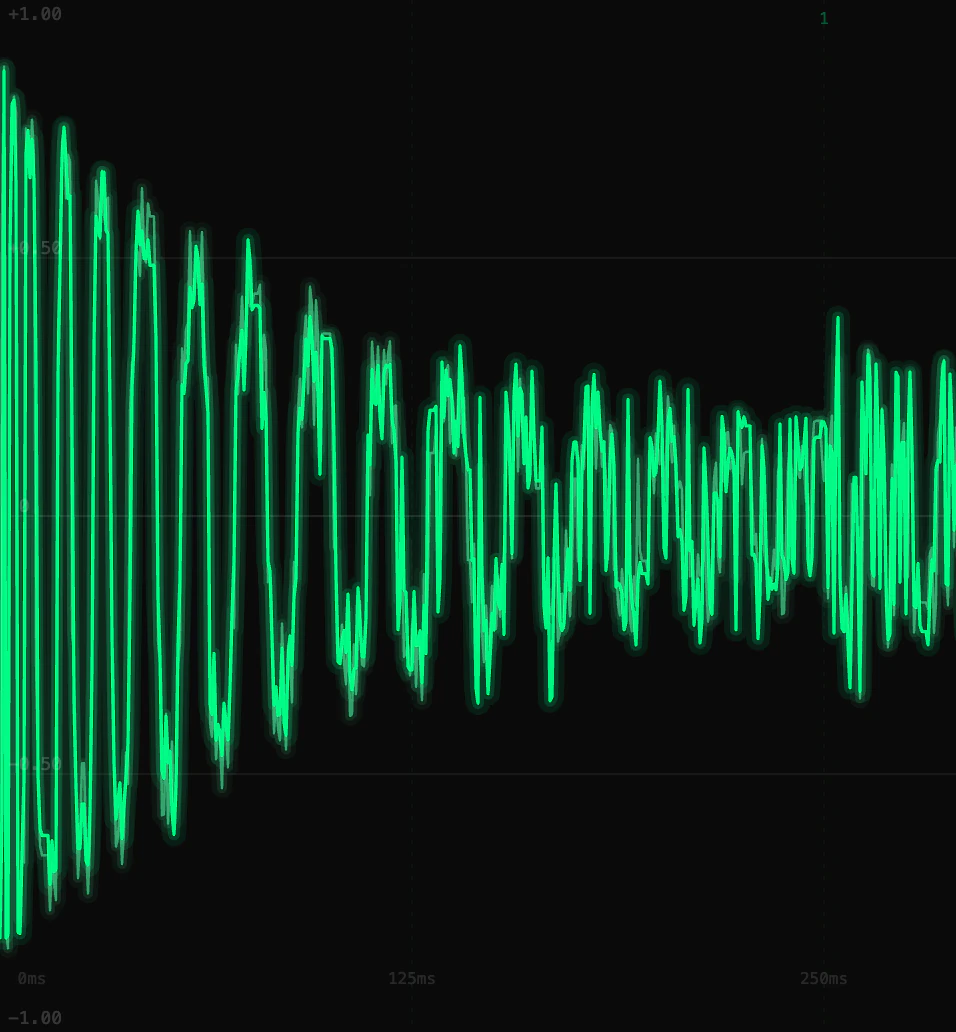
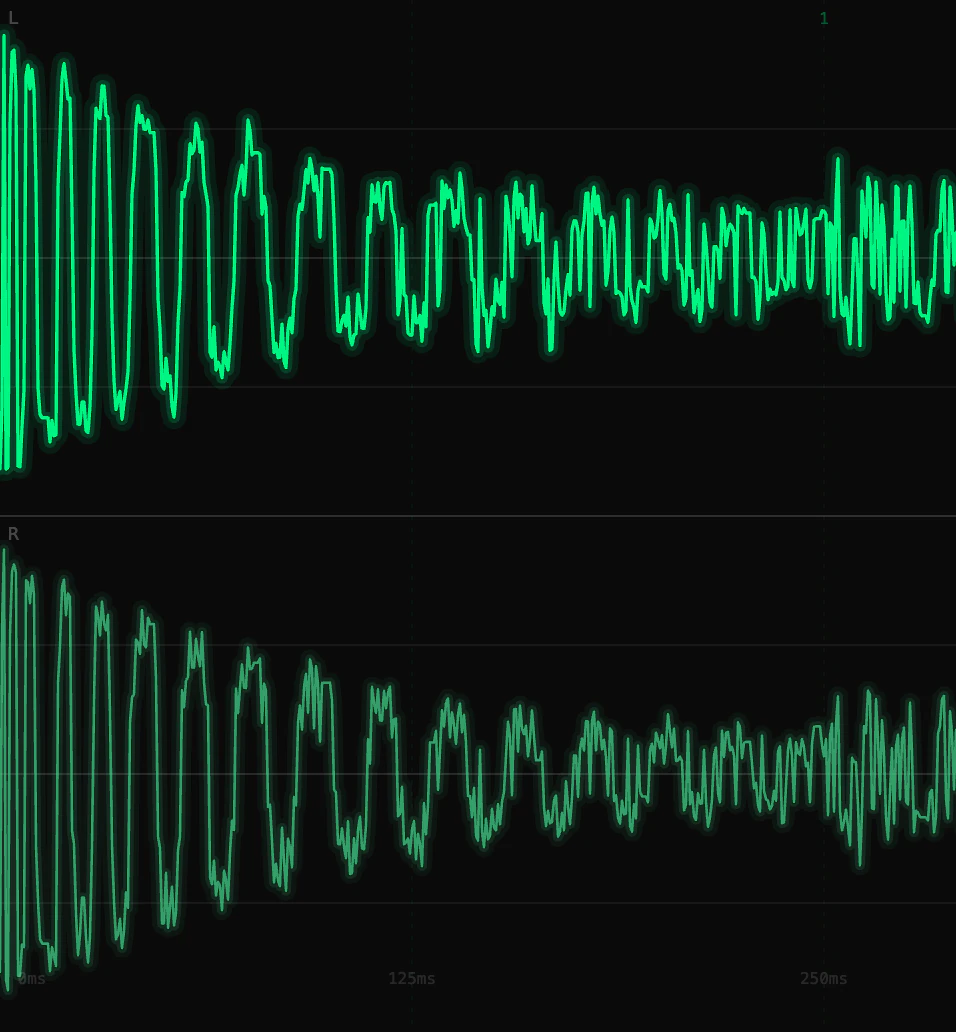
In the plugin, an SC button and a Fade slider follow the switch. They belong to the plugin's sidechain input, and the app, which has none, leaves them out: see Sidechain.
Triggers and Auto Gain
Three more options are in Config, under SCOPE. A trigger decides where each picture starts, so that a repeating waveform is drawn in the same place every time and does not drift across the display.
FIG.11AUGVR / Scope options in Config
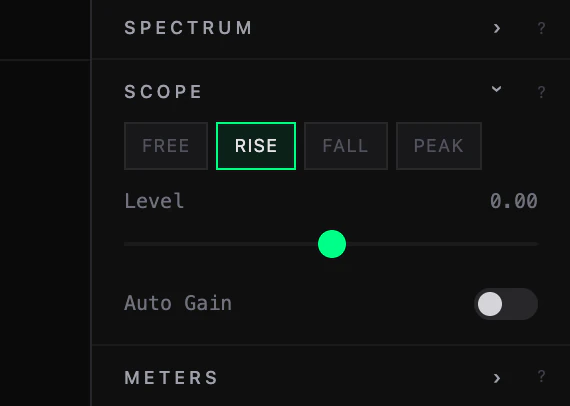
- 01Trigger modeFREE, RISE, FALL or PEAK.
- 02LevelThe amplitude the signal has to cross, -1.00 to 1.00. Shown for RISE and FALL.
- 03Auto GainMagnifies a quiet signal to fill the display.
- FREE. No trigger: the display shows the latest signal as it comes.
- RISE. The picture is aligned on the point where the signal rises through Level.
- FALL. The same, where the signal falls through Level.
- PEAK. The picture is aligned on the highest peak of the recent signal.
With RISE and FALL, a faint dashed horizontal line marks the level. With RISE, FALL and PEAK, a dashed vertical line marks the point the trigger found. The trigger reads the left channel, or the right when the channel switch is on R.
Triggers act whenever the Scope is not locked to a tempo: on Free, and on a note length while no tempo is known. Choosing a note length while a tempo is known sets a PEAK trigger back to FREE. With a note length and a tempo, the four buttons are dimmed and Config reads Triggers inactive in sync mode. Set Time Division to Free to enable.
Auto Gain magnifies a quiet signal until its loudest point nearly fills the height of the display. It never reduces a loud one, it acts only while Zoom is at 1.0x, and zooming with the wheel switches it off.
The wheel
Two wheel gestures work over the display while the Scope runs.
- Cmd or Ctrl and the wheel. Moves Zoom in steps of 0.5x, or of 0.1x with Shift held as well.
- Option and the wheel, Alt on Windows. Sets the time shown on Free. Each notch moves it by 50 ms, between 5 ms and 340 ms. No control in the toolbar shows it; the time scale does.
The wheel alone does nothing until the view is frozen. Then it zooms the held picture: see Freeze and zoom.
Tempo in the app
In a DAW the tempo comes from the host, and the right end of the toolbar shows it, as in 120 BPM. The app has no host: it reads the tempo from the audio it is given and shows it with a tilde, as in ~120 BPM. It needs sound to do so. Until it has a tempo, and again in silence, the readout says detecting…
FIG.12AUGVR / Tempo in the app
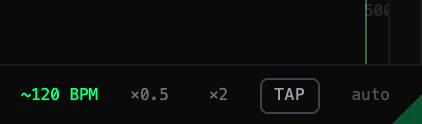
- 01TempoThe tempo read from the audio, marked with a tilde.
- 02×0.5Halves the tempo, for music that was read at twice its speed.
- 03×2Doubles it, for music that was read at half its speed.
- 04TAPClick in time with the music to set the tempo by hand.
- 05autoDrops a tapped tempo and any halving or doubling, and returns to the tempo read from the audio.
When the input is AUGVR Server, the tempo and the transport are those of the DAW: the readout is plain and these four buttons are not shown. Only a window whose input is the Server follows the DAW; a window on another input reads the tempo from its own audio. Change the input of a window and its tempo follows the new input at once. See Getting sound in.
Settings
| Setting | Where | Range | Default |
|---|---|---|---|
| Time division | Toolbar | Free, or 1/128 to 32 Bars, straight, triplet or dotted | 1/4 |
| Zoom | Toolbar, or Cmd / Ctrl and the wheel, with Shift for fine steps | 0.1x to 3.0x | 1.0x |
| Channel | Toolbar | L, Both, Split, R | Both |
| SC | Toolbar, in the plugin | on, off | on |
| Fade | Toolbar, in the plugin, while SC is on | 10% to 100% | 100% |
| Trigger | Config, SCOPE | FREE, RISE, FALL, PEAK | FREE |
| Level | Config, SCOPE | -1.00 to 1.00 | 0.00 |
| Auto Gain | Config, SCOPE | on, off | off |
| Time shown on Free | Option / Alt and the wheel | 5 to 340 ms | 100 ms |
| Scope Res | Config, DISPLAY | 256, 512, 1024, 2048, 4096 | 2048 |
| Clip | Config, DISPLAY | ON, OFF | OFF |
Scope Res is the amount of detail in the trace. Clip marks the parts of the trace that reach full scale; it is described under Waveform.
All of these are remembered except SC and Fade, which start fresh each time the plugin is loaded: SC on, Fade at 100%.
Waveform
The Waveform view (key 3) draws the outline of the signal over a longer stretch of time than the Scope, a few bars at once, so you can follow the dynamics of a passage. Time is horizontal, with the newest sound at the right edge; amplitude is vertical, mirrored around the centre line, with full scale at the top and bottom edges.
FIG.13AUGVR / Waveform
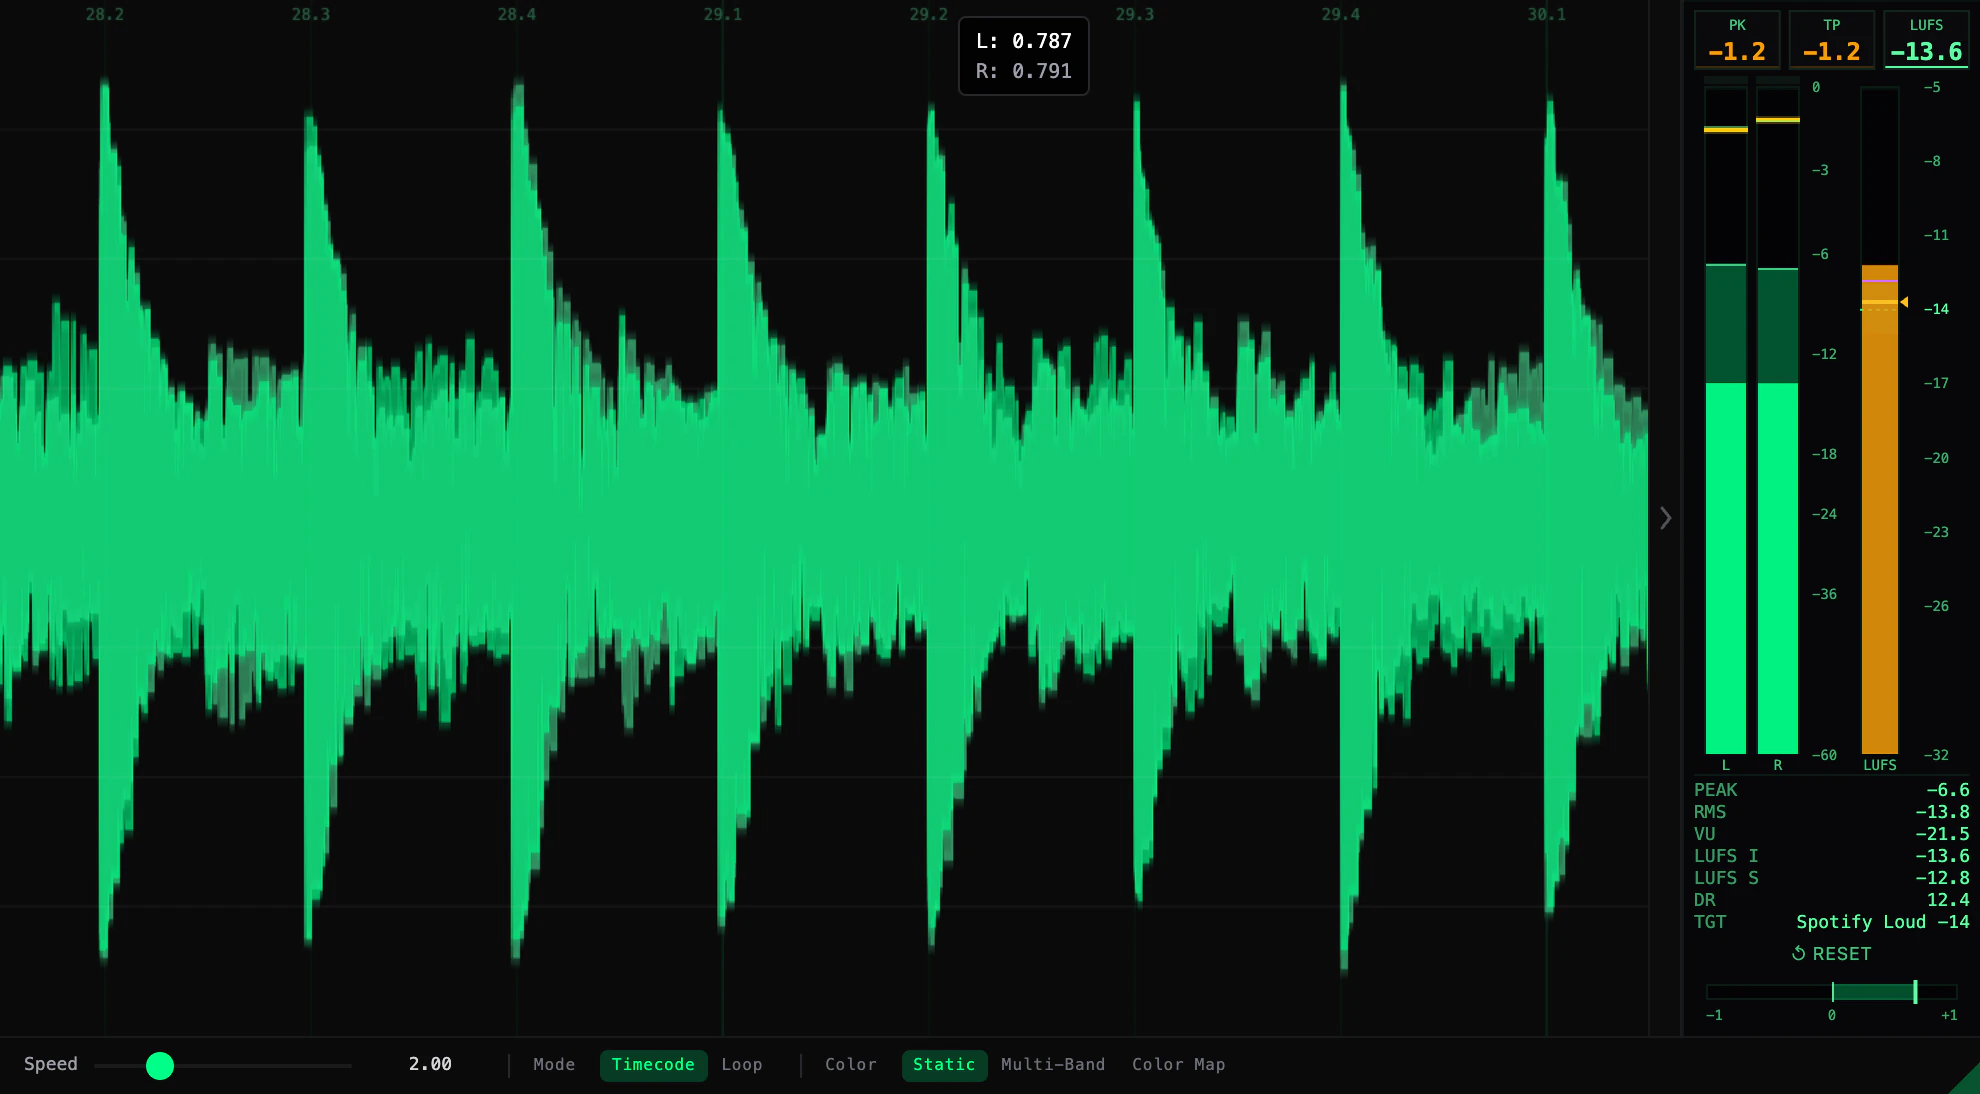
- 01WaveformNew sound enters at the right edge and travels left. In the Static colour mode the left channel is drawn in the main colour of the theme and the right one dimmer, over each other.
- 02Bar and beat labelsBar and beat along the top, as in 12.1, 12.2, while the transport plays.
- 03Pointer readoutThe level of the left and of the right channel at the point in time under the pointer.
- 04SpeedHow fast the waveform travels, 0.25 to 8.00. Lower shows more time.
- 05ModeTimecode scrolls. Loop draws in place.
- 06ColorStatic, Multi-Band or Color Map.
In the plugin the toolbar ends in an SC button, which shows or hides the trace of the sidechain input, and a Fade slider. The app has no sidechain input and leaves both out. See Sidechain.
Speed
Speed sets how fast the waveform travels, and with it how much time fits on the display: halve the value and twice as much time is shown. With every setting at its default, the display spans two bars at the current tempo.
Speed is the only control in the full window for the length of time shown. In the app, the Waveform module of Mini mode has a Window setting; this view uses the same one, so a change made there changes the span here.
Mode
Timecode scrolls the waveform from right to left, anchored to the transport. While the transport plays and a tempo is known, beat lines and the bar and beat labels run along the top. On a long span only the bars are labelled. In the app the labels appear once it has a tempo: see Scope.
Loop keeps the picture in place. A bright write head travels from left to right, replacing the previous pass as it goes, and starts again at the left when it reaches the right edge. One pass lasts as long as the display spans in Timecode, so with the defaults a two-bar loop is drawn over itself and a change from one pass to the next stands out.
FIG.14AUGVR / Loop mode
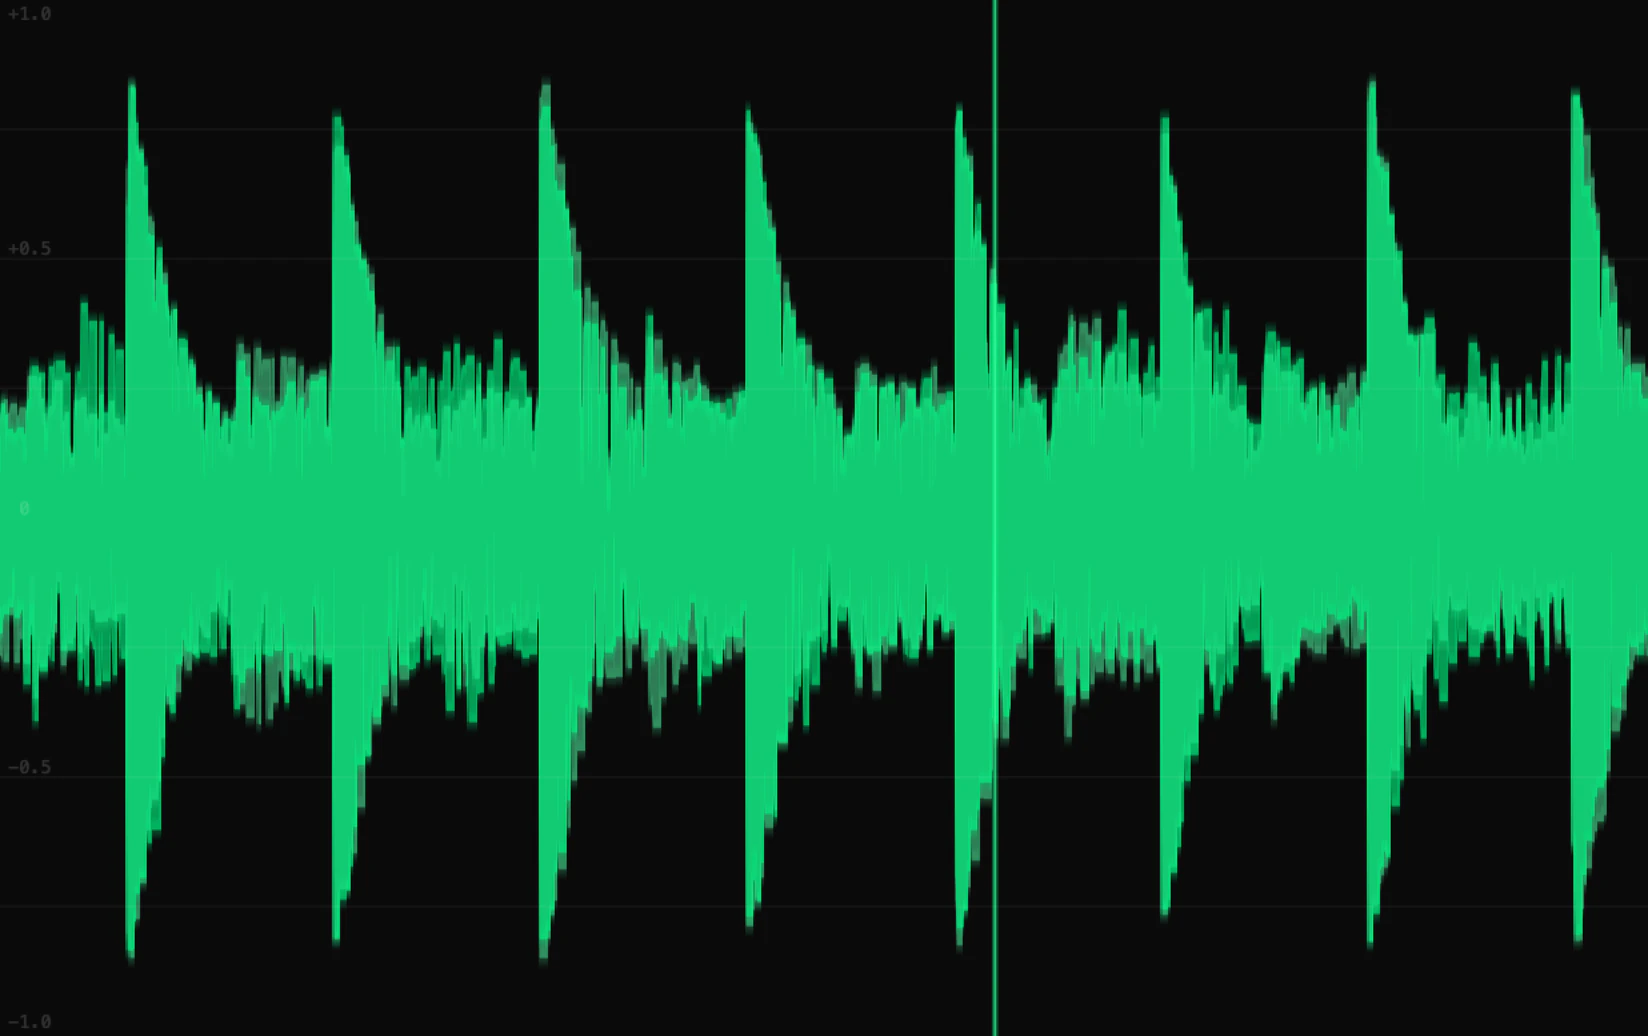
- 01Write headWhere the waveform is being drawn. What lies to its right is the previous pass.
- 02Amplitude scale+1.0 to -1.0 at the left edge. It is shown in Loop, and in Timecode when no tempo is known.
Transport stoppedIn both modes, when a tempo is known the waveform advances only while the transport plays. Stop the DAW and the picture stands still until you play again.
Colour
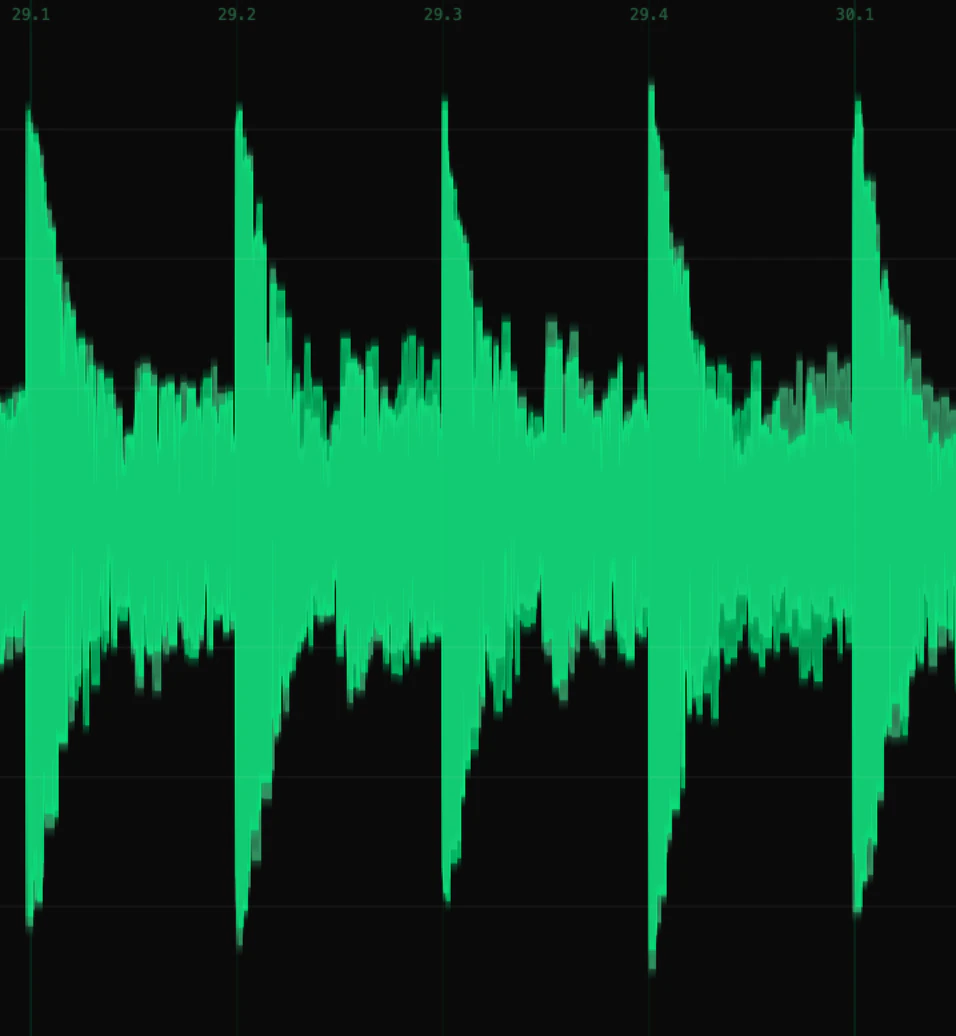
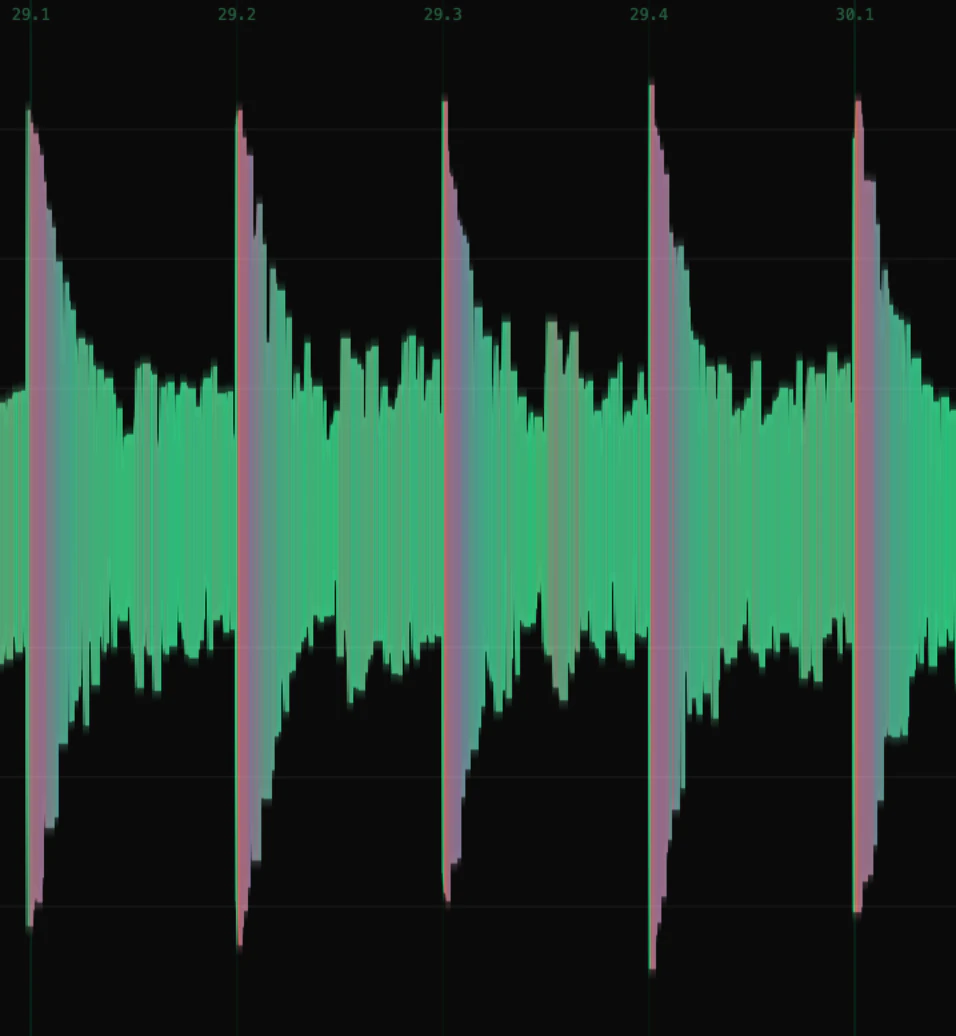
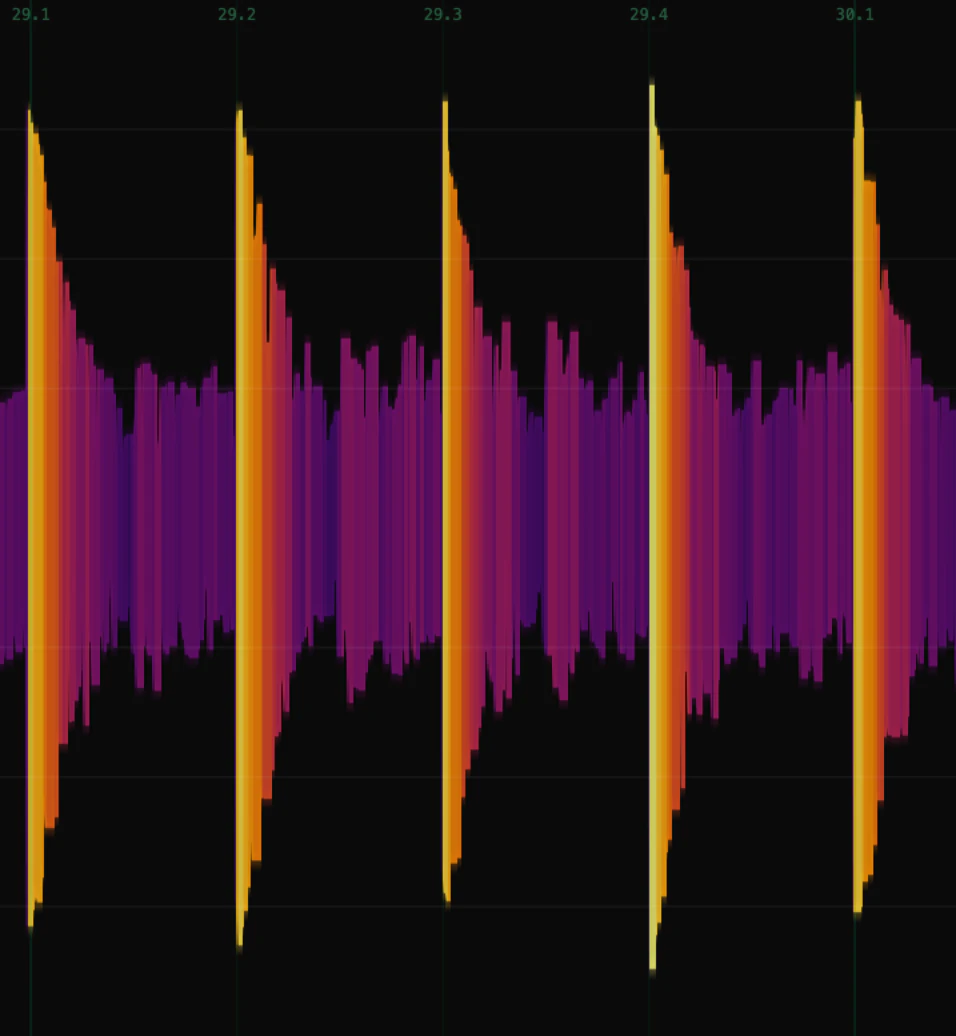
The Color switch has three modes.
- Static. The colours of the theme: main for the left channel, dimmer for the right.
- Multi-Band. The colour shows where the energy sits at each moment: blue for lows, orange for mids, pink for highs, and the mixtures between them. Quiet passages stay in the theme colour.
- Color Map. The colour follows the amplitude through a colormap. A second switch appears beside the first with five of them: Theme, Inferno, Magma, Viridis and Turbo.
FIG.15AUGVR / Colour modes
Vertical zoom and Clip
Hold Cmd or Ctrl and turn the wheel over the display to magnify the waveform vertically, from 1x to 10x in steps of 0.5x. Hold Shift as well for steps of 0.1x. Nothing on the screen shows the amount.
Clip, in Config under DISPLAY, is off by default. When it is on, the parts of the waveform that reach full scale are drawn in the Clip colour of the theme, and the word CLIP shows at the top right of the display for a moment. The same option acts on the Scope.
Settings
| Setting | Where | Range | Default |
|---|---|---|---|
| Speed | Toolbar | 0.25 to 8.00 | 2.00 |
| Mode | Toolbar | Timecode, Loop | Timecode |
| Color | Toolbar | Static, Multi-Band, Color Map | Static |
| Colormap | Toolbar, with Color Map | Theme, Inferno, Magma, Viridis, Turbo | Theme |
| SC | Toolbar, in the plugin | on, off | on |
| Fade | Toolbar, in the plugin, while SC is on | 10% to 100% | 100% |
| Vertical zoom | Cmd / Ctrl and the wheel, with Shift for fine steps | 1x to 10x | 1x |
| Clip | Config, DISPLAY | ON, OFF | OFF |
Speed, Mode, Color, the colormap and Clip are remembered. The vertical zoom starts fresh each time the plugin or the app is loaded, at 1x, and so do SC and Fade in the plugin: SC on, Fade at 100%.
Lissajous
The Lissajous view (key 4) plots the two channels against each other, so the shape of the figure shows how wide the signal is and whether it will survive being summed to mono. The vertical axis is mid, what left and right have in common; the horizontal axis is side, the difference between them.
FIG.16AUGVR / Lissajous
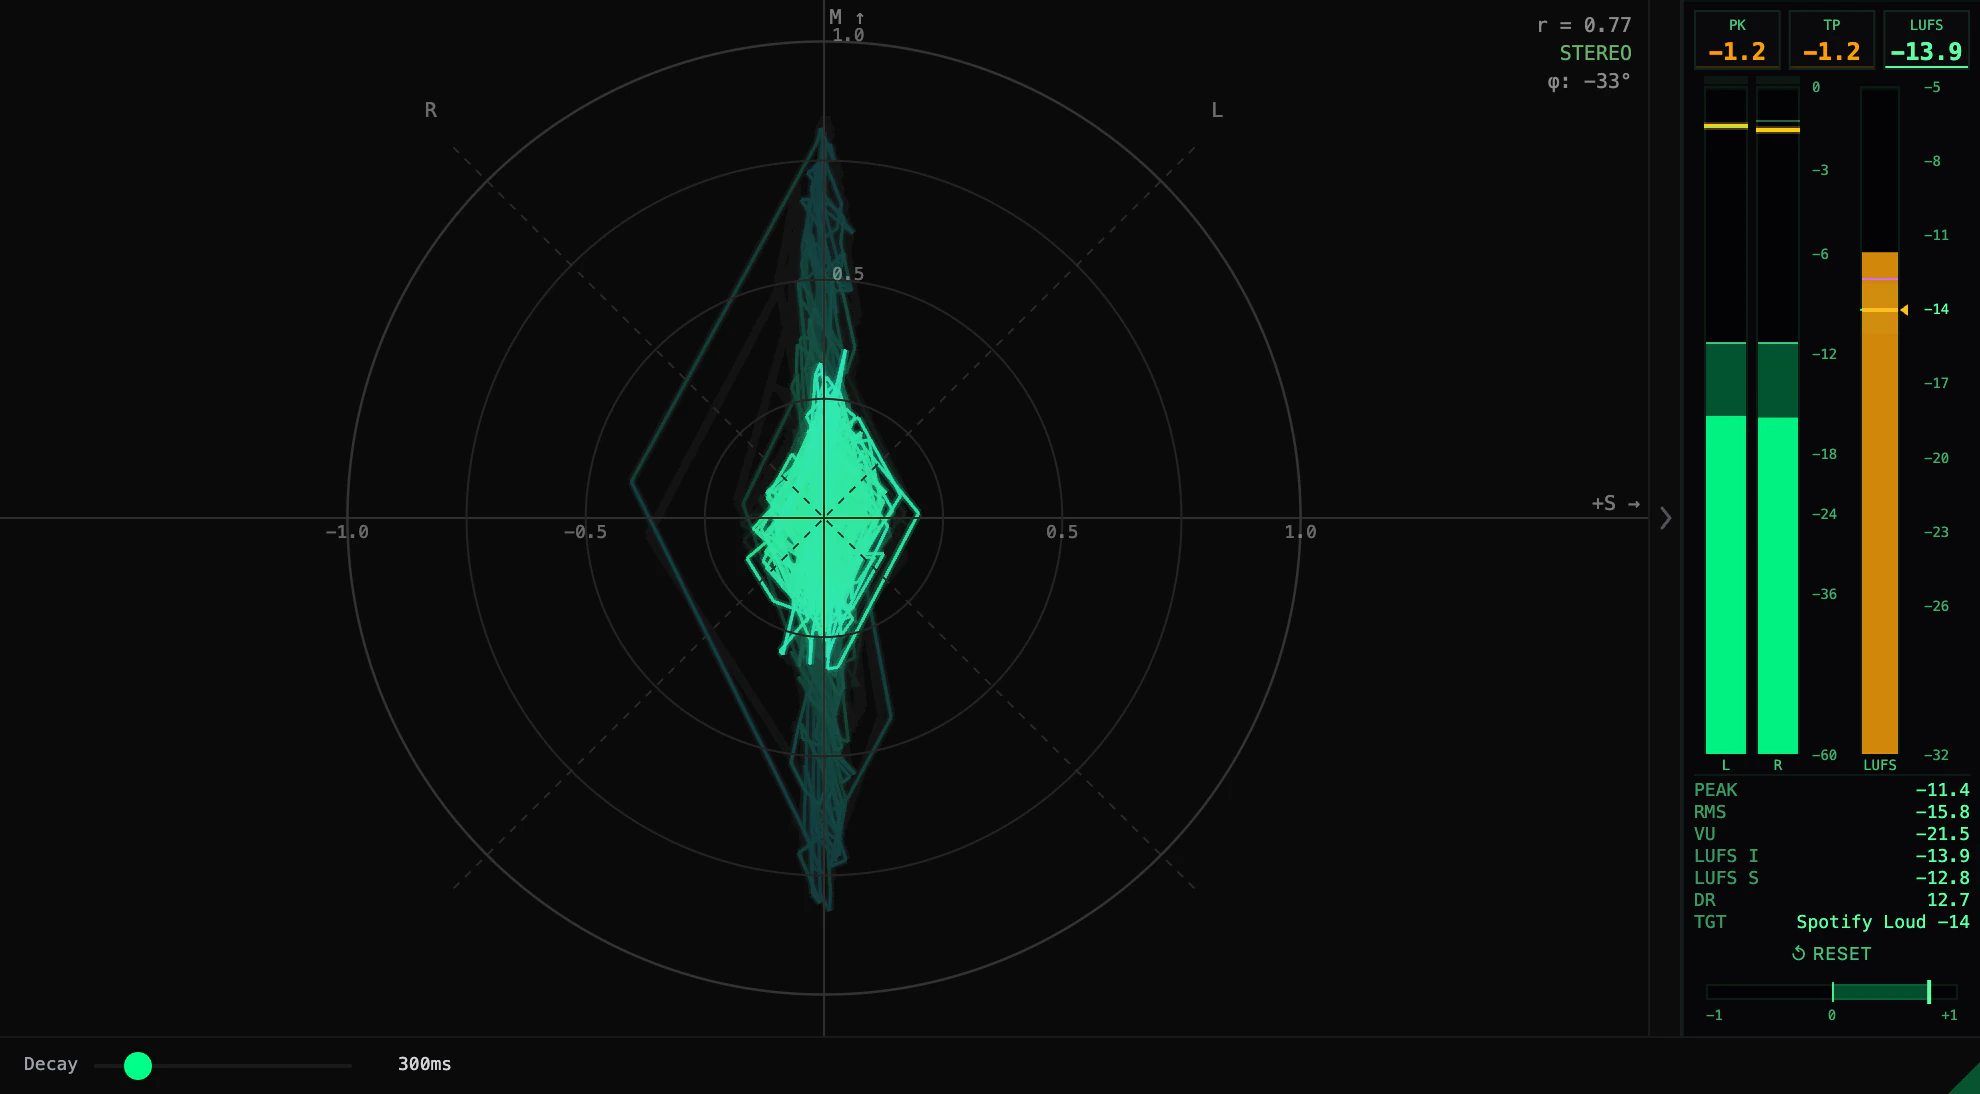
- 01FigureThe last moments of the signal, fading as they age. The circles and the numbers 0.5 and 1.0 on the axes give the scale.
- 02L and RThe two dashed diagonals. A signal that is in one channel only lies along the diagonal of that channel: L at the upper right, R at the upper left.
- 03M ↑The mid axis. A mono signal is a line along it.
- 04+S →The side axis. Stereo width spreads the figure along it.
- 05ReadoutsThe correlation r, a word that sums it up, and the phase angle φ.
- 06DecayHow long the trail stays, 50ms to 2000ms.
Reading the figure
- A vertical line is mono: both channels carry the same signal.
- Width is stereo. The further the figure spreads to the sides, the more the channels differ.
- A horizontal spread, a figure that is wider than it is tall, means the channels are out of phase. That part of the signal cancels when the mix is summed to mono.
The readouts
Three lines at the top right put numbers on the picture: the correlation, as in r = 0.85, one of four words, and the average phase angle in degrees, as in φ: 12°. The word follows the correlation.
| Word | When it shows | Colour |
|---|---|---|
| MONO | Left and right are nearly the same. | Grey |
| STEREO | A normal stereo mix. | Green |
| WIDE | Left and right have little in common. | Yellow |
| OUT OF PHASE | Left and right work against each other. | The Dark colour of the theme |
The correlation meter at the foot of the meter panel shows the same value on a bar, whichever view is on screen: see The meters.
Decay and zoom
Decay, the one control in the toolbar, sets how long the trail stays on the display. Low values fade fast and show only the present; high values leave a longer trail and a fuller figure.
Hold Cmd or Ctrl and turn the wheel over the display to zoom in on a quiet signal, from 1x to 4x in steps of 0.25x, or of 0.05x with Shift held as well. There is no zoom readout: the circles grow and the numbers on the axes change with it.
Freeze holds the figure like any other view, but the Lissajous has no zoom panel while frozen: the plain wheel and a drag do nothing here. See Freeze and zoom.
Settings
| Setting | Where | Range | Default |
|---|---|---|---|
| Decay | Toolbar | 50 to 2000 ms | 300 ms |
| Zoom | Cmd / Ctrl and the wheel, with Shift for fine steps | 1x to 4x | 1x |
Both are remembered.
Spectrogram
The Spectrogram (key 5) shows how the spectrum changes over time, as a picture that scrolls. Time is horizontal, with the newest sound at the right edge; frequency is vertical, from 20 Hz at the bottom to 20 kHz at the top; colour is level, from the dark end of the colormap for silence to its bright end for the loudest sound.
FIG.17AUGVR / Spectrogram
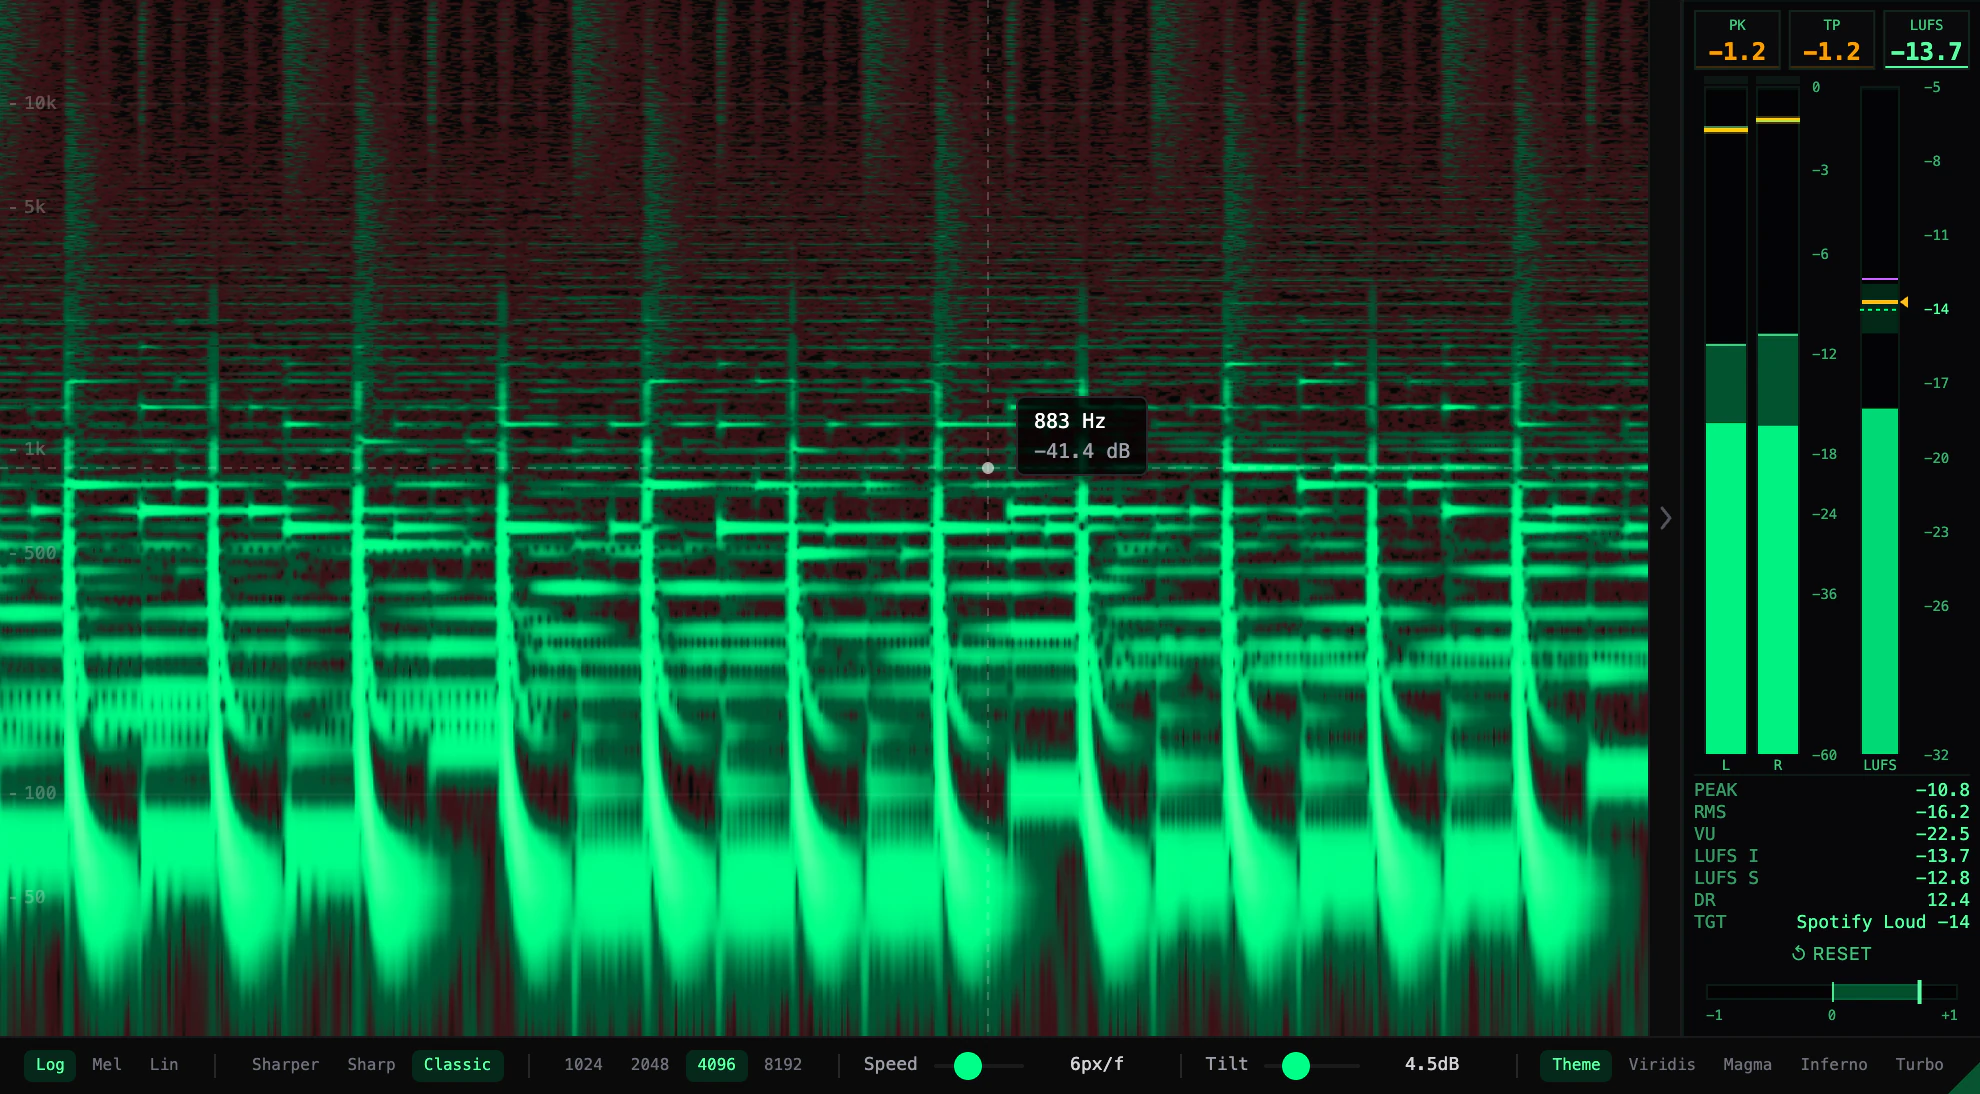
- 01Newest columnNew sound is drawn at the right edge and travels left.
- 02Frequency labels50, 100, 500, 1k, 5k and 10k at the left edge, with faint lines at 100 Hz, 1 kHz and 10 kHz. They move with the scale, and with the zoom of a frozen picture.
- 03Pointer readoutA box with the frequency under the pointer and the level that frequency has now.
- 04ScaleLog, Mel or Lin: how the frequency axis is spaced.
- 05ModeSharper, Sharp or Classic: how finely each component is drawn.
- 06FFT size1024, 2048, 4096 or 8192: detail in frequency against speed in time.
- 07SpeedHow fast the picture scrolls, 1px/f to 16px/f.
- 08TiltTilts the picture toward the high frequencies, 0.0dB to 18.0dB.
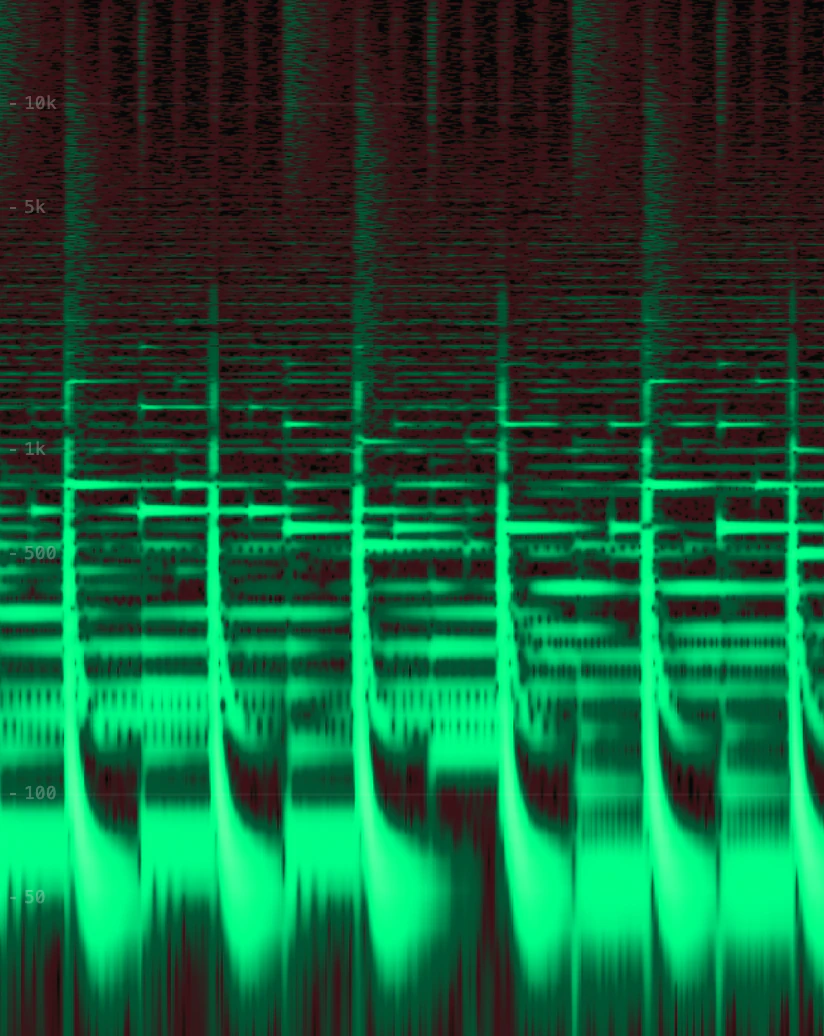
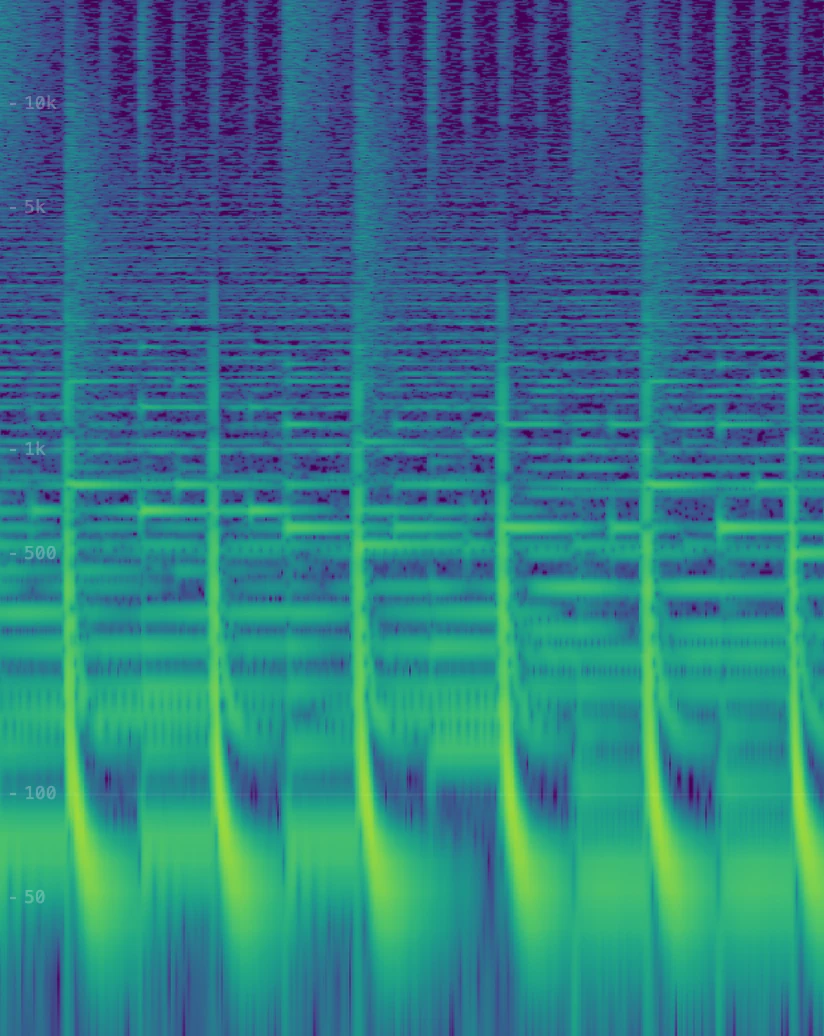
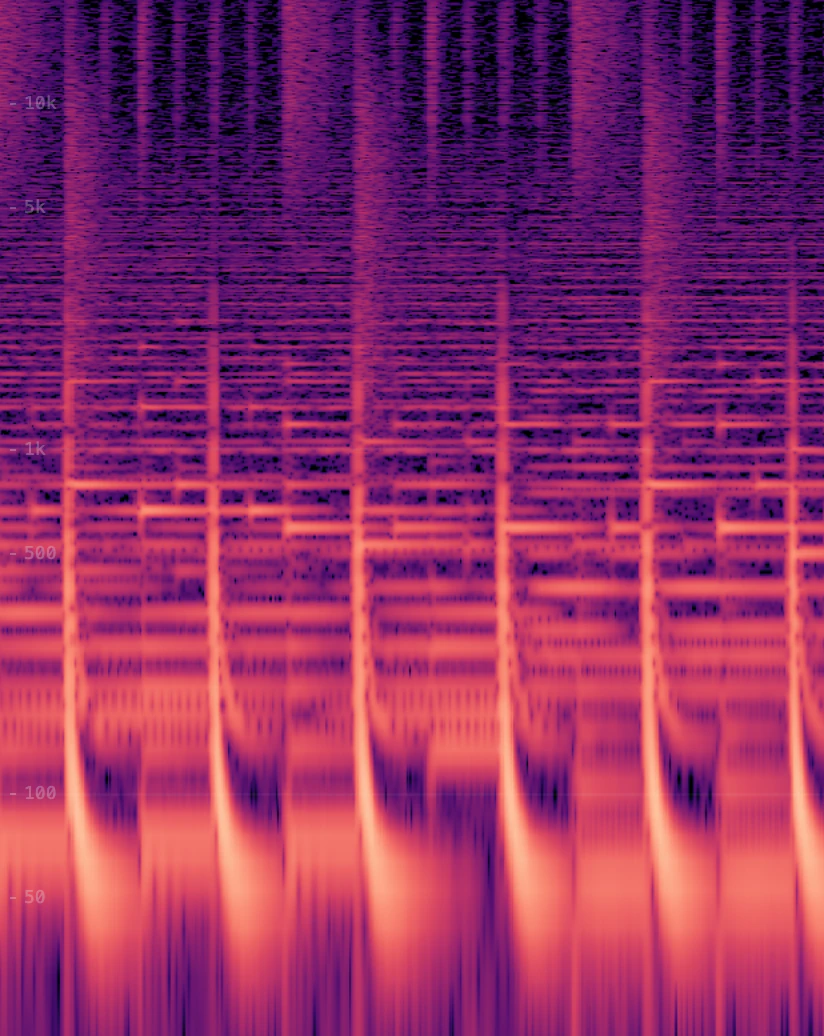
- 09ColormapTheme, Viridis, Magma, Inferno or Turbo.
The toolbar
- Scale. Log gives every octave the same height. Lin gives every hertz the same height, which leaves most of the display to the top octaves. Mel follows the way pitch is heard and sits between the two.
- Mode. Classic draws the spectrum smoothly. Sharp keeps thin lines at their full strength, so that they do not fade. Sharper draws the thinnest lines.
- FFT size. A larger size gives more detail in frequency and is slower in time: close partials separate, fast hits smear. A smaller size does the opposite.
- Speed. How far the picture moves with each frame. Low values show more time and a sharper picture; high values spread events apart.
- Tilt. Most music has less level at the top of the spectrum than at the bottom. Tilt slopes the picture toward the high frequencies by the set number of dB per decade: what is above 1 kHz is raised and what is below it is lowered, so that the upper part of the picture is not left dark. At 0.0dB nothing is changed. A new value applies to what is drawn from then on.
- Colormap. Theme uses the colours of the current theme. The other four are fixed palettes.
FIG.18AUGVR / Colormaps
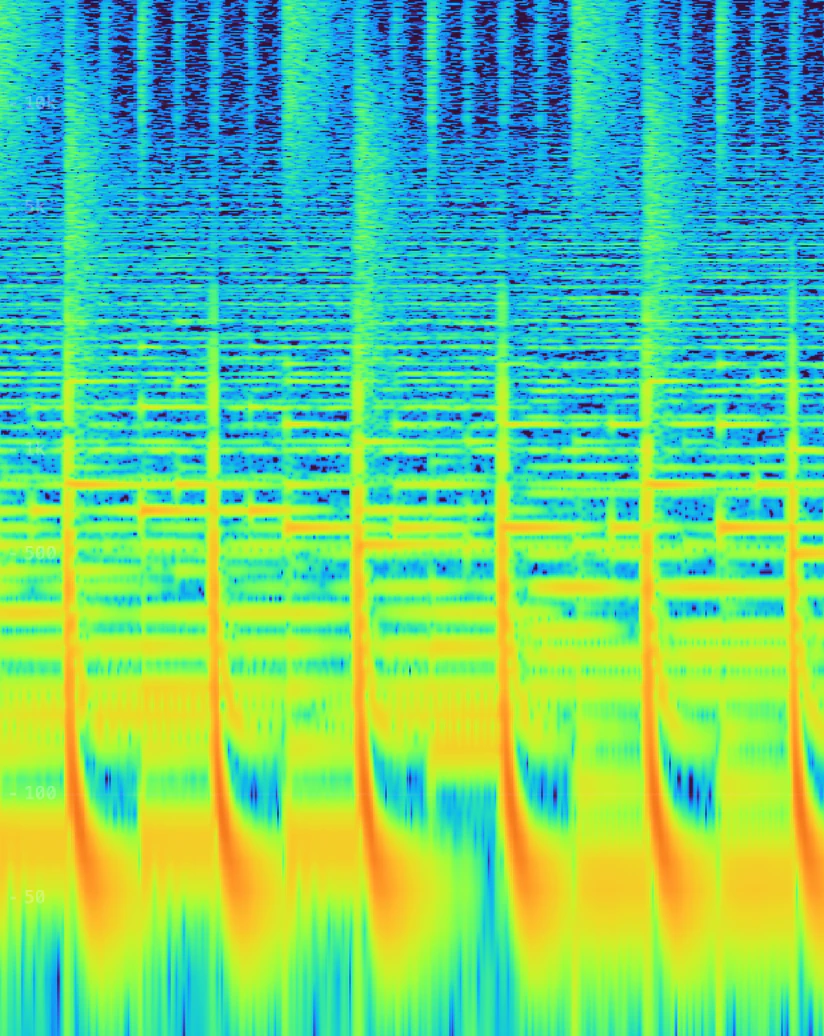
Reading a level
The picture has no colour scale and no time axis. To read a level, move the pointer over the display: a box appears beside it, with the frequency at the height of the pointer and a level in dB. A dashed crosshair marks the point as the pointer moves.
That level is the live one. It is what the signal holds at that frequency now, not what it held at the moment in the past that lies under the pointer, so moving the pointer sideways does not change the reading.
Settings
| Setting | Where | Range | Default |
|---|---|---|---|
| Scale | Toolbar | Log, Mel, Lin | Log |
| Mode | Toolbar | Sharper, Sharp, Classic | Classic |
| FFT size | Toolbar | 1024, 2048, 4096, 8192 | 4096 |
| Speed | Toolbar | 1 to 16 px/f | 6 px/f |
| Tilt | Toolbar | 0 to 18 dB | 4.5 dB |
| Colormap | Toolbar | Theme, Viridis, Magma, Inferno, Turbo | Theme |
Freeze stops the scrolling and lets you zoom into the held picture: see Freeze and zoom.
Waterfall
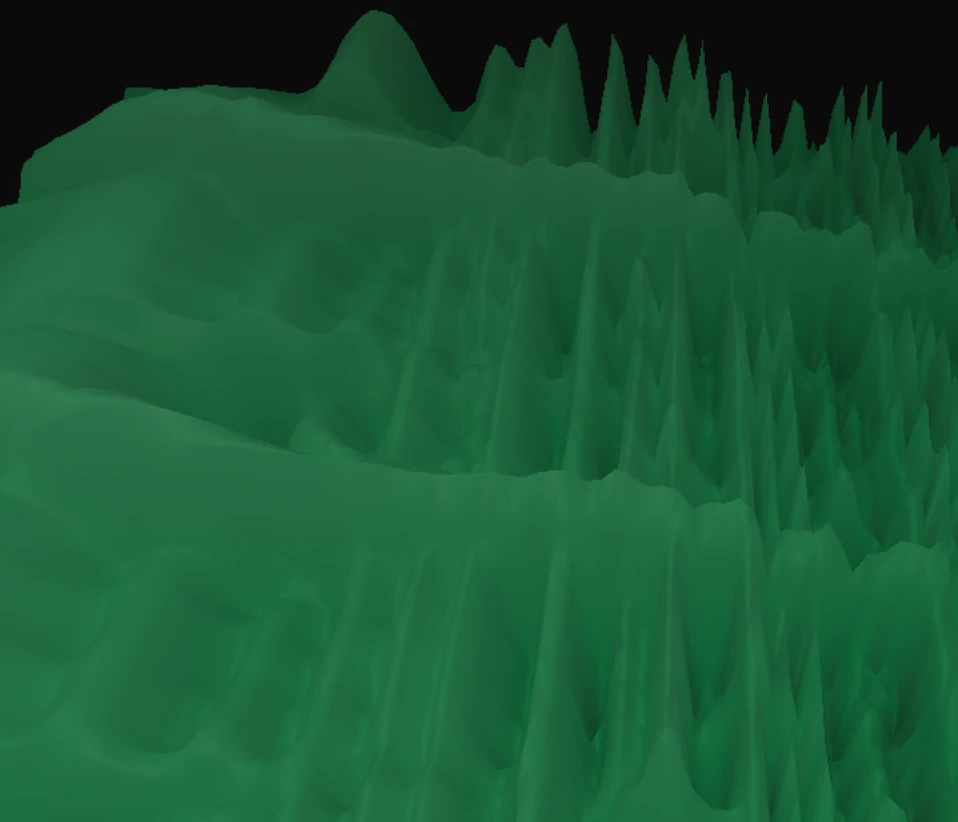
The Waterfall (key 6) shows the spectrum over time as a surface in three dimensions: each new spectrum is a slice, and the slices line up into a landscape. Frequency runs from 20 Hz at the left to 20 kHz at the right, height is level, and depth is time.
FIG.19AUGVR / Waterfall
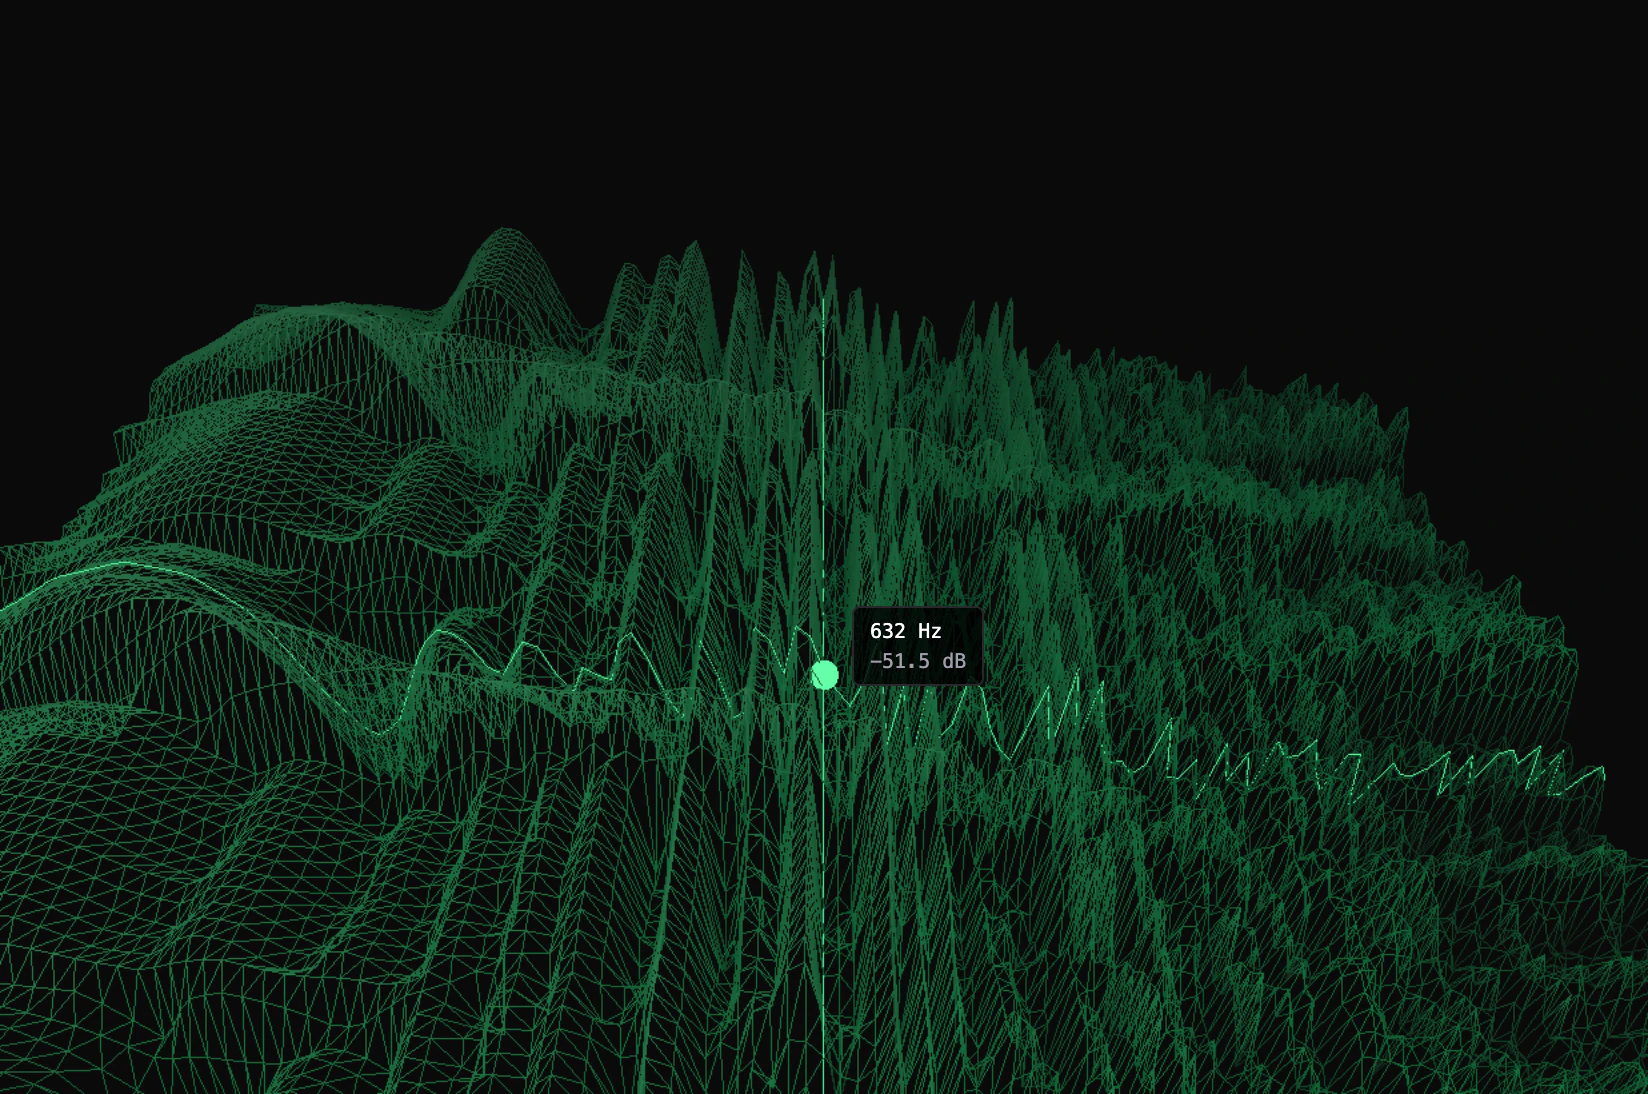
- 01Newest sliceNew sound enters at the back.
- 02Oldest sliceEach slice moves toward the front as new ones arrive, and leaves at the front edge.
- 03FrequencyLow frequencies at the left, high at the right, on a logarithmic scale.
- 04Pointer readoutThe frequency and the level of the point of the surface under the pointer.
The view has no toolbar, and the surface carries no labels or scales. You read it with the pointer, and three options in Config shape it.
Reading the surface
Move the pointer over the surface. Two lines follow its relief through that point, one across the frequencies and one back through time, and a bright dot marks the spot. The box beside the pointer gives the frequency and the level there.
The readout follows the surface, so it reads the past as well as the present: point at a slice near the front and you get the level that sound had when it happened. Off the surface nothing is shown.
Settings
The three options are in Config, under WATERFALL.
FIG.20AUGVR / Waterfall options in Config
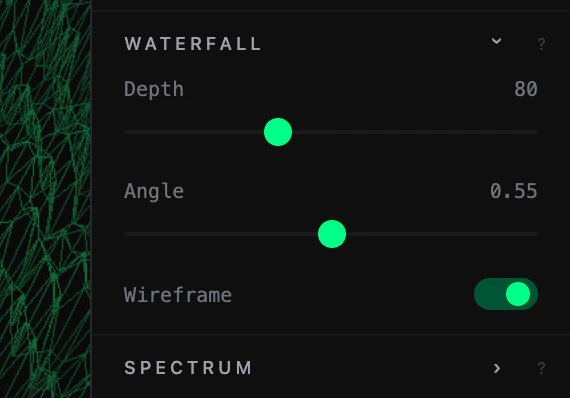
- 01DepthHow many slices the surface holds. More slices show a longer stretch of time.
- 02AngleThe height of the viewpoint. Higher values look down on the surface from further above; lower values look across it.
- 03WireframeOn, the surface is a mesh of lines. Off, it is solid and shaded.
FIG.21AUGVR / Wireframe and surface
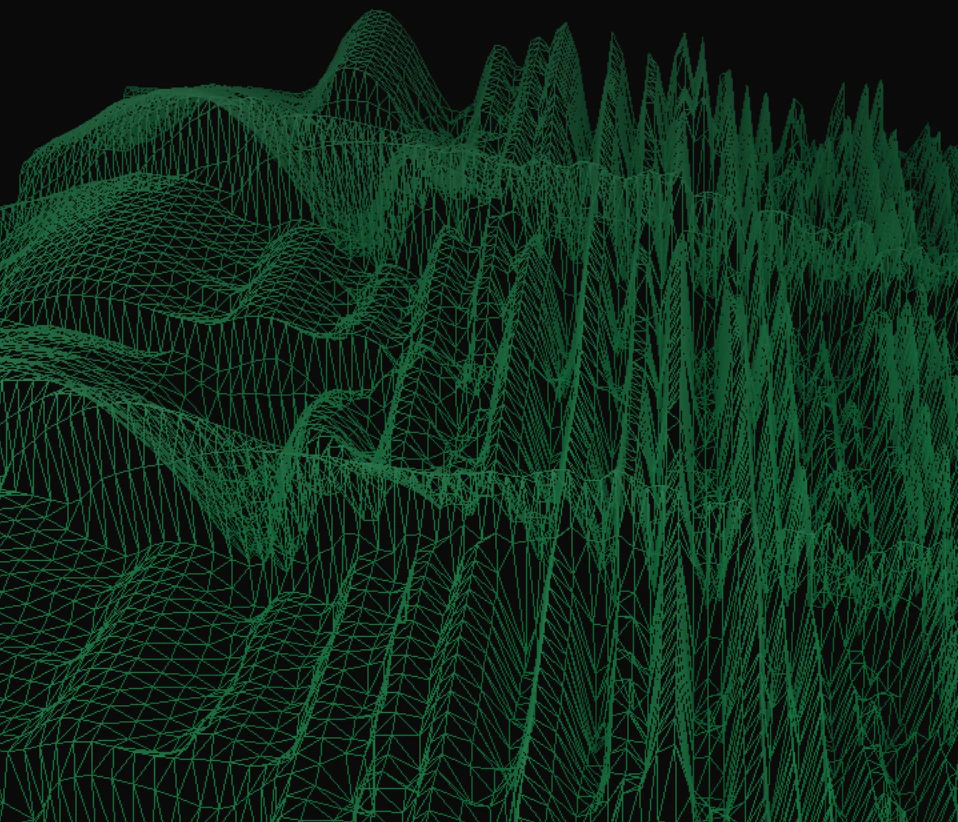
| Setting | Where | Range | Default |
|---|---|---|---|
| Depth | Config, WATERFALL | 40 to 150 | 80 |
| Angle | Config, WATERFALL | 0.30 to 0.80 | 0.55 |
| Wireframe | Config, WATERFALL | on, off | on |
All three are remembered. Freeze stops the surface and lets you move in on it: see Freeze and zoom.
Shader
The Shader view (key 7) fills the display with one shader: a small program that draws a moving picture from the music, from its spectrum, its waveform, its levels, its loudness and its beat. There is nothing to read off it and no scale. It is there to watch, while the meter panel beside it measures as it does in every view. The plugin and the app both have it.
It starts with Code Rain, one of the ten starters that come with AUGVR, and it can show any of them or a shader of your own.
FIG.22AUGVR / Shader
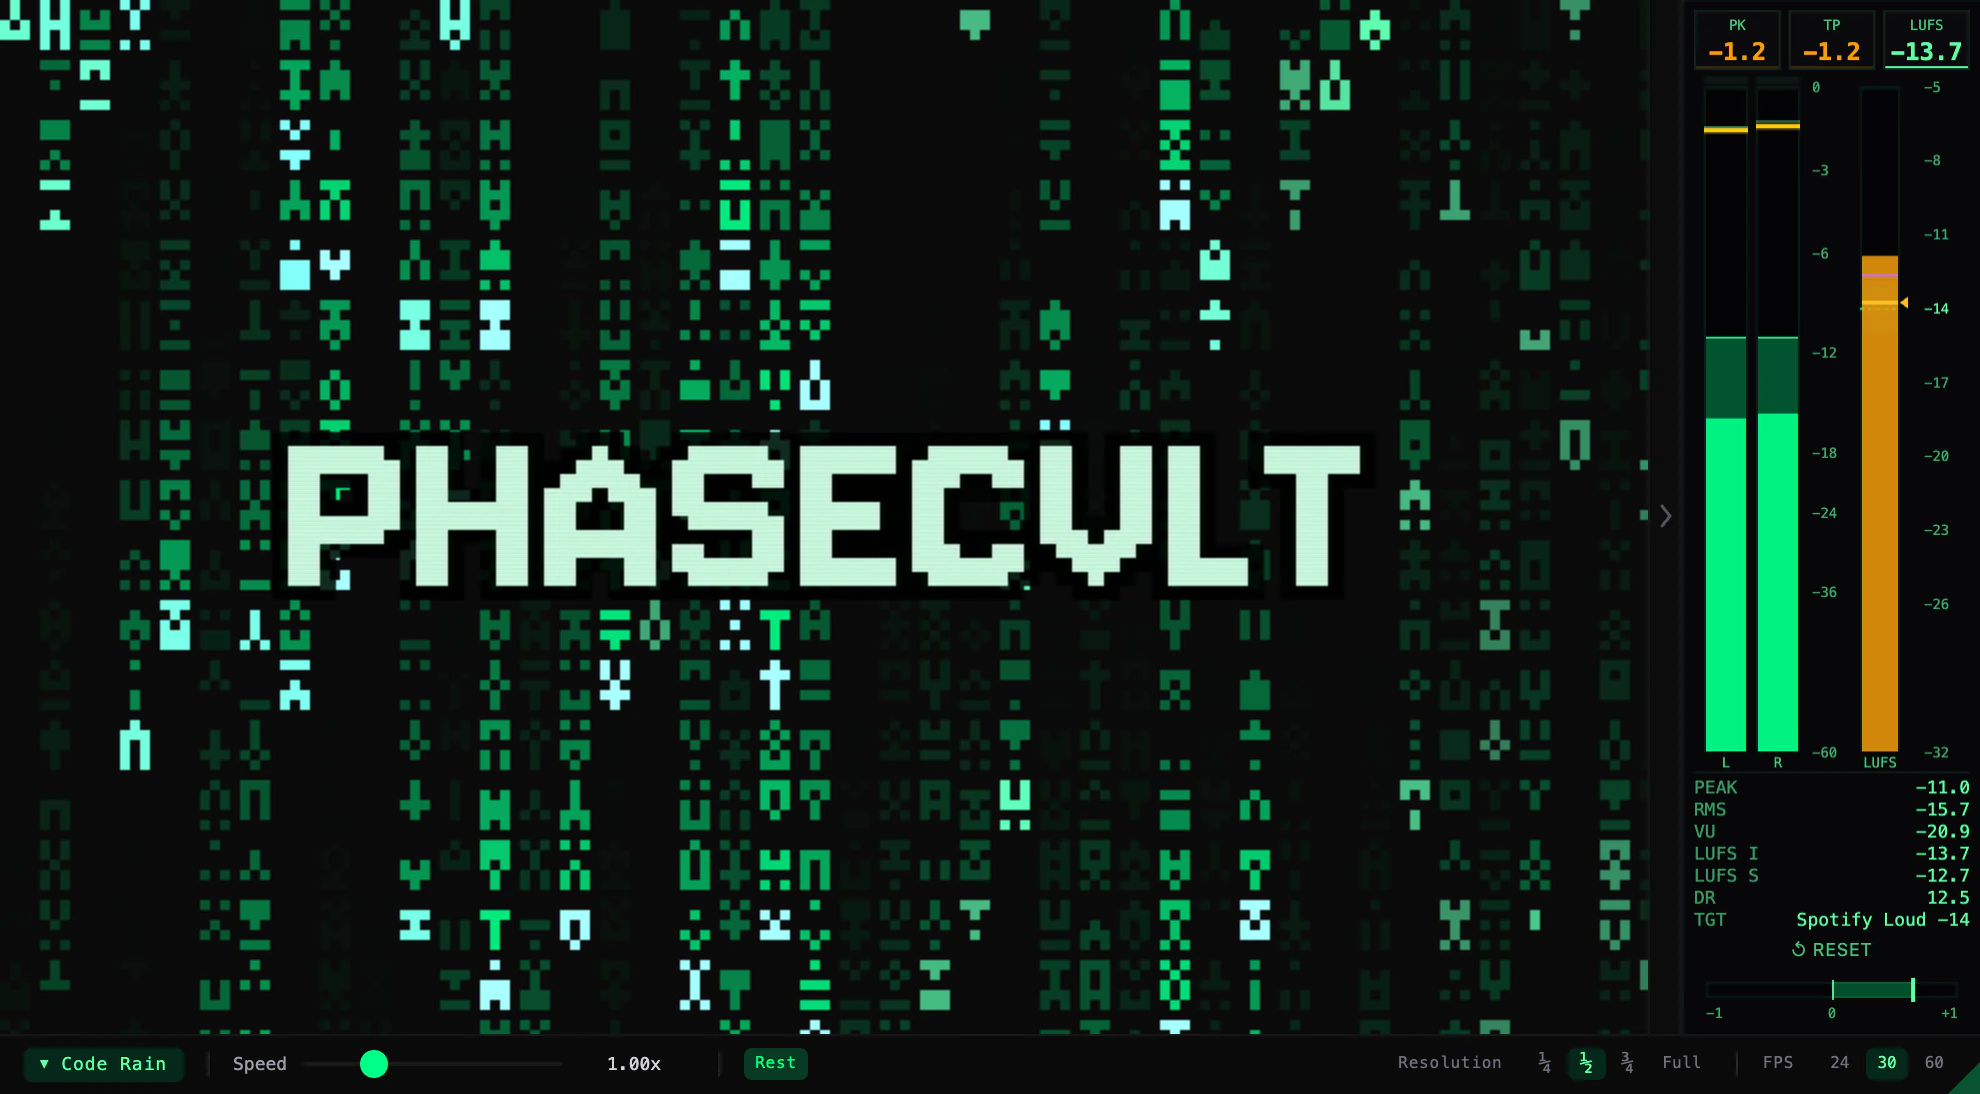
The view as it starts, with Code Rain.
- 01PictureThe shader, drawn in the colours of the theme. It draws only while the view is on screen.
- 02ShaderThe name of the shader on screen. Click it for the list of shaders.
- 03SpeedHow fast the shader runs, 0.00x to 4.00x. At 0.00x it stands still.
- 04RestRest when quiet. Lit while it is on.
- 05ResolutionHow finely the picture is drawn: ¼, ½, ¾ or Full.
- 06FPSThe most pictures a second the view draws: 24, 30 or 60.
Choosing a shader
Click the name at the left of the toolbar. The list of shaders opens above it. Click a shader to put it on the display; a click anywhere outside the list closes it and changes nothing.
FIG.23AUGVR / The list of shaders
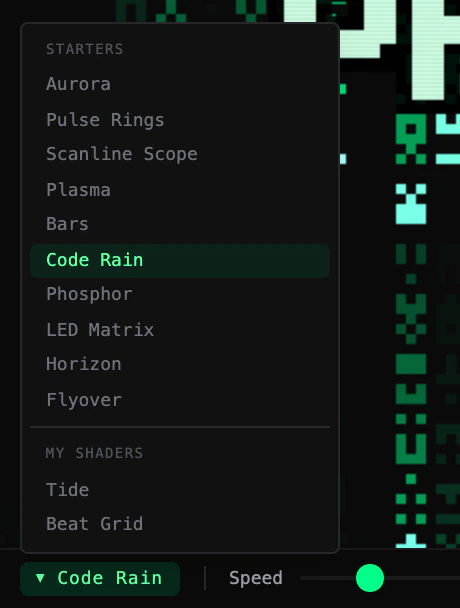
- 01StartersThe ten shaders that come with AUGVR. What each one draws is in the table of starters in Mini mode.
- 02On screenThe shader the view shows is lit.
- 03My shadersThe shaders of your own library. The group is there once the library holds a shader.
A shader of your own is shown as it was last saved in your library. If it is deleted from the library, the view switches to Aurora, the first starter, and the toolbar names it.
Your shaders are written, pasted in and kept in the app, in the Options window of the mini strip. Shaders, in Mini mode, covers the library, the editor, the AI prompt and the values a shader can react to.
Settings
- Speed sets how fast the shader runs. It is a slider like the others in the toolbars: ↺, or a double-click on its name, returns it to 1.00x.
- Rest, Rest when quiet, is on to begin with. When the sound stops, the picture slows down to a stop and stays as it is, and the view does not redraw until sound comes back. Switch it off to keep the picture moving in silence.
- Resolution and FPS trade sharpness and smoothness for a lighter load on the graphics of the computer. Lower them in a large window or on a slower computer. FPS is a ceiling: the frame rate set in Config, under DISPLAY, still applies, and the lower of the two wins.
The view takes its colours from the theme, the one chosen in Config. The palettes of the mini strip, BANDS and GRADIENT, belong to the strip: a starter that takes the colours of a palette there draws in the main colour of the theme here.
| Setting | Where | Range | Default |
|---|---|---|---|
| Shader | Toolbar | The ten starters and your own | Code Rain |
| Speed | Toolbar | 0.00x to 4.00x | 1.00x |
| Rest | Toolbar | on, off | on |
| Resolution | Toolbar | ¼, ½, ¾, Full | ½ |
| FPS | Toolbar | 24, 30, 60 | 30 |
All five are remembered, and RESET DEFAULTS in Config brings back the defaults.
Freeze
Freeze holds the picture: the shader stands still until Freeze is off again. The view has no zoom panel while frozen, so the wheel, a drag and the zoom keys do nothing here; like the Lissajous, it only holds. See Freeze and zoom.
The view and the strip's Shader tiles
The Shader tiles of the mini strip run the same shaders and react to the same audio. The two are set apart all the same:
- Each has its own shader and its own Speed and Rest. Choosing a shader in the view leaves the tiles as they are, and the other way round.
- The colours. The view draws in the colours of the theme; a tile follows the palette of the strip.
- No limit. A strip holds at most three Shader tiles. The view does not count towards them.
Freeze and zoom
Freeze stops the displays on the picture they show, so that you can study a moment that would otherwise be gone. The button is in the header, to the right of the view selector, and its key is F. Click it or press the key again to return to the live picture.
FIG.24AUGVR / Frozen and zoomed
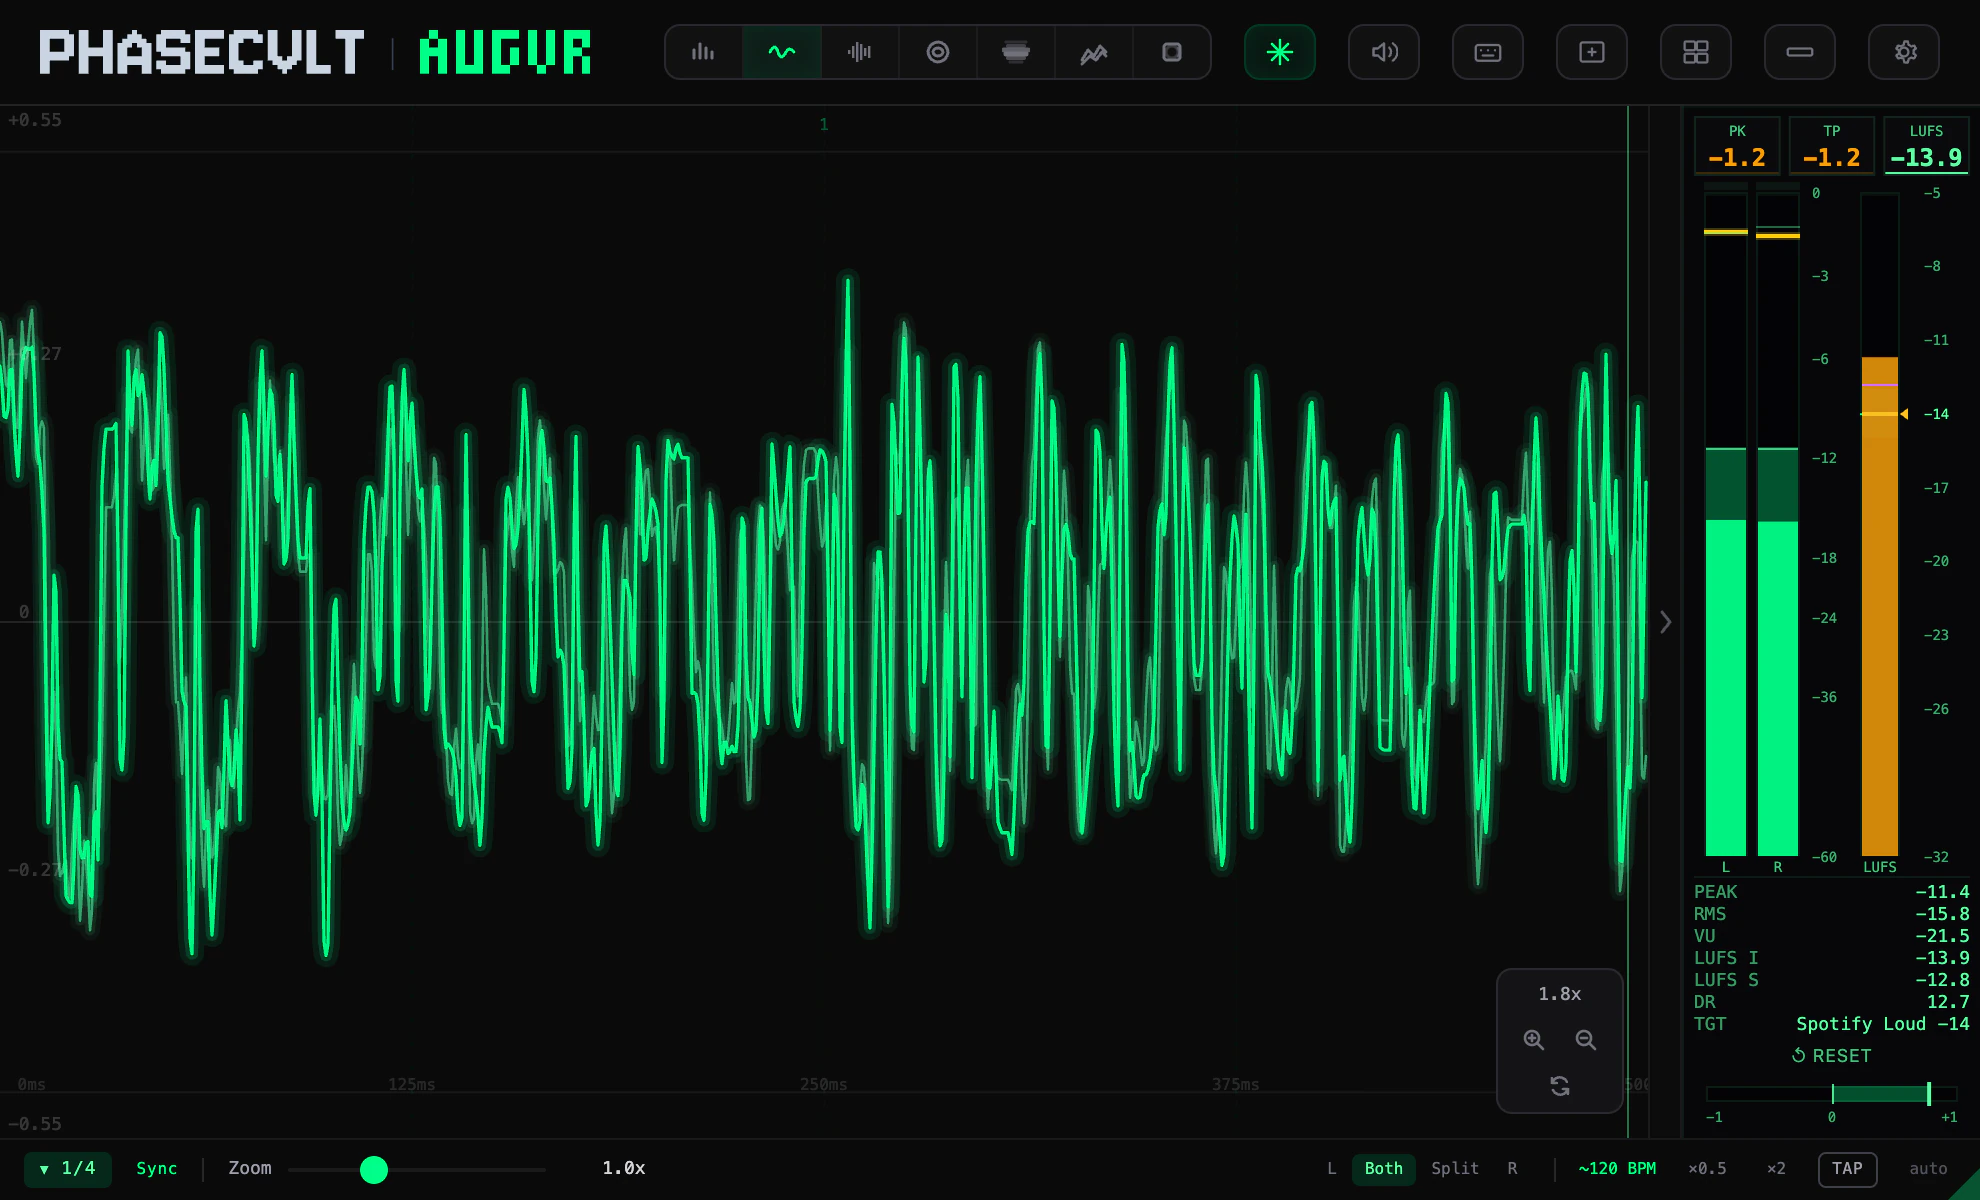
- 01FreezeLit while the displays are held. Its tooltip reads Freeze [F], and Unfreeze [F] while it is on.
- 02Zoom levelThe magnification of this view, from 1.0x to 20.0x.
- 03Zoom inMagnifies the picture around the centre of the display. Key +.
- 04Zoom outThe reverse. Key −.
- 05Reset zoomBack to 1.0x. Key R. The button is shown only while the picture is zoomed.
What is held
Freeze holds all seven displays at once, not only the one in front: the Spectrum, the Scope, the Waveform, the Lissajous figure, the Spectrogram, the Waterfall and the Shader. You can switch views while frozen and look at the same moment in each.
The meter panel is not frozen. Its level bars and its loudness values keep running, so a measurement in progress is not interrupted. Only the correlation meter at its foot stays where it was: see The meters.
Zooming a held picture
While Freeze is on, a small zoom panel sits at the lower right of the display in five of the seven views. The Lissajous and the Shader views have none: they hold their picture and that is all.
- Turn the wheel over the display to zoom in and out, with the pointer on the part you want to see closer. The point under the pointer stays where it is while the picture grows around it.
- Drag a zoomed picture to move it. The pointer turns into a hand. The picture stops at its own edges, sideways and up and down, so the display is always full.
- Press + or −, or use the two buttons of the panel, to zoom in and out in larger steps, around the centre of the display. = works like +.
- Press R, or click the reset button, to return to 1.0x.
The keys act on the view in front and only while Freeze is on; Shortcuts and menus lists them with the others. Each view keeps its own zoom while you switch between them. Leaving Freeze resets the zoom of every view.
What a zoom shows depends on the view. In every one of them the pointer readout reads the zoomed picture: it gives the value of the point the pointer is on.
- Spectrum. The picture is magnified in frequency and in level, which separates peaks that sit close together. The frequency captions along the lower edge follow the zoom, and every grid line gets one.
- Scope. The trace is spread out in time and magnified in amplitude, and a drag travels along the held signal. The amplitude scale follows the zoom. On Free the time scale follows it too. With a note length, the time scale and the beat lines stay as they were. On Split the two channels move apart as the picture grows, each in its own half of it: drag up or down to bring one or the other into view.
- Waveform. The held strip is magnified in time and in amplitude, and the amplitude scale, where it is shown, follows. A drag reaches both ends of the strip, the oldest sound included.
- Spectrogram. A region of time and frequency fills the display. The frequency labels follow the zoom, with a few more added so that a magnified band still has some.
- Waterfall. The view moves in on the surface.
The Cmd, Ctrl and Option or Alt wheel gestures of the Scope, the Waveform and the Lissajous are separate from this zoom and keep their own meaning, with or without Shift: see How the controls behave.
Freeze and the host
Freeze is one of the two parameters the plugin gives to the host, beside the view, so it can be automated: see Reference. It is never restored. A project always opens with the displays live, and so does the app.
The meters
The meter panel stands at the right of every view. It reads level, loudness and stereo correlation, and it is the same in the plugin and in the app. It measures the main signal only, never the sidechain, and it keeps running while a view is frozen.
FIG.25AUGVR / The meter panel
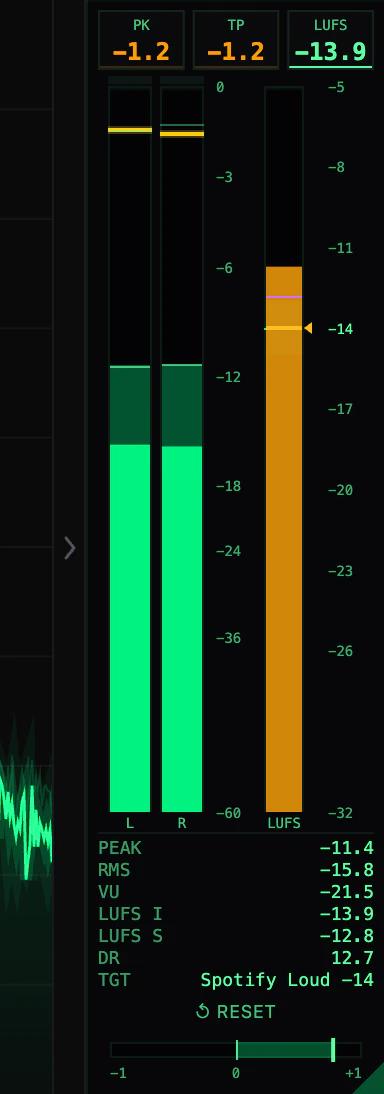
- 01TabHides the panel and gives its width to the view. Click it again to bring the panel back.
- 02PK, TP, LUFSThe highest sample peak, the highest true peak and the integrated loudness since the last reset.
- 03Clip lampsOne over each bar. A lamp lights on an over. Click the lamps to clear them.
- 04L, RThe level bars of the left and right channels, in the mode chosen in Config.
- 05dB scaleFrom 0 at the top to -60 at the bottom.
- 06LUFSThe loudness bar: momentary, short-term and integrated loudness against the target.
- 07Loudness scaleIn LUFS. It is centred on the target and moves with it.
- 08Value rowsThe readings as numbers, from PEAK to DR.
- 09TGTThe loudness target. Click its value to choose another.
- 10RESETThe button, printed ↺ RESET, clears the held readings and starts the integrated loudness again.
- 11CorrelationHow alike the left and right channels are, from -1 to +1.
Rest the pointer on PK, TP or LUFS, or on the name of a value row, and a tooltip says what the reading is.
Level bars
The two tall bars are the left and right channels, marked L and R. The scale beside them runs from -60 dB at the bottom to 0 at the top.
- Colour. A bar is drawn in the main colour of the theme. The part above -6 dB is yellow.
- Hold marker. A short line stays at the latest peak for a moment, then falls. It is yellow above -6 dB and takes the Clip colour of the theme at 0 dB, or at -1 dBTP in the two True Peak modes.
- Highest level. A fainter line stays at the highest level reached since the last reset.
- Clip lamps. The lamp over a bar lights on an over and goes out by itself about a second and a half after the last one. A click on the lamps clears them at once, and does everything RESET does.
What counts as an over depends on the mode. In the three modes that watch the sample peak it is a sample over full scale, above 0 dB. A signal that reaches 0 dB exactly, or only comes close to it, does not light the lamp. In the two True Peak modes it is a true peak at -1 dBTP or above.
FIG.26AUGVR / A level bar, Peak & RMS
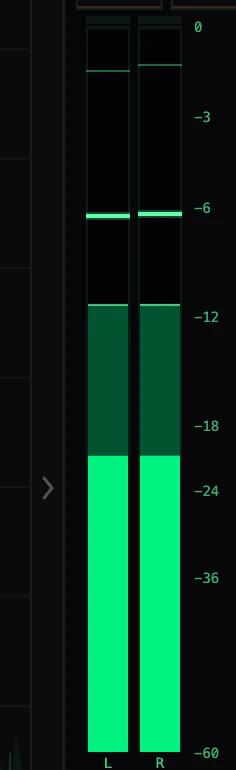
- 01Clip lampLit after an over. It goes out by itself; a click clears it at once.
- 02Hold markerThe latest peak, held for a moment before it falls.
- 03PeakThe translucent fill: the peak level.
- 04RMSThe solid fill: the RMS level. It never rises above the peak.
- 05Highest levelThe highest peak since the last reset. RESET removes the line.
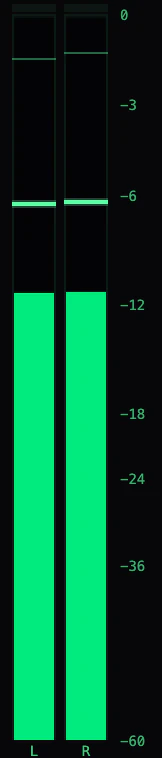
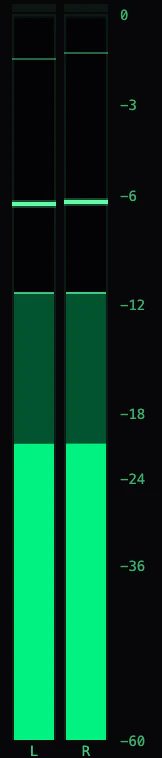
The five modes
The mode decides what the bars show. It is chosen in Config, under METERS, not on the panel: see FIG.33. The default is PEAK & RMS.
For each mode the table gives what fills the bar, what is drawn behind it, the reading the hold marker follows and what lights the clip lamp.
| Mode | Bar | Behind it | Hold marker | Clip lamp |
|---|---|---|---|---|
| Peak | Sample peak | Nothing | Sample peak | Sample over full scale |
| RMS | RMS | Nothing | None | Sample over full scale |
| Peak & RMS | RMS | Sample peak | Sample peak | Sample over full scale |
| True Peak | True peak | Nothing | True peak | True peak at -1 dBTP or above |
| True Peak & RMS | RMS | True peak | True peak | True peak at -1 dBTP or above |
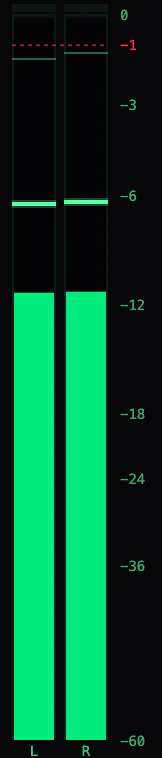
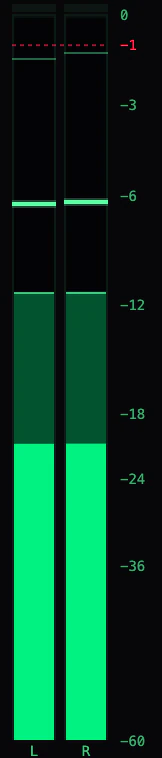
In the two combined modes the solid bar is the RMS level and the translucent fill behind it is the peak. The gap between them shows how far the peaks stand above the average level. RMS alone is a single solid fill, with no hold marker and no line for the highest level. In the other modes that line follows the same reading as the hold marker.
In the two True Peak modes a dashed line across both bars marks -1 dBTP, and the scale gains the label -1. Both are in the Clip colour.
RMS is a true RMS with a 300 ms integration time (AES17). True peak is measured 4× oversampled per ITU-R BS.1770-4: it catches the peaks between samples that the sample peak misses.
FIG.27AUGVR / Meter modes
Loudness
The narrower bar marked LUFS shows three loudness readings at once, against the target. Loudness is measured per ITU-R BS.1770-4 / EBU R128. A mono source is measured as one channel, the way the standard counts it: a mono track in a DAW, a single input channel in the app, or a mono track sent through AUGVR Server. It therefore reads 3 dB lower than the same signal on both channels of a stereo track. The level bars and the views still show it as two equal channels, centred.
FIG.28AUGVR / The loudness bar
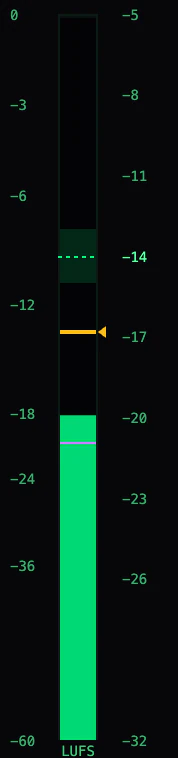
- 01MomentaryThe bar itself: the loudness of the moment. It turns orange while it is at or above the target.
- 02Short-termThe thin line, in the SC colour of the theme: the loudness over a 3 s window.
- 03IntegratedThe yellow mark with a notch at the right edge: the loudness of the whole programme since the last reset.
- 04Target bandA shaded band from 1 LU under the target to 1 LU over it, with a dashed line at the target.
- 05TargetThe brighter label on the scale at the right of the bar. The scale is in LUFS and moves with the target.
The LUFS readout at the top of the panel is the integrated loudness as a number. It turns orange when the integrated loudness is 1 LU or more above the target.
With the target set to Off there is no band and no dashed line, nothing turns orange, and the scale no longer follows a target.
The value rows
Under the bars, seven rows give the readings as numbers. PEAK, RMS and VU are in dB and take the higher of the two channels.
| Row | Reads |
|---|---|
| PEAK | The sample peak at this moment. The number takes the Clip colour at 0 dB. |
| RMS | True RMS with a 300 ms integration time (AES17). |
| VU | A rectified average with a 15 ms time constant. It reads a little differently from RMS. |
| LUFS I | Integrated loudness: the gated programme loudness per ITU-R BS.1770-4 / EBU R128. |
| LUFS S | Short-term loudness, over a 3 s window. |
| DR | Dynamic range: the highest peak since the last reset minus the integrated loudness, also called the peak-to-loudness ratio. Higher is more dynamic. It shows a dash until there is an integrated loudness. |
| TGT | The loudness target and its value in LUFS, for example Spotify Loud -14. |
PEAK follows the signal. The PK readout at the top holds the highest sample peak since the last reset, and TP holds the highest true peak. Both turn orange from -6 dB and take the Clip colour at the over: 0 dB for PK, -1 dBTP for TP.
A reading of -∞ means silence, or a signal too quiet for the meter.
Choosing a target
The target is the loudness you are aiming for. It places the band on the loudness bar, centres the scale and decides when the readings turn orange. It does not change the audio.
Click the value at the right of the TGT row to open the list, then click a target. The name TGT at the left of the row only shows its tooltip. The list opens above the row and shows every target at once; a click anywhere outside closes it with no change.
FIG.29AUGVR / Choosing a target
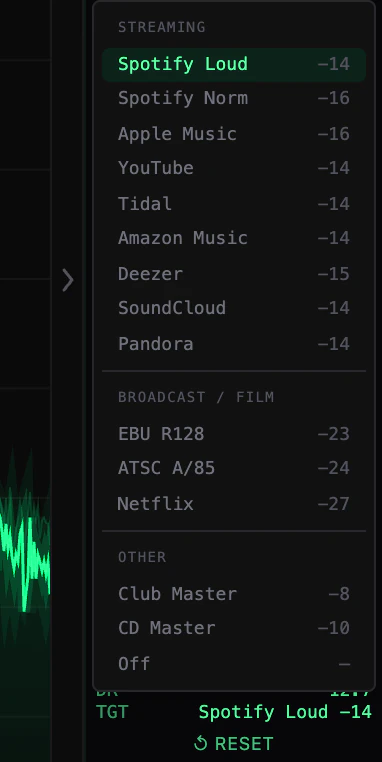
- 01TGTClick the value on this row to open or close the list.
- 02Current targetThe highlighted entry. Its value is at the right.
- 03OffNo target. The loudness is still measured.
| Target | LUFS |
|---|---|
| Streaming | |
| Spotify Loud | -14 |
| Spotify Norm | -16 |
| Apple Music | -16 |
| YouTube | -14 |
| Tidal | -14 |
| Amazon Music | -14 |
| Deezer | -15 |
| SoundCloud | -14 |
| Pandora | -14 |
| Broadcast / Film | |
| EBU R128 | -23 |
| ATSC A/85 | -24 |
| Netflix | -27 |
| Other | |
| Club Master | -8 |
| CD Master | -10 |
| Off | No target |
Spotify Loud is the default. The target is remembered with the other settings, and the Loudness module of the mini strip uses the same one.
Reset
RESET, under the value rows, starts the held readings again:
- PK and TP go back to -∞, and the lines for the highest level disappear;
- the hold markers drop and the clip lamps go out;
- the loudness readings start again, the integrated loudness among them, and DR with it.
The mode, the target, RMS, VU and the correlation meter are left as they are.
In the plugin, the loudness readings also start again each time the host's transport goes from stopped to playing, so every pass is measured from its start. A window of the app does the same while its input is AUGVR Server, which gives it the transport of the DAW. The loudness readings also start again when the source changes between mono and stereo, for example when a single channel is ticked instead of a pair.
Correlation
The bar at the bottom of the panel compares the left and right channels. Its marker moves between -1 and +1.
- At +1 left and right are the same: the signal is mono.
- Around 0 they have little in common: the signal is wide.
- At -1 they are the same signal with opposite polarity: it cancels when the channels are summed to mono.
Left of centre the fill takes the Clip colour of the theme. A marker that stays there means the mix loses level in mono.
This is the one part of the panel that Freeze holds: while a view is frozen, the marker stays where it was when you froze it. The Lissajous view shows the same correlation as a number.
Hiding the panel
The narrow tab along the left edge of the panel hides it. Click the tab and the view takes the whole width; click it again and the panel returns.
FIG.30AUGVR / Meters collapsed
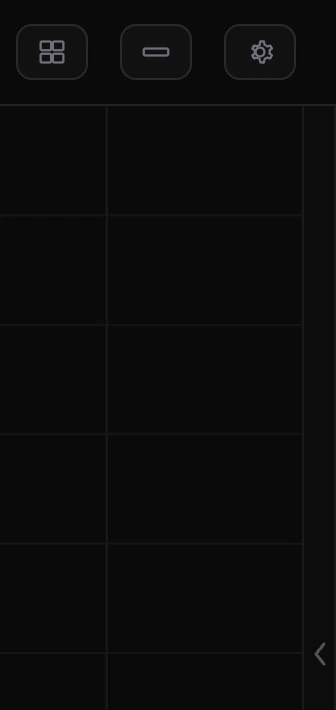
- 01TabClick to show the meters again.
Whether the panel is open is remembered with the other settings, and in the app it is saved in a workspace. RESET DEFAULTS in Config opens it again.
Config
The gear at the right of the header opens Config, a drawer that slides in over the right edge of the window. It holds the theme, the options of the views that are not on a toolbar, the meter mode, the display settings and the news from PhaseCvlt. Every change applies as you make it; there is nothing to confirm.
Close the drawer with the x in its corner, or by clicking anywhere outside it.
FIG.31AUGVR / Config
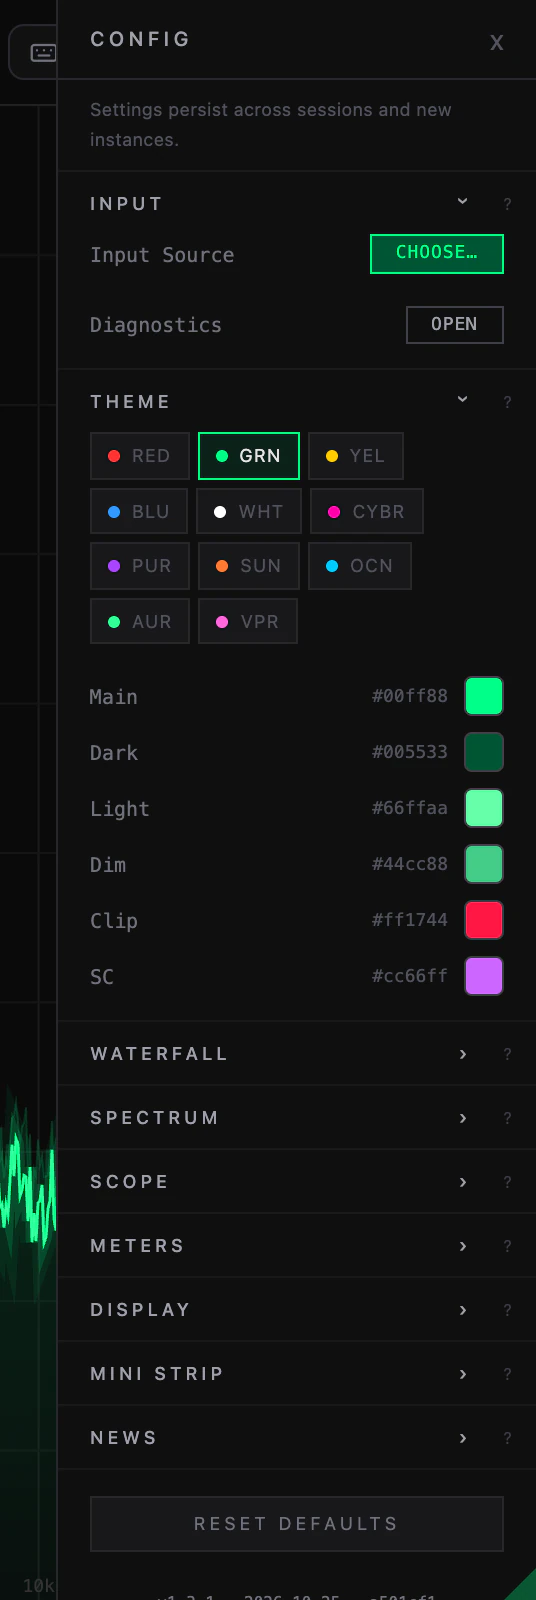
- 01xCloses the drawer. A click outside it does the same.
- 02INPUTThe app only. CHOOSE… opens the Choose Audio Input window and OPEN shows Audio Diagnostics.
- 03PresetsThe eleven themes. Click one to use it; the lit one is in use.
- 04ColoursThe six colours of the theme. Click a swatch to change one.
- 05SectionsClick a title to open or close a section. The ? beside it describes the section when the pointer rests on it.
- 06RESET DEFAULTSReturns the settings to their defaults, at once.
| Section | Holds |
|---|---|
| Input | The app only. Input Source, with CHOOSE… to pick what the app listens to, and Diagnostics, with OPEN to show Audio Diagnostics. See Getting sound in and If nothing shows. |
| Theme | The eleven presets and the six colours. |
| Waterfall | Depth, Angle and Wireframe. See Waterfall. |
| Spectrum | Snap to Peak, Auto Peaks, Decay and Hold. See Spectrum. |
| Scope | The trigger mode, Level (shown for RISE and FALL) and Auto Gain. See Scope. |
| Meters | Mode: what the level bars of the meter panel show. See The meters. |
| Display | The frame rate, Scope Res, Glow, Clip and, in the app, Always on top. |
| Mini strip | The app only. A Preset list, the Background of the strip, Pin on top (mini) and the button ENTER MINI MODE. All of it is covered in Mini mode. |
| News | The news from PhaseCvlt, with the switch Show news from PhaseCvlt. A dot after the title means there is an item you have not seen. See News from PhaseCvlt. |
| Reset Defaults | A button at the foot of the drawer, with the version of AUGVR under it. |
Theme
A theme is six colours, and a seventh, Accent, that only the mini strip draws with (see Mini mode). A preset sets them all at once, and each colour can then be changed on its own. The theme colours the full window and, in the app, the mini strip.
There are eleven presets. RED, GRN, YEL, BLU, WHT, CYBR and PUR are red, green, yellow, blue, white, cyberpunk and purple. SUN, OCN, AUR and VPR, sunset, ocean, aurora and vapor, are built on two colours, for the mini strip's GRADIENT palette. GRN is the default. The dot on a chip is the main colour of that theme.
FIG.32AUGVR / Themes
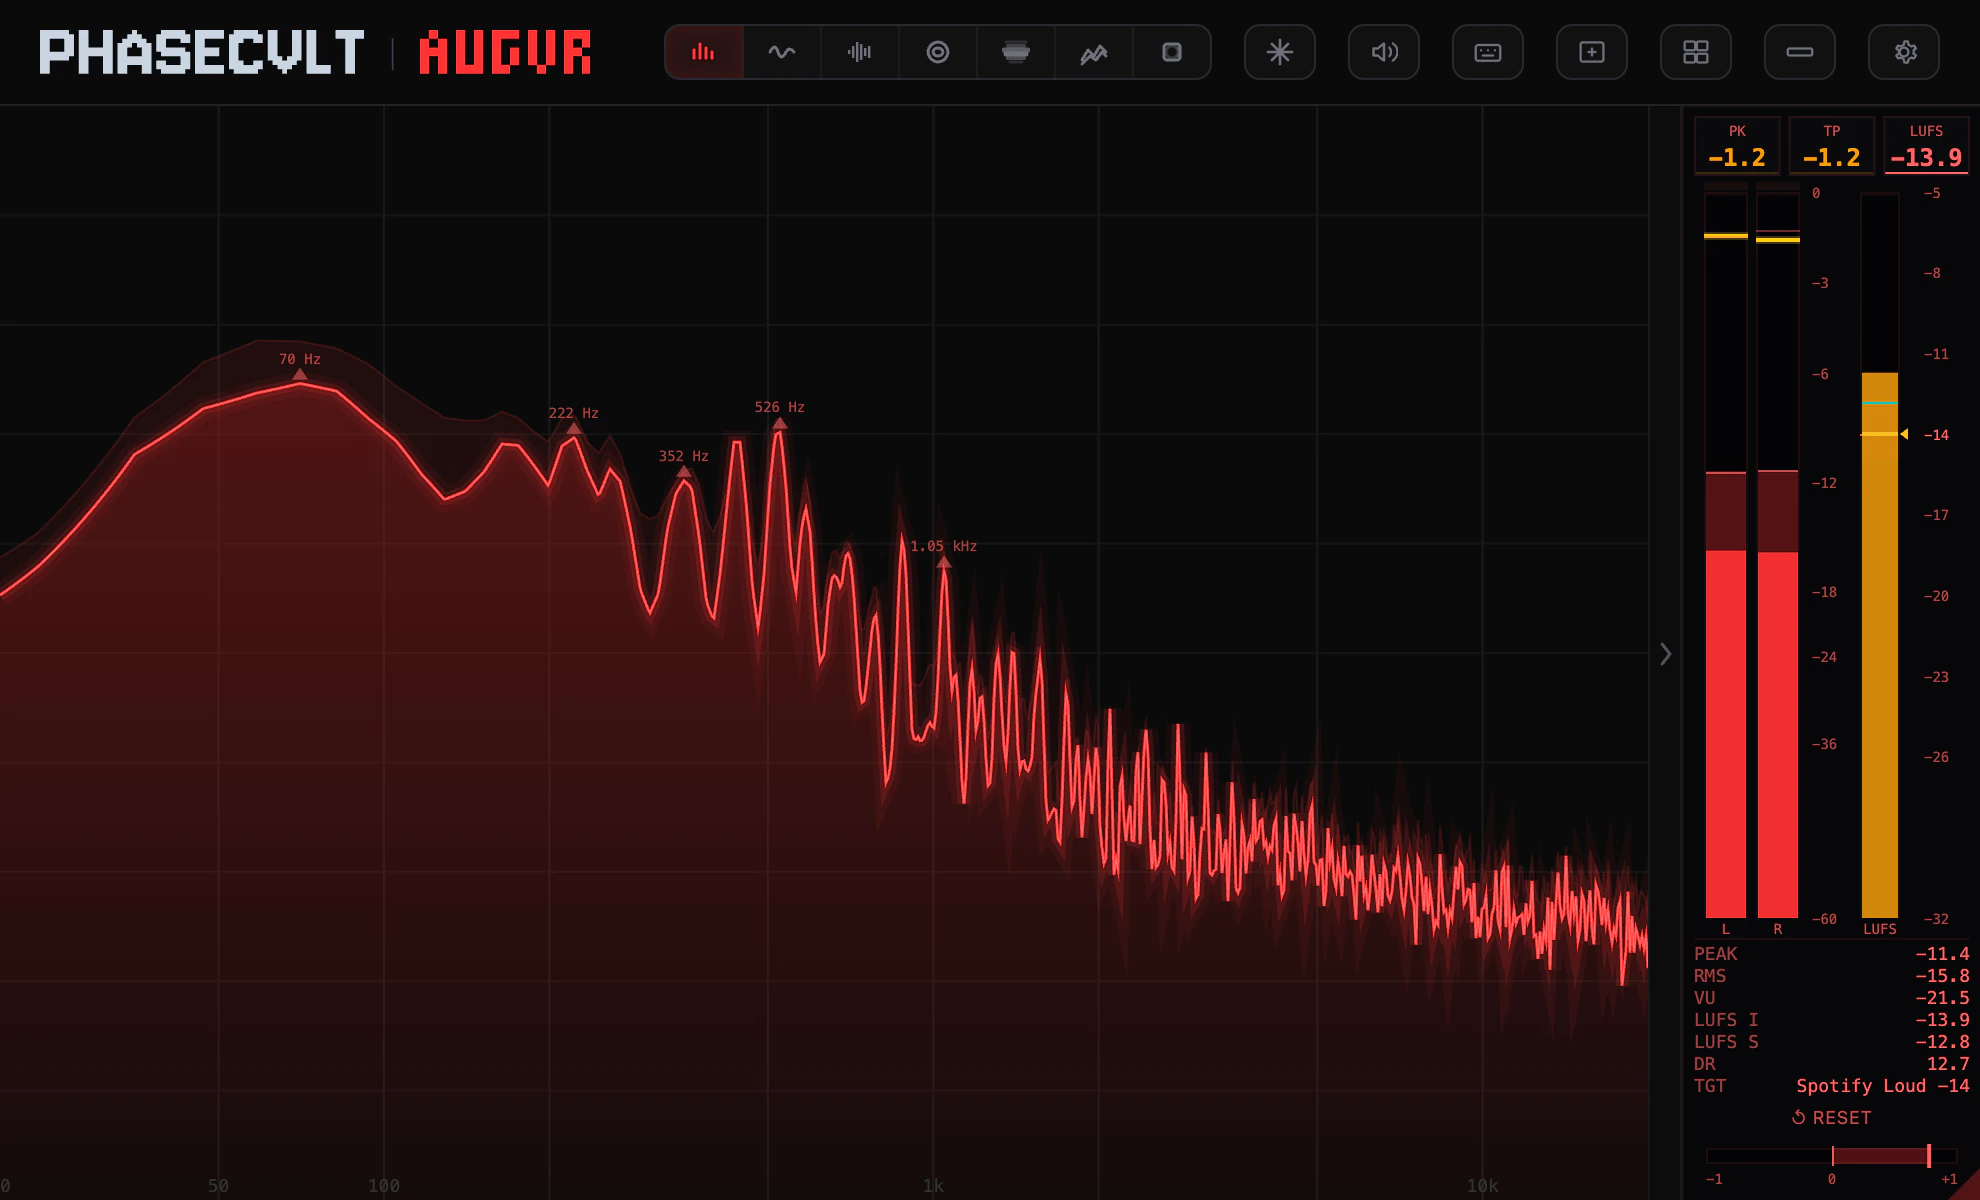
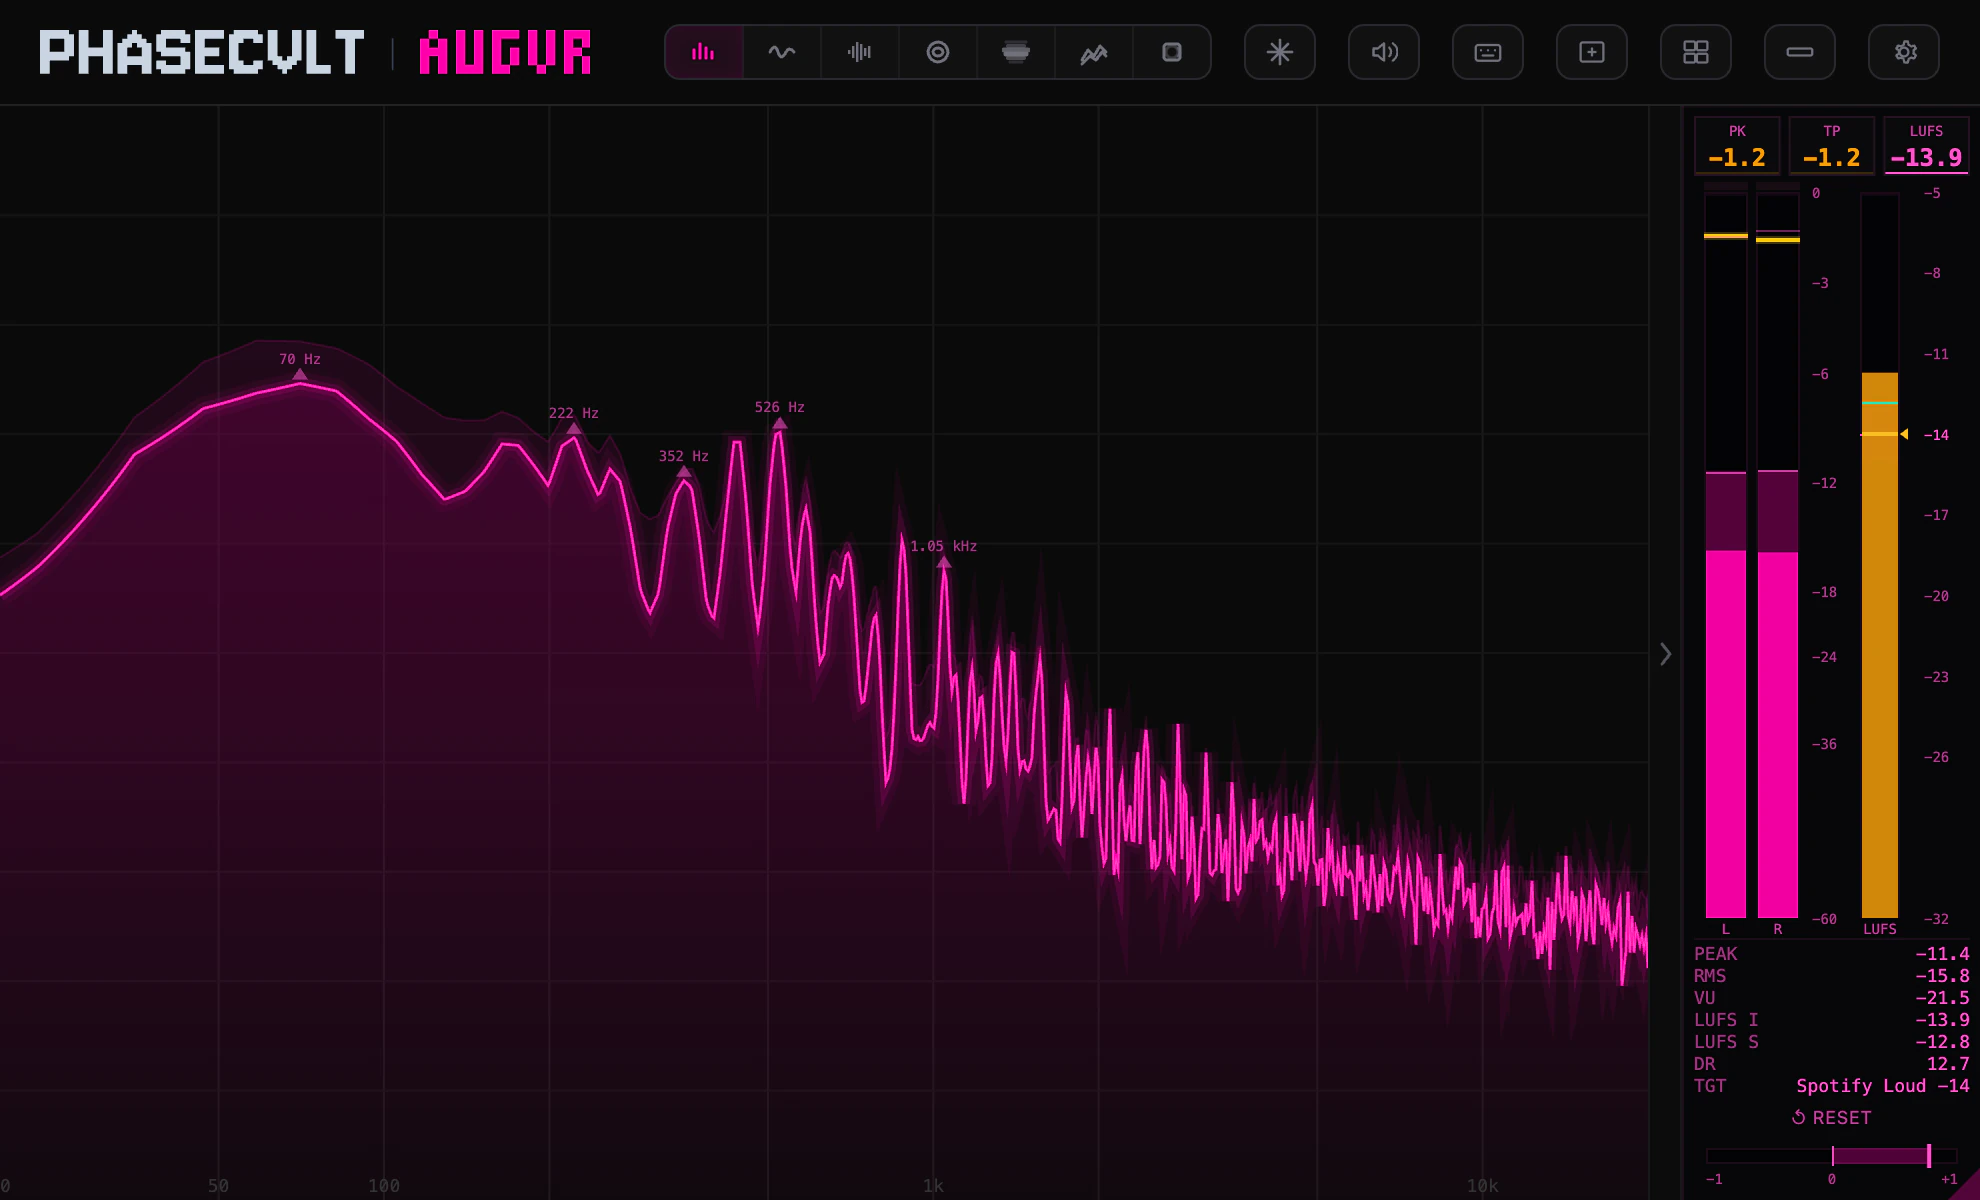
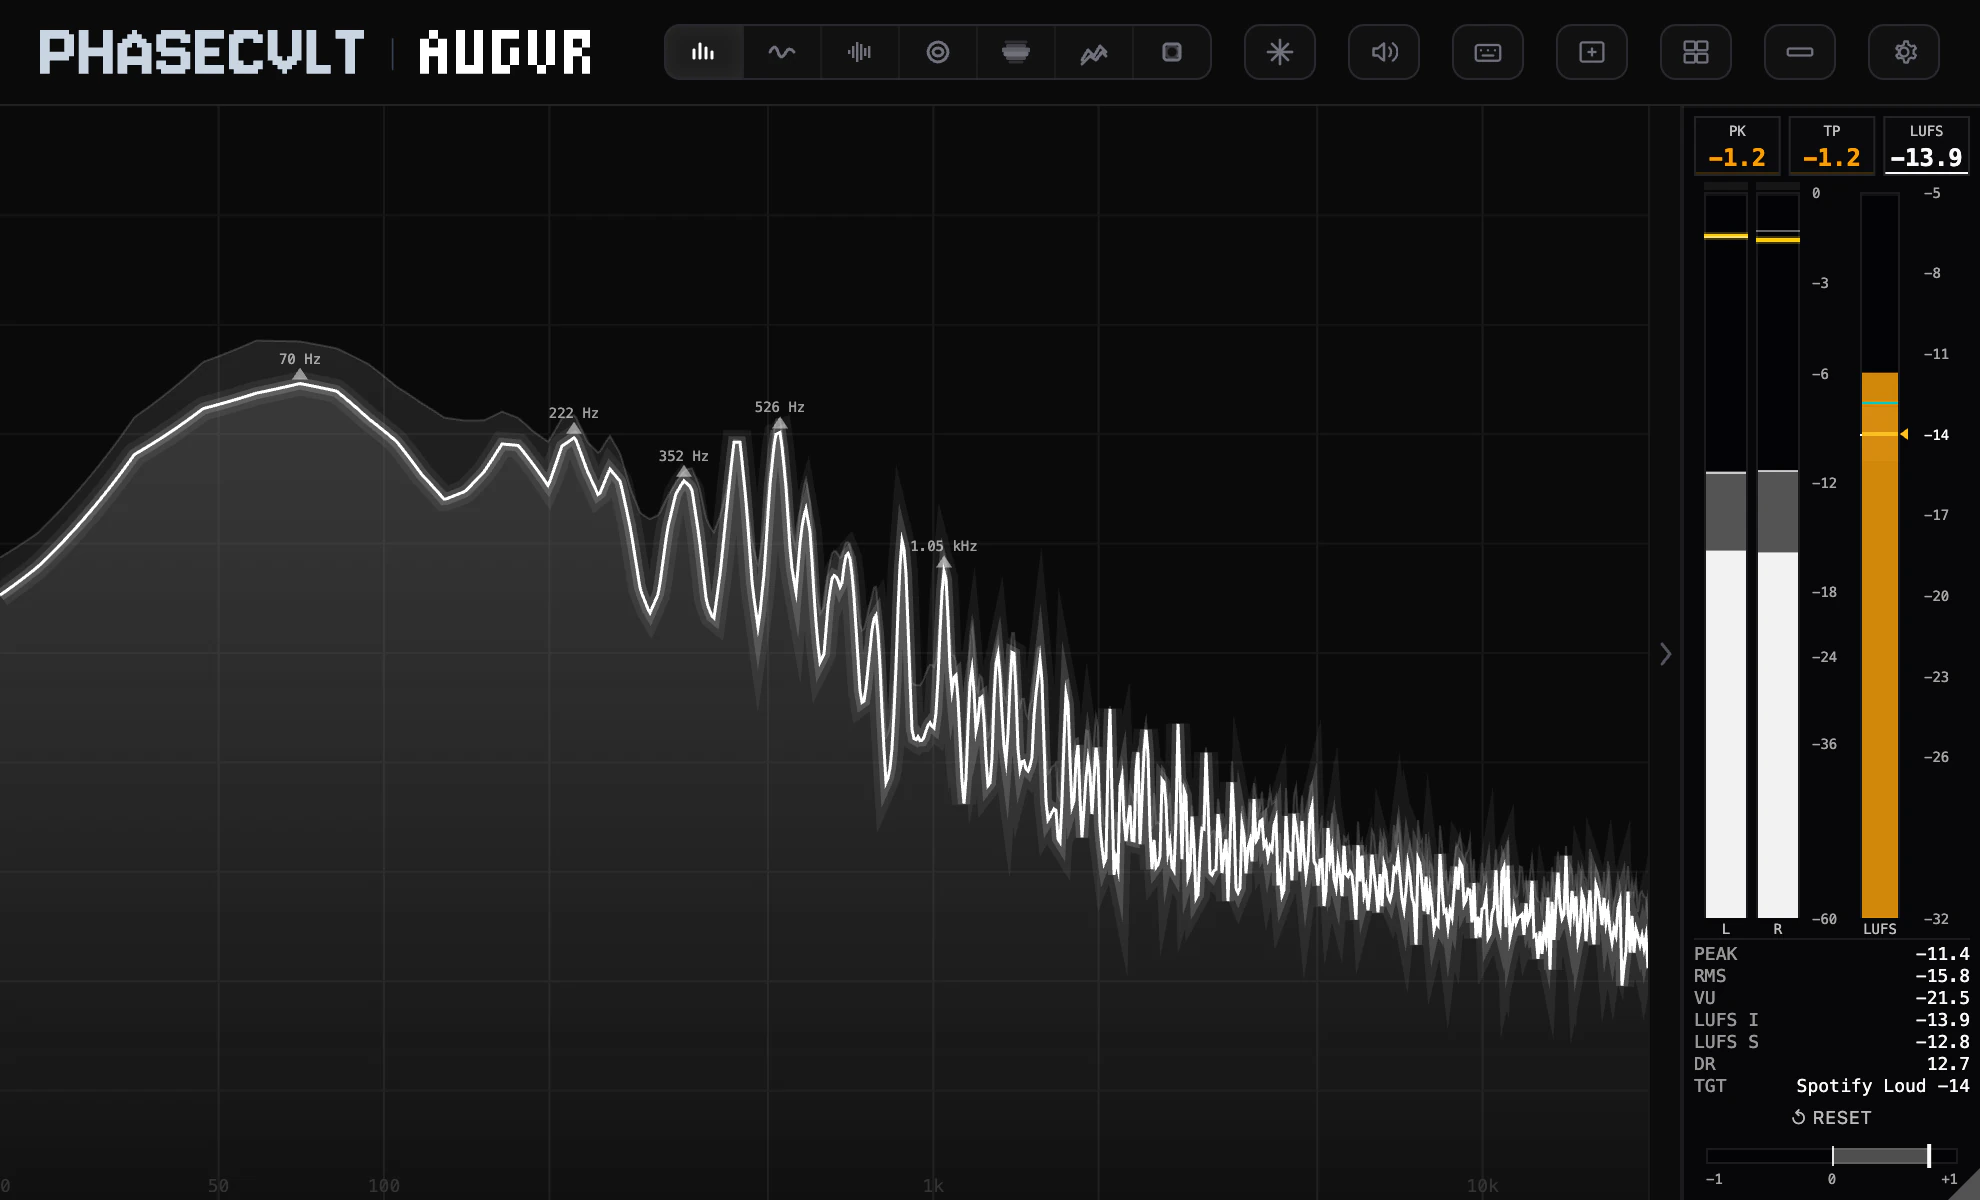
Under the presets, each colour has a row: its name, its value and a swatch. Click the swatch to pick another colour. As soon as one colour is changed the theme is a custom one: no preset is lit, and the line Custom colors appears under the rows. Click a preset to return to it.
| Colour | What it colours |
|---|---|
| Main | The traces and bars of the views and the meters, and the lit buttons of the window. |
| Dark | The fill under the Spectrum curve, the tint of lit buttons and the darker part of the Spectrogram's Theme colormap. |
| Light | The text, scales and hold markers of the meter panel, the labels of markers and peaks on the Spectrum, and the brighter part of the same colormap. |
| Dim | The right channel on the Scope and the Waveform. |
| Clip | The clip lamps and overs of the meters, clipping on the Scope and the Waveform, and the left half of the correlation meter. |
| SC | The sidechain signal on the Scope and the Waveform. In the meter panel, the short-term loudness line and the TP readout. |
The Clip colour is red in seven of the presets and yellow in RED, CYBR, SUN and VPR.
Meters
METERS holds one setting, Mode. The meter panel follows it at once. The meters explains what each mode shows.
FIG.33AUGVR / Meters
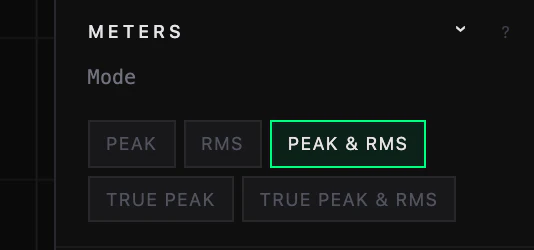
- 01ModeFive chips: PEAK, RMS, PEAK & RMS, TRUE PEAK and TRUE PEAK & RMS. Click one; the lit one is in use. The default is PEAK & RMS.
Display
DISPLAY sets how the views are drawn. The first two settings trade smoothness and detail for a lighter load on the computer.
FIG.34AUGVR / Display
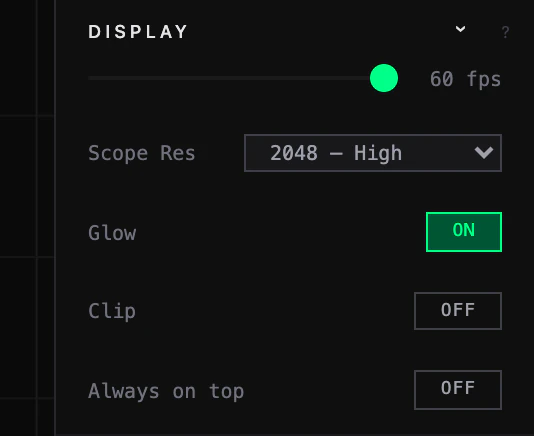
- 01Frame rateThe slider at the top, with its reading beside it: 12 fps to 60 fps. The default is 60 fps. The Shader view never draws faster than this, whatever its own FPS.
- 02Scope ResThe detail of the Scope trace, in five steps from 256 (Minimal) to 4096 (Ultra). The default is 2048 (High).
- 03GlowA soft glow around the traces, ON or OFF. On by default.
- 04ClipShows clipping on the Scope and the Waveform, ON or OFF. Off by default.
- 05Always on topThe app only. Keeps the AUGVR window above all others, ON or OFF. Off by default.
With Clip on, the clipped parts of the trace are drawn in the Clip colour and CLIP appears for a moment at the top right of the view. It is separate from the clip lamps of the meter panel, which always work.
Always on top belongs to the full window. The mini strip has its own setting, Pin on top (mini), under MINI STRIP.
Reset Defaults
RESET DEFAULTS returns the theme, the meters and every setting of the views, in the drawer and on the toolbars, to the defaults, at once and without asking: the GRN theme, 60 fps, the mode PEAK & RMS, the target Spotify Loud, the meter panel open. It also removes the markers from the Spectrum.
In the app it also brings back the mini strip AUGVR starts with, the PhaseCvlt preset. Save your strip as a preset first if you want it back; see Mini mode.
It does not change the view on screen, the audio input, Always on top, Pin on top (mini), the workspaces or Show news from PhaseCvlt.
On macOS the app's Audio menu has Reset to Default State as well. It asks first, then does the same for the window in front and also brings back the Spectrum with Freeze off. See Shortcuts and menus.
What is remembered
Nothing has to be saved by hand. The drawer says so under its title: Settings persist across sessions and new instances.
- With the DAW project. Each copy of the plugin saves its settings in the project: the view on screen and everything set in Config and in the view toolbars, the theme, the meter mode, the loudness target and whether the meter panel is open among them.
- Between sessions. A plugin added to a project, and the app when it starts, begin with the settings you used last in Config and in the view toolbars. A plugin added to a project opens on the Spectrum. A project that was saved with its own settings opens with those.
- In the app. The audio input, the size of the window and Always on top are kept from one launch to the next. Another window opened from the app starts as a copy of the window it was opened from. Windows and workspaces covers which windows come back at the next launch.
A few things are not kept. Each time the plugin or the app is loaded:
- Freeze is off and no frozen picture is zoomed;
- the Spectrum has no markers;
- in the plugin, on the Scope and the Waveform, SC is on and Fade is at 100%;
- in the drawer, only THEME is open, and INPUT in the app.
Sidechain
The plugin has a second input: an optional stereo sidechain, which also takes a mono signal. Send it a signal and the Scope and the Waveform draw that signal behind the main one, in a colour of its own, so you can see one against the other: the kick against the bass it ducks, a reference against the mix. The app has no sidechain input, and its Scope and Waveform toolbars have no SC or Fade.
FIG.35AUGVR / Sidechain on the Scope
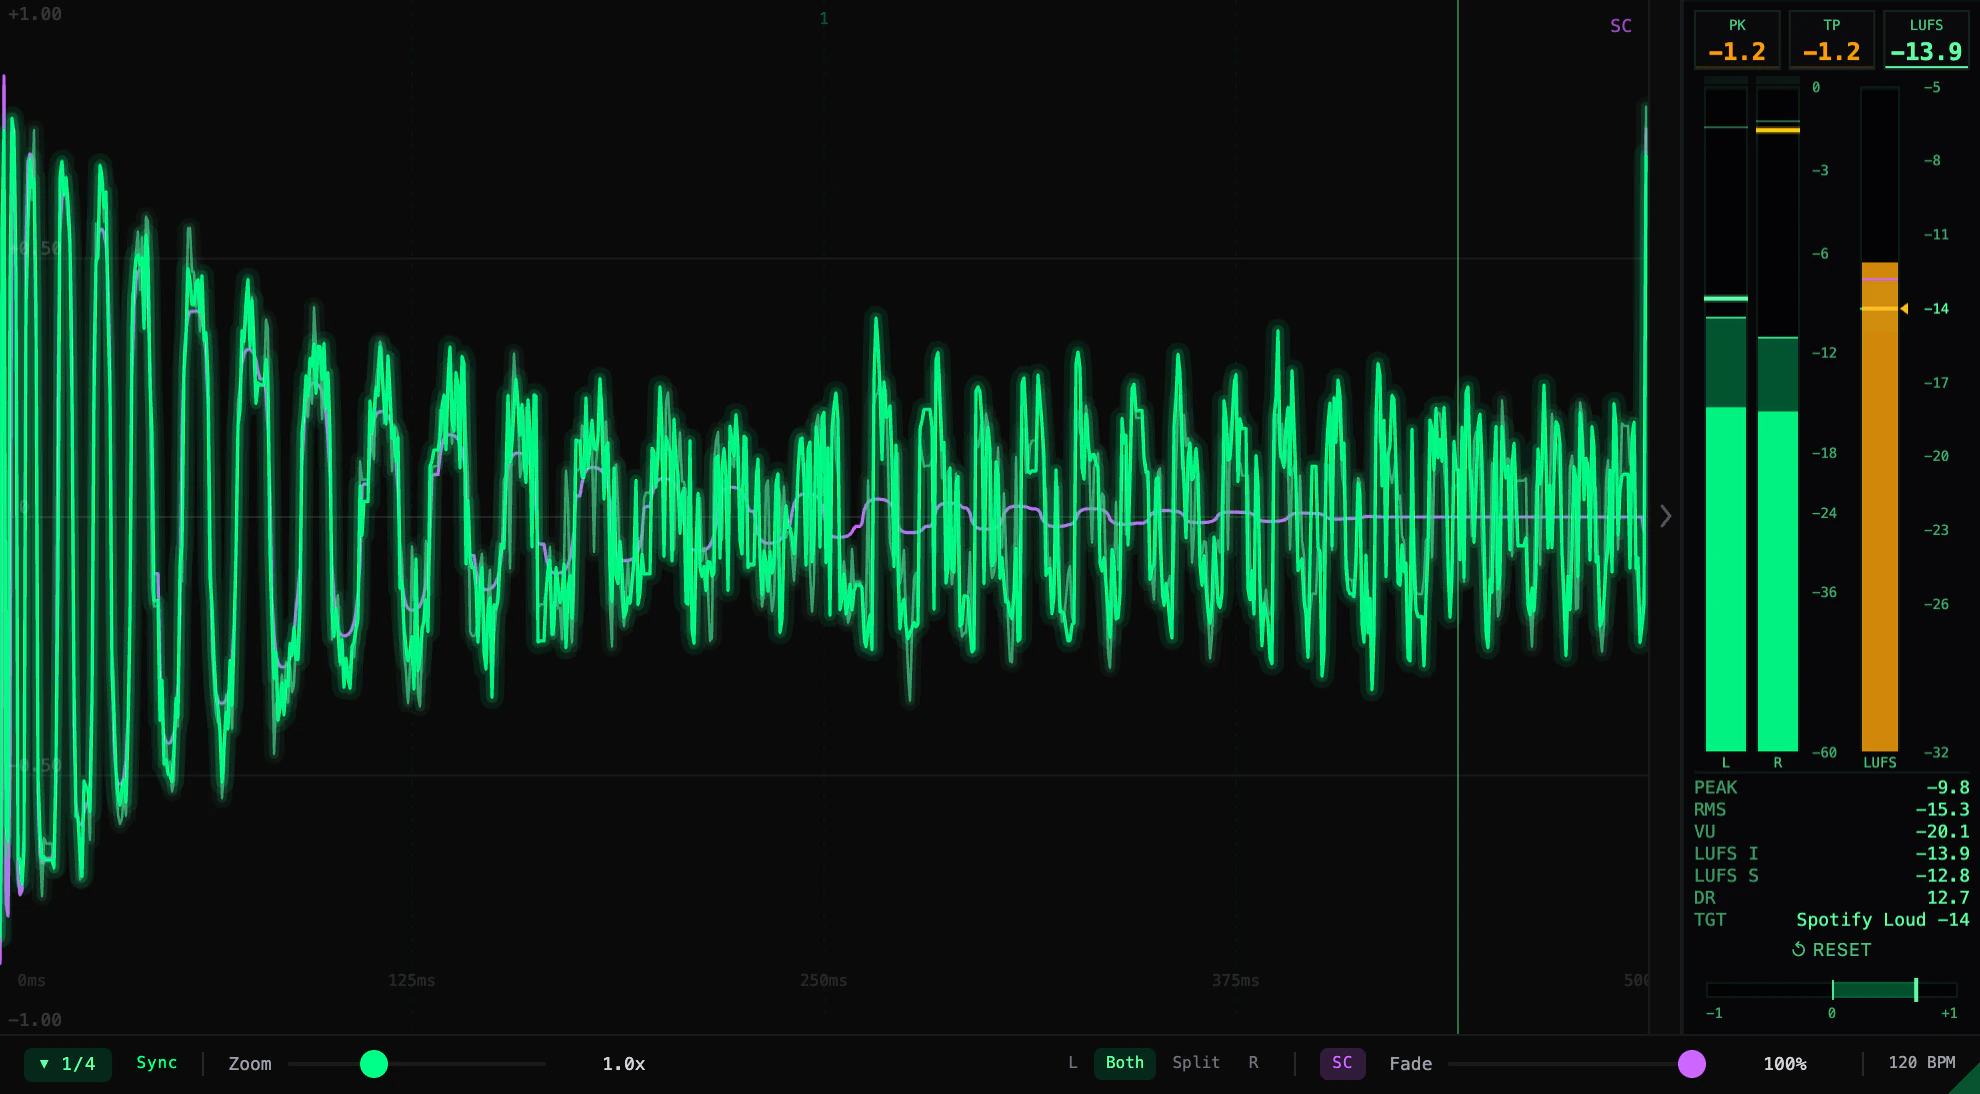
- 01Main signalThe main input of the plugin, in the main colour of the theme.
- 02Sidechain signalThe sidechain input, drawn behind it in the SC colour of the theme.
- 03SC badgeThe letters SC at the top right of the display: a sidechain is connected and its trace is shown.
- 04SCShows or hides the sidechain trace. The button is tinted in the SC colour while it is on.
- 05FadeDims the main trace so that the sidechain stands out, from 100% down to 10%.
Connecting it
The sidechain input is off until the host connects it. Route a track or a bus to it the way your DAW routes a sidechain to any plugin. Nothing has to be switched on in AUGVR: as soon as the input is connected, the second trace and the SC badge appear in the Scope and the Waveform. A sidechain that is connected but silent shows on the Scope as a flat line.
SC and Fade
The Scope and the Waveform each have an SC button at the right of their toolbar, and each view keeps its own setting. Fade appears beside the button while it is on. It lowers the main trace only and leaves the sidechain trace as it is, and one Fade value serves both views.
The sidechain colour is the SC row of the theme in Config.
| Setting | Where | Range | Default |
|---|---|---|---|
| SC | Scope toolbar, Waveform toolbar | on, off | on |
| Fade | Both toolbars, while SC is on | 10% to 100% | 100% |
Neither is remembered. Each time the plugin is loaded, SC is on and Fade is at 100%.
What it does not reach
The sidechain is drawn in the Scope and the Waveform only. The Spectrum, the Lissajous, the Spectrogram, the Waterfall, the Shader and the meter panel read the main input alone, whatever is connected to the sidechain.
Mini mode
Mini mode belongs to the app; the plugin does not have it. It turns the window into a strip: one row of meters and small displays, with no header and no title bar. The strip is made for the corner of a screen while you work, or for a stream overlay. What it holds, in what order and in which colours is yours to set.
FIG.36AUGVR / The strip

The strip as it first opens, with the pointer away from it.
- 01SpectrumThe spectrum of the audio, without its captions. Small triangles mark the strongest peaks.
- 02WaveformThe level of the last bars or seconds, drawn as a waveform.
- 03Peak / True PeakTwo level bars, left above right, each with a hold marker and a clip lamp at its end. A wider tile adds the level in dB.
- 04LoudnessMomentary loudness as the large number, with short-term and integrated under it, and a bar against the target. To begin with the numbers are in LU, measured from the target. A wider tile adds loudness range.
Entering and leaving
There are four ways in.
- The header button. The last of the app buttons, marker 04 in FIG.1. Its tooltip reads Mini mode (⇧⌘M) on macOS and Mini mode (Ctrl+Shift+M) on Windows.
- The shortcut. ⇧⌘M on macOS, Ctrl+Shift+M on Windows.
- The menu bar, on macOS. View > Mini Mode. The item is ticked while the strip is showing.
- Config. The MINI STRIP section of Config ends with ENTER MINI MODE.
To go back to the full window, use the same shortcut or the same menu item, or click Exit mini mode in the menu of the strip (FIG.37).
The window changes size in one step. The full window and the strip each remember their own size, and the strip comes back where you last left it. A strip can be anything from 360 × 64 px to 4096 × 400 px; it first opens at 800 × 100 px.
With the pointer over the strip
While the pointer is somewhere else, the strip shows its tiles and nothing more. Move the pointer over it and its controls appear: a menu, a small bar on the tile under the pointer, and a grip in the bottom right corner. Move the pointer away and they are gone again.
FIG.37AUGVR / The strip with the pointer over it

- 01Tile barBelongs to the tile under the pointer. The two arrows move the tile one place, the letter steps its size, the gear opens its settings and the cross removes it. A Correlation tile has no settings, and no gear.
- 02PresetThe name of the active preset, or Unsaved. A dot in front of the name means you have changed the strip since you applied or saved it. Click to open Presets.
- 03FreezeHolds every tile on its last picture. Click again to release it. The key is F.
- 04PinKeeps the strip above other windows. The button is lit while the strip is pinned.
- 05ArrangeTurns Arrange mode on and off. The key is A.
- 06Exit mini modeReturns to the full window.
- 07Add module+ opens the Options window on Modules.
- 08OptionsThe gear opens the Options window on the section it last showed. It is lit while that window is open.
- 09Resize gripDrag to size the strip.
The menu is a row in the top right corner. On a strip tall enough to hold it, it stands as a column on the right edge. When an update is available, the menu also carries a button that names the new version: see Updates, About and help. While an important news item from PhaseCvlt has not been seen yet, it carries New as well, which opens News in the Options window: see News from PhaseCvlt.
Moving, sizing and arranging
- Move the strip by dragging it anywhere that is not a control.
- Size the strip by dragging the grip in its bottom right corner.
- Move a tile with the arrows on its bar: one place to the left or to the right.
- Size a tile with the letter on its bar. Each click steps through S, M and L: one, two and three shares of the width.
The tiles always fill the strip. A tile's width is its share of the whole, so sizing one tile, or the strip, sizes the others with it. On a narrow tile the bar leaves out the letter, and then the arrows, so that it still fits.
To rearrange the whole strip, use Arrange mode: click Arrange in the menu or press A.
FIG.38AUGVR / Arrange

- 01Move the windowWhile Arrange is on, the strip moves only from this handle. A drag anywhere else arranges.
- 02TileDrag a tile left or right to change the order. A line shows where it will land.
- 03DividerDrag the line between two tiles to size the pair against each other. Any width is possible here, not only S, M and L.
- 04SettingsOpens the settings of the module in the Options window.
- 05RemoveTakes the tile out of the strip.
Overlays show as dashed frames in Arrange mode, and are dragged and sized the same way. While Arrange is on, the menu stays visible. Leave with A, Esc or the button. With an overlay selected, the first Esc deselects it.
The Options window
Everything that needs more room than the strip has is in a second window, AUGVR Options. It opens on the section that matches what you clicked:
- the gear in the menu: the section it last showed;
- the preset name: Presets;
- +: Modules;
- the gear on a tile: Modules, with that module selected;
- the pencil on an overlay: Overlays, with that overlay ready to edit;
- New in the menu, or View on a news line along the bottom of the strip: News.
On macOS, ⌘, and View > Strip Options… open the window as well, while the strip is showing.
FIG.39AUGVR / The Options window
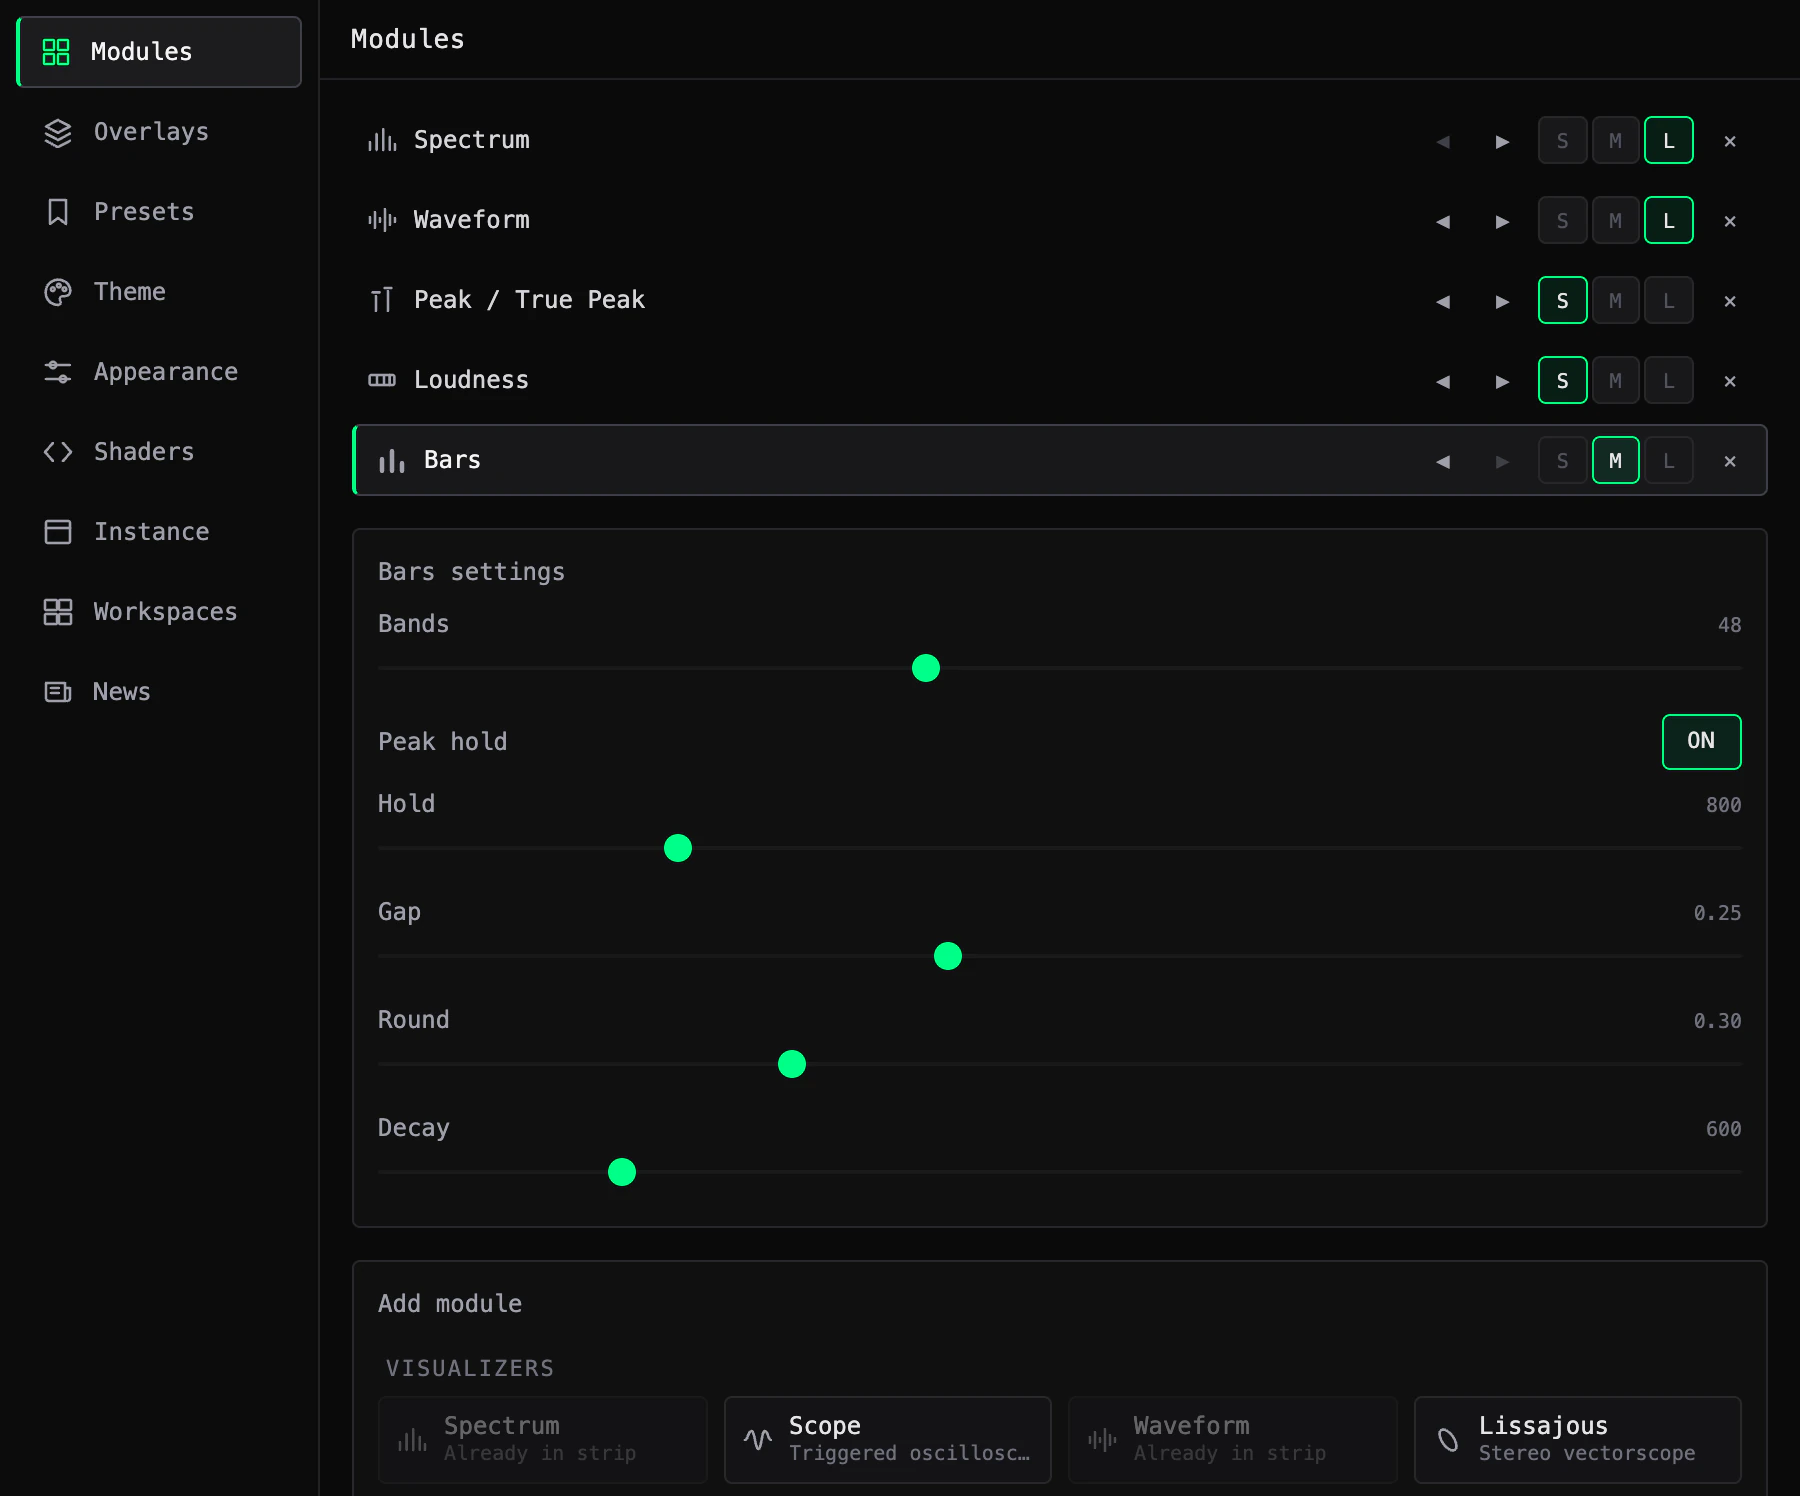
- 01SectionsThe nine sections of the window. Click one to show it.
- 02Module listOne row per tile, in the order of the strip. Click a row to select it.
- 03Move, size, removeThe arrows move the tile one place, S M L set its size, the cross removes it.
- 04SettingsThe settings of the selected module.
- 05Add moduleA card for every module, in four groups. Click a card to add it.
| Section | What it is for |
|---|---|
| Modules | The tiles of the strip: adding, ordering, sizing and removing them, and the settings of each. |
| Overlays | Text and image layers that float over the tiles. |
| Presets | Saving and recalling whole strips. |
| Theme | The colours, shared with the full window. |
| Appearance | The strip itself: background, opacity, snap and pin. |
| Shaders | Your library of shaders, for Shader tiles and the Shader view. |
| Instance | Actions on this window: its audio input, another window, leaving mini mode, closing. |
| Workspaces | Saving and recalling sets of windows. See Windows and workspaces. |
| News | News from PhaseCvlt, and the switch that turns it off. See News from PhaseCvlt. |
Every change applies to the strip at once and is kept. There is nothing to confirm. Esc closes the window, and so does ⌘W on macOS; while a text field has the focus, the first Esc only leaves the field. Leaving mini mode closes it too. It is an ordinary window: it can be moved and sized, it reopens where you left it, and it stays above a pinned strip.
Instance has five buttons on macOS and four on Windows:
- Input source… opens the window where the audio input is chosen. See Getting sound in.
- Audio capture…, on macOS only, opens System Settings on Privacy & Security > Screen & System Audio Recording, where PhaseCvlt AUGVR is allowed to capture system audio. System audio needs macOS 14.4 or later: see Getting sound in.
- New instance opens another AUGVR window. See Windows and workspaces.
- Exit mini mode returns to the full window.
- Quit this instance closes this window and leaves any others open. It asks first.
Modules
A module is one kind of tile. To add one, click + on the strip, or open Modules in the Options window, and click a card under Add module. The new tile joins the right end of the strip and is selected, so its settings are in front of you.
| Group | Modules |
|---|---|
| Visualizers | Spectrum, Scope, Waveform, Lissajous, Spectrogram, Waterfall, Bars, Mirror Bars, Ring |
| Meters | Peak / True Peak, Loudness, Correlation, History, Beat, VU, Balance |
| Custom | Custom, and two cards that add an overlay instead of a tile: Text overlay and Image overlay |
| Shader | Shader |
- Once each. Spectrum, Scope, Waveform, Lissajous, Spectrogram and Waterfall can be in the strip once. While one of them is there, its card reads Already in strip.
- As often as you like. Every other module can be added several times, and each tile keeps its own settings.
- Up to three Shader tiles. With three in the strip, the Shader card reads GPU budget reached until one of them is removed. So do the cards of Waveform, Spectrogram and Waterfall, if those are not in the strip yet.
There is no switch that hides a tile: a module shows for as long as it is in the list. An empty strip reads Hover the strip and press + to add modules. What every module shows is listed in the Reference.
FIG.40AUGVR / Some modules
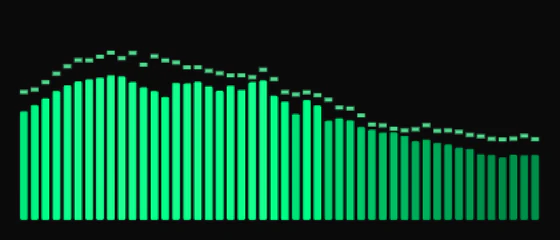
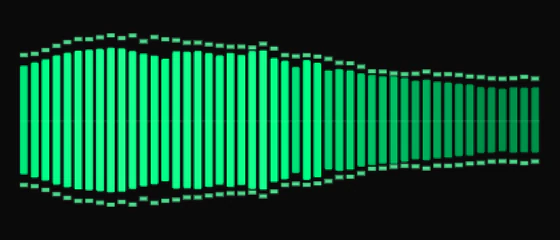
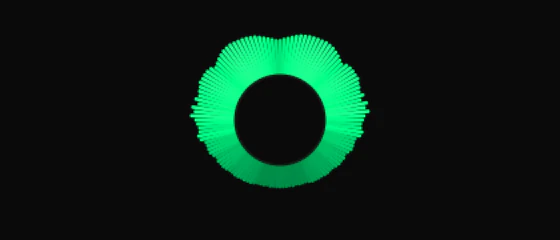
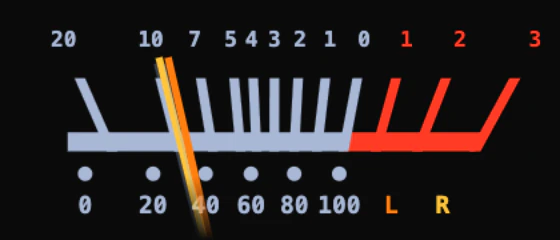
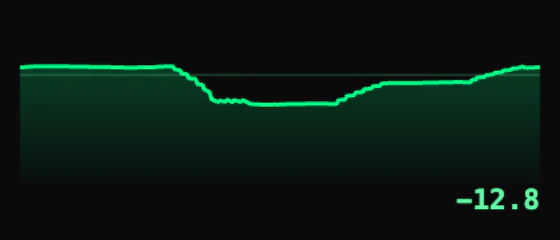
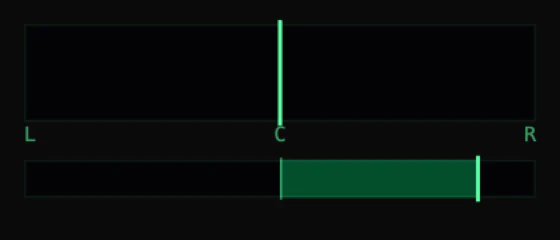
Select a tile in the module list, or click the gear on its bar, to see its settings. Correlation has none. Sliders show their value as a plain number. A tile you have not changed shows the defaults given in the tables below.
| Setting | Values | Default | What it does |
|---|---|---|---|
| Mode | Peak, RMS, Peak & RMS, True Peak, True Peak & RMS | Peak | What the two bars show. These are the five modes of the meter panel, described in The meters. The setting belongs to the tile: it does not follow the mode chosen in Config. |
The clip lamp at the end of a bar lights on an over and goes out by itself a moment later. The strip has no reset.
| Setting | Values | Default | What it does |
|---|---|---|---|
| Bands | 16 to 96 | 48 | The number of bars. |
| Peak hold | ON, OFF | ON | A marker that stays at the highest level each bar has reached. |
| Hold | 200 to 3000 | 800 | How long the marker stays, in milliseconds. |
| Gap | 0 to 0.6 | 0.25 | The space between the bars. |
| Round | 0 to 1 | 0.3 | How round the ends of the bars are. |
| Decay | 100 to 3000 | 600 | How long a bar takes to fall, in milliseconds. |
| Axis | VERT, HORZ | VERT | Mirror Bars only. VERT: the bars grow up and down from the middle of the tile. HORZ: they grow left and right from its middle. |
| Setting | Values | Default | What it does |
|---|---|---|---|
| Bands | 16 to 96 | 64 | The number of bars across the spectrum. |
| Inner | 0.2 to 0.75 | 0.45 | The size of the opening in the middle of the ring. |
| Rotate | ON, OFF | OFF | Turns the ring slowly. |
| Speed | 0.05 to 1 | 0.2 | How fast it turns. |
| Mirror | ON, OFF | ON | Draws the spectrum on both halves of the ring, so that the ring is symmetric. |
| Setting | Values | Default | What it does |
|---|---|---|---|
| Source | LUFS-S, LUFS-M, PEAK, TRUEPK | LUFS-S | The value that is drawn over time: short-term loudness, momentary loudness, peak or true peak. |
| Seconds | 10 to 60 | 30 | The length of time across the tile. |
| Fill | ON, OFF | ON | Fills the area under the line. |
With a loudness source, the graph follows the Target of the Loudness module and draws a faint line at the target.
| Setting | Values | Default | What it does |
|---|---|---|---|
| BPM | ON, OFF | ON | Shows the tempo as a number with the pulse. |
| Shape | CIRCLE, BAR | CIRCLE | The shape of the pulse. |
While the tempo is known and the transport is running, the pulse is the beat. Otherwise it pulses with the audio. The number has ≈ in front of it when the tempo was read from the audio, and reads -- when there is none. For tempo in the app, see Scope.
| Setting | Values | Default | What it does |
|---|---|---|---|
| Channel | L+R, L, R, MONO | L+R | Two needles, one for each channel; one channel alone; or one needle for both channels together. |
| Colors | CLASSIC, THEME | CLASSIC | A pale blue scale with a red zone above 0 VU and orange needles, or the colours of the theme. |
| % scale | ON, OFF | ON | The row of percent figures on the card. |
| Ballistics | 50 to 1000 | 300 | How quickly the needle moves, in milliseconds. |
| Reference | AUTO, MANUAL | AUTO | AUTO sets 0 VU from the level of the music, so that loud, mastered music does not pin the needle. MANUAL fixes 0 VU at the level set in the next row. |
| 0 VU ref (manual) | -24 to 0 | -18 | The level in dBFS that reads 0 VU. Used only while Reference is MANUAL. |
| Setting | Values | Default | What it does |
|---|---|---|---|
| Corr | ON, OFF | ON | A correlation bar under the balance track. |
| Ballistics | 50 to 800 | 200 | How quickly the marker moves, in milliseconds. |
Seven modules have no settings of their own. What their tile offers are settings the strip shares with the full window: change one here and the full window changes with it and, where the full window has the same control, the other way round. Window and Unit can be set only here.
| Module | Settings | Described in |
|---|---|---|
| Spectrum | Decay, Auto peaks | Spectrum |
| Scope | Trigger, Channel | Scope |
| Waveform | Window, Colour | Waveform |
| Lissajous | Zoom, Decay | Lissajous |
| Spectrogram | Colormap, Mode | Spectrogram |
| Waterfall | Depth, Wireframe | Waterfall |
| Loudness | Unit, Target | The meters, and below |
Window on the Waveform tile is the length of time across the tile: 2s to 60s, or 2bar to 16bar.
Unit on the Loudness tile chooses how its numbers are written. LU (relative), the default, shows the distance from the target: 0.0 is on target, a positive number is louder. LUFS (absolute) shows the loudness itself. With the target set to Off there is nothing to measure from, and the tile shows LUFS. Loudness range, which a wider tile adds, is how far the loudness of the programme has moved between its quiet and its loud passages, in LU.
Overlays
An overlay is a layer of text or a picture that floats over the tiles: a name, a logo, a live readout. It can sit anywhere on the strip, at any size, and has its own opacity and its own place in the stack. Overlays are kept with the strip and saved in presets.
To add one, open Overlays in the Options window and click Add text overlay or Add image overlay. A text overlay appears reading Your text, selected, so that typing replaces it. An image overlay asks for the file first; cancelling adds nothing. A new overlay goes in front of the others.
FIG.41AUGVR / An overlay on the strip

- 01OverlayClick to select it, drag to move it. It stays inside the strip. Double-click to edit it.
- 02ToolbarIn order: Move, Edit, Bring to front, Send to back and Remove.
- 03CornerDrag to size the overlay.
On the strip, an overlay shows a dashed outline and its toolbar while the pointer is over it. A selected overlay keeps both until you press Esc, click an empty part of the strip, or move the pointer off the strip. Delete or Backspace removes the selected overlay.
FIG.42AUGVR / Overlays
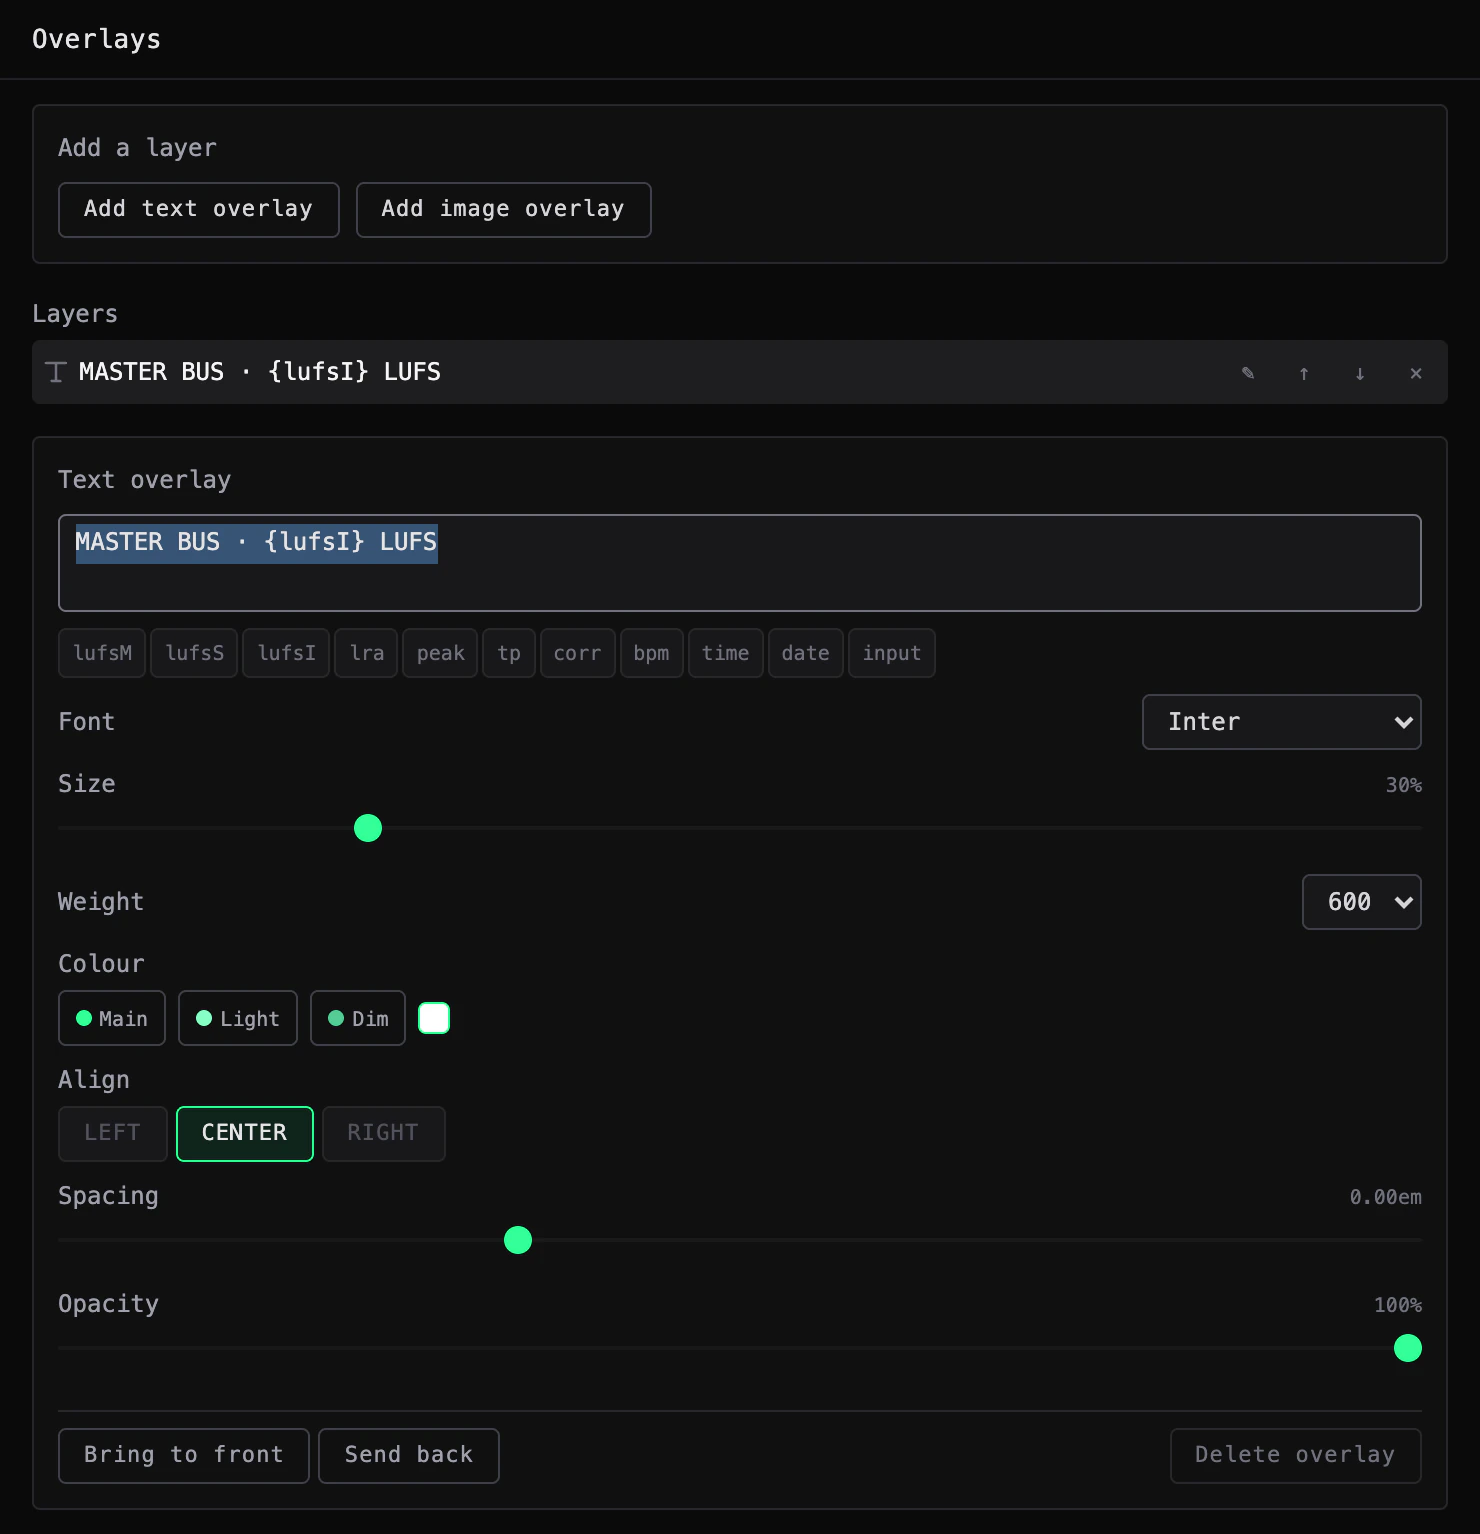
- 01Add a layerAdd text overlay and Add image overlay.
- 02LayersEvery overlay, the front one first. Click a row to edit that overlay. The arrows move it one step forward or backward; the cross removes it.
- 03TextWhat the overlay says. It can run over several lines.
- 04Live valuesClick a chip to insert that value where the cursor is.
- 05StyleFont, Size, Weight, Colour and Align, then Spacing and Opacity.
- 06Order and deleteBring to front, Send back and Delete overlay, which asks once.
| Control | Values | Default |
|---|---|---|
| Font | Inter, JetBrains Mono, Bebas Neue, Space Grotesk, System, Mono | Inter |
| Size | 10% to 100% | 35% |
| Weight | 400, 500, 600, 700 | 600 |
| Colour | Main, Light, Dim, or the swatch | Main |
| Align | LEFT, CENTER, RIGHT | CENTER |
| Spacing | -1.00em to 2.00em | 0.00em |
| Opacity | 10% to 100% | 100% |
Size is a share of the height of the overlay's box, so the text grows and shrinks with the box. Main, Light and Dim follow the theme; the swatch beside them picks any colour. Spacing is the space between letters.
A live value is a word in braces. In the strip it is replaced by the current reading. Levels and loudness are inserted as bare numbers, so type the unit yourself: {lufsS} LUFS. In silence they read -∞. The readings follow the audio and hold while the strip is frozen. A word in braces that is not in this list stays as you typed it.
| Type | It shows |
|---|---|
| {lufsM} | Momentary loudness, in LUFS. |
| {lufsS} | Short-term loudness. |
| {lufsI} | Integrated loudness. |
| {lra} | Loudness range. |
| {peak} | Peak level in dBFS, the higher of left and right. |
| {tp} | True peak in dBTP, the higher of left and right. |
| {corr} | Stereo correlation with its sign, for example +0.85. |
| {bpm} | Tempo. ≈ comes first when it was read from the audio; -- when it is not known. |
| {time} | The time of day, as hours, minutes and seconds on a 24-hour clock. |
| {date} | Today's date, written the way your system writes dates. |
| {input} | The name of the audio input, or a dash when there is none. |
An image overlay takes a PNG, JPEG, SVG or GIF file of up to 4 MB. A larger file is refused with Image too large (max 4 MB). Replace image… swaps the picture and Clear image empties the overlay, which then shows a dashed box reading no image.
| Control | Values | Default |
|---|---|---|
| Fit | CONTAIN, COVER, FILL | CONTAIN |
| Scale | 0.25× to 4.00× | 1.00× |
| Offset X, Offset Y | -1.00 to 1.00 | 0.00 |
| Opacity | 10% to 100% | 100% |
CONTAIN shows the whole picture inside the box, COVER fills the box and crops the picture, FILL stretches the picture to the box. The two offsets shift the picture inside its box.
The Custom module uses the same two editors for a tile in the row instead of a floating layer. Its switch chooses TEXT or IMAGE, and it has no Opacity. A new Custom tile is empty until you type something.
Presets
A preset is a whole strip under one name. Six come with the app. The first, PhaseCvlt, is the strip AUGVR starts with, and Reset to Default State brings it back.
FIG.43AUGVR / Factory presets





| Preset | Tiles | It also sets |
|---|---|---|
| PhaseCvlt | Shader (Code Rain, with Rest when quiet on), Lissajous, Spectrum, Waveform, Spectrogram, Loudness, Peak / True Peak | The Green theme. |
| Streamer | Shader (Horizon, with Rest when quiet on), a Custom tile that reads {lufsS} LUFS · {bpm} BPM, Mirror Bars | The Vapor theme and the GRADIENT palette. |
| Mastering | Peak / True Peak, Loudness, Correlation, History, Spectrum | The White theme, Loudness Unit to LUFS (absolute) and Target to EBU R128. |
| Minimal | Bars, Peak / True Peak | The Aurora theme and the GRADIENT palette. |
| DJ | Mirror Bars, Waveform, Beat, VU | The Cyberpunk theme, the BANDS palette and the Waveform's Colour to Multi-Band. |
| Analog | Shader (Phosphor), VU, Shader (LED Matrix), Peak / True Peak, both shaders with Rest when quiet on | The Yellow theme and the GRADIENT palette. |
FIG.44AUGVR / Presets
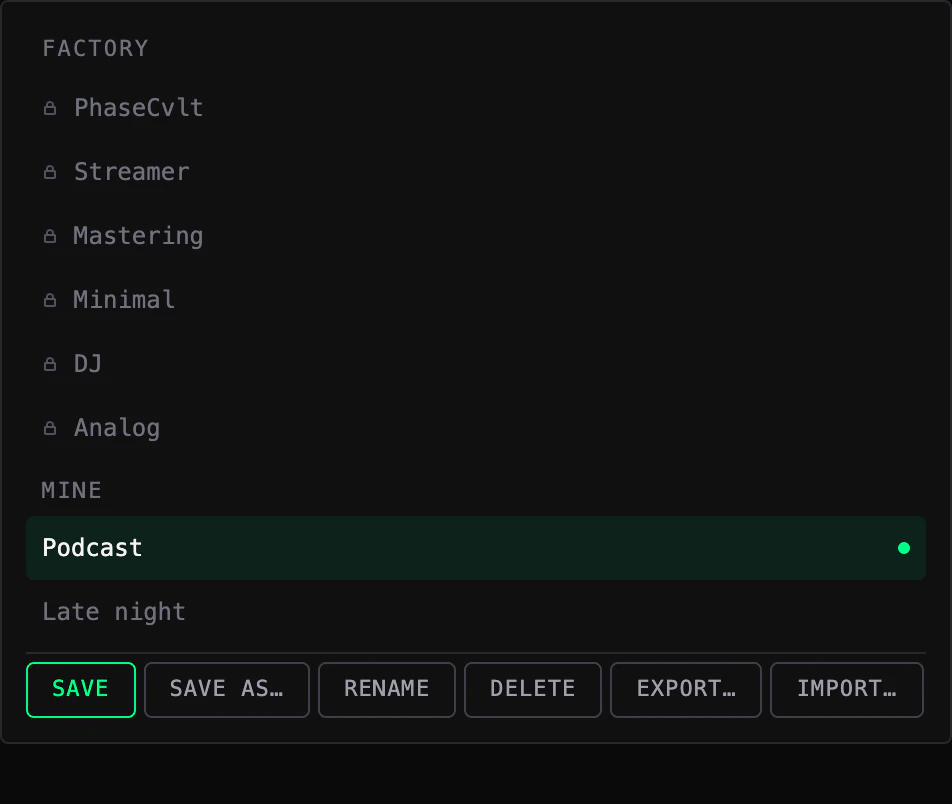
- 01FACTORYThe six presets in the table above, each with a padlock. Click one to apply it. They cannot be overwritten, renamed or deleted.
- 02MINEYour presets. Click one to apply it. The active preset is highlighted, with a dot when you have changed the strip since.
- 03Save and manageSAVE, SAVE AS…, RENAME and DELETE.
- 04Export and importEXPORT… and IMPORT… move your presets and shaders between computers.
Applying a preset changes the strip at once. The preset's name then shows in the menu of the strip, and clicking it there opens this section.
- SAVE AS… saves the strip as a new preset of your own. Type a name and press Enter or OK. The new preset becomes the active one.
- SAVE overwrites the active preset. It is available when the active preset is one of yours and you have changed the strip since.
- RENAME and DELETE act on the active preset when it is one of yours. Delete asks once.
You can keep 32 presets of your own. Saving one more removes the oldest.
A preset holds:
- The tiles: which modules, in which order, at which sizes, each with its own settings.
- The overlays: their text or picture, place, size, opacity and order.
- The background and the snap setting from Appearance.
- The look: the display settings the strip shares with the full window, such as the spectrum decay, the loudness unit and target, and the colour maps. Applying a preset therefore changes them in the full window too.
A preset also carries the theme and the palette, so applying one changes the colours. Each factory preset sets the theme given in the table, and the palette THEME unless the table says otherwise. All six set the background to THEME and Snap to FREE.
A preset does not hold the position and size of the strip, Pin, Opacity or the audio input. For a Shader tile it holds which shader is chosen, not the shader itself, which stays in your library.
EXPORT… saves all of your presets and shaders in one file, augvr-mini-library.json unless you name it otherwise, to move them to another computer or to keep a copy. IMPORT… reads such a file and keeps what you already have.
A line under the buttons reports the result. After an export it names the file. After an import it gives what was added, as in Imported 2 presets, 1 shader, then what was skipped because the library is full, which holds at most 32 presets and 20 shaders, and how many entries were in the library already. A file that is not an AUGVR library, is too large to be one, or cannot be read is refused with a line that starts Import failed: and says which. An export that cannot be written says Export failed: the file could not be saved.
Theme
The strip and the full window share one theme. Theme in the Options window sets it without leaving mini mode. It also holds two things only the strip uses: the Palette, and the theme's seventh colour, Accent.
FIG.45AUGVR / Theme
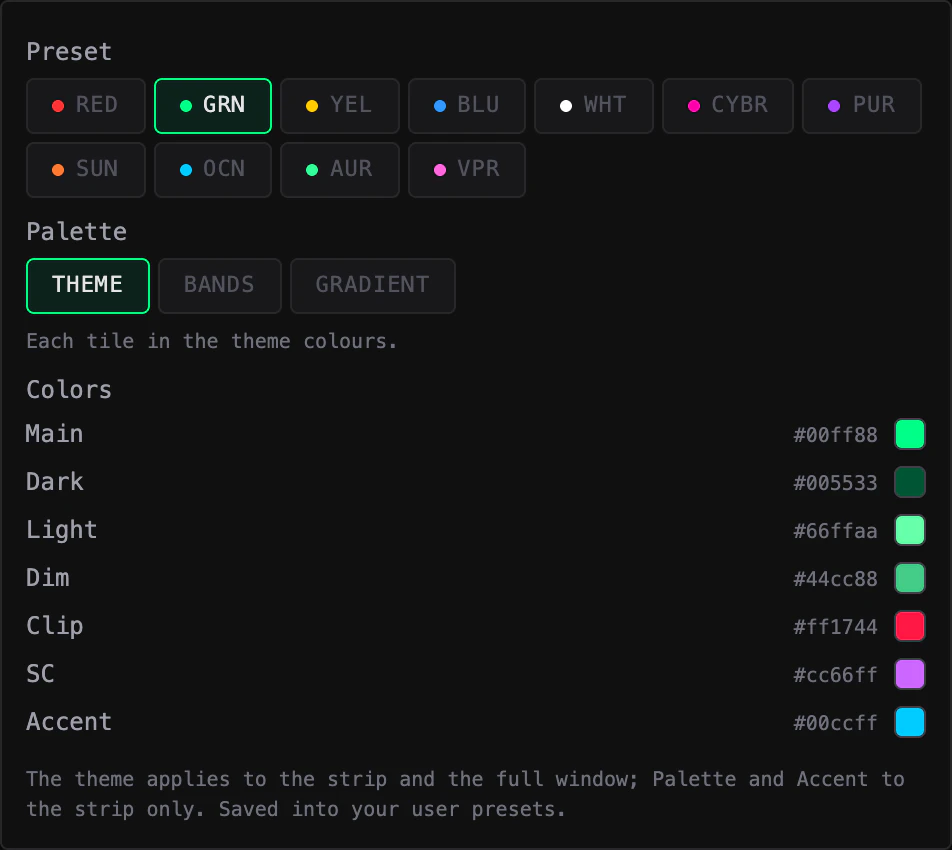
- 01PresetThe eleven themes: RED, GRN, YEL, BLU, WHT, CYBR and PUR, and SUN, OCN, AUR and VPR, which are built on two colours. Green is the default. While the palette is GRADIENT, each dot shows both colours of its theme.
- 02PaletteTHEME, BANDS or GRADIENT: how the tiles that draw the spectrum are coloured. The line under it says what the choice does. THEME is the default.
- 03ColorsMain, Dark, Light, Dim, Clip, SC, the sidechain colour, and Accent, the far end of GRADIENT. Click a swatch to change one; the line Custom colors then appears under the presets.
The themes and the first six colours are those of Config. A change made here shows in the full window as well, and is saved in your own presets.
Palette. With THEME, the default, every tile is drawn in the theme colours, as in the full window. BANDS and GRADIENT colour by frequency instead, from the lows at the left of a spectrum to the highs at its right. BANDS uses the colours of the Waveform's Multi-Band mode: blue for the lows, orange for the mids, pink for the highs. GRADIENT runs from Main at the lowest frequencies to Accent at the highest. The four themes built on two colours are made for it, but it works with any theme.
The palette colours the Spectrum, Bars, Mirror Bars and Ring tiles, and the trace of a Lissajous tile, where each part of the figure takes the colour of the frequency it carries: a bass line draws in the low colour, cymbals in the high one. A Waveform tile follows the palette while its Colour is Multi-Band. A Shader tile can follow it too; the starters Bars, Code Rain, LED Matrix and Horizon do, as Shaders below explains. The meters, the Scope, the Spectrogram and the Waterfall keep their own colours.
The palette belongs to the strip, so a preset saves it with the tiles. Accent belongs to the theme like the other colours, but the full window does not draw with it.
Appearance
Appearance is about the strip as a window: what is behind the tiles, how solid it is, and where it sits.
FIG.46AUGVR / Appearance
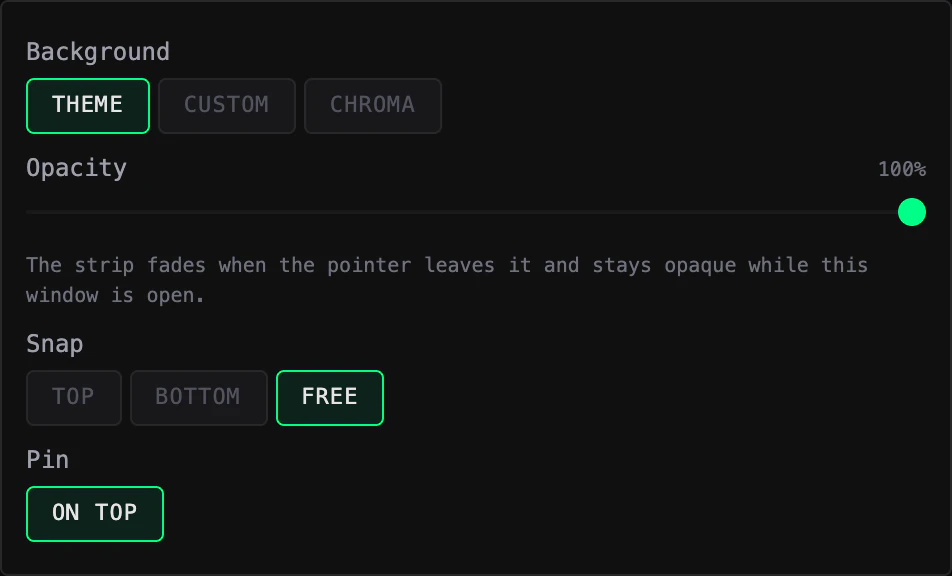
- 01BackgroundTHEME, CUSTOM or CHROMA.
- 02OpacityHow solid the strip is while the pointer is away. On macOS only.
- 03SnapTOP, BOTTOM or FREE.
- 04PinReads ON TOP or FLOATING. Click to switch.
Background. THEME, the default, is the dark background of the app. With CUSTOM, one colour of your choice lies behind everything, and the tiles are drawn without a background of their own so that it shows through. Click the swatch beside the colour value to pick the colour. CHROMA does the same with pure green (#00ff00).
FIG.47AUGVR / Backgrounds



CHROMA is for streaming. The note beside its swatch reads Key this colour out in OBS: capture the strip in OBS, then give that source a chroma key filter with green as the key colour. The green disappears and the meters stand alone over your picture.
Opacity. On macOS, a slider from 20% to 100%, the default. Below 100% the strip is see-through while it is left alone. It turns fully solid while the pointer is over it, while the Options window is open, in Arrange mode and while an overlay is dragged. On Windows there is no Opacity control.
Snap. TOP and BOTTOM dock the strip to that edge of the display it is on: it keeps its height and stretches across the full width. Drag a docked strip away and the setting returns to FREE, the default, which leaves the strip wherever you put it.
Pin. The same switch as the pin button in the menu of the strip. It is on by default and counts only while the window is a strip. The full window has its own Always on top: see Windows and workspaces.
Shaders
A Shader tile draws a GLSL fragment shader that is fed with the live audio. A shader can react to:
- the spectrum, on a linear frequency scale or on a logarithmic one like the Spectrum view's, and the spectrum of the last few seconds, for a scrolling picture of the past;
- the waveform of each channel, and a picture of the stereo image like the Lissajous view's;
- the levels and the loudness: peak, true peak and their held peaks, the needle of a VU meter, the loudness and its range, the loudness target of the meters, and a history of the meters that reaches back further;
- the music: the beat, the tempo, the place in the beat and in the bar, the number of the bar, and the frequency of the strongest peak with how long it has led;
- the colours of the theme and of the strip's palette.
A shader can also read its own last frame, for trails and feedback, and a font, to write text. The UNIFORMS list of the editor names all of these, and they are described in the table at the end of this section. The same shaders run full size in the Shader view of the full window: see Shader.
Add a Shader tile from Modules like any other. It starts with Aurora, the first of ten shaders that come with the app.
| Starter | What it draws |
|---|---|
| Aurora | The spectrum as soft curtains of light rising from the bottom, in the colours of the theme. |
| Pulse Rings | Rings spreading from the centre that pulse with the beat. |
| Scanline Scope | The waveform as a glowing line across the tile. |
| Plasma | A flowing field that moves faster as the audio gets louder. |
| Bars | Thin spectrum bars with bright tips, from the bass on the left to the highs on the right. With the BANDS or GRADIENT palette each bar takes the colour of its frequency. |
| Code Rain | Columns of glyphs falling, each column following one band of the spectrum, from the bass on the left to the highs on the right. The beat lights the leading glyphs, and the PhaseCvlt name sits in the middle. With the BANDS or GRADIENT palette each column takes the colour of its band. |
| Phosphor | The live waveform as a glowing trace on the curved glass of an old oscilloscope, with fine scanlines and a faint grid etched on the glass. |
| LED Matrix | A panel of round LEDs like the front of studio gear: each column lights up with one band of the spectrum, from the bass on the left to the highs on the right. With the BANDS or GRADIENT palette each column takes the colour of its band. |
| Horizon | A sunset over a grid floor: a striped sun in the colours from Main to Accent, mountains shaped by the spectrum, and a floor that rushes towards you faster as the music gets louder. With the BANDS or GRADIENT palette the mountains and the grid take the colours of the palette. |
| Flyover | A flight low over the last eight seconds of the music. Each glowing ridge is one moment of the spectrum: it rises at the horizon, under a sun in the colours from Accent to Light, and rolls towards you. The highs run along the floor of the valley and the bass builds its walls; the loudest crests turn to the Accent colour. The beat dips the camera and flares the sun. With the BANDS or GRADIENT palette each ridge takes the colours of the palette along its length. |
The settings of a Shader tile are an editor. Select the tile in Modules, or click the gear on its bar.
FIG.48AUGVR / Editing a shader
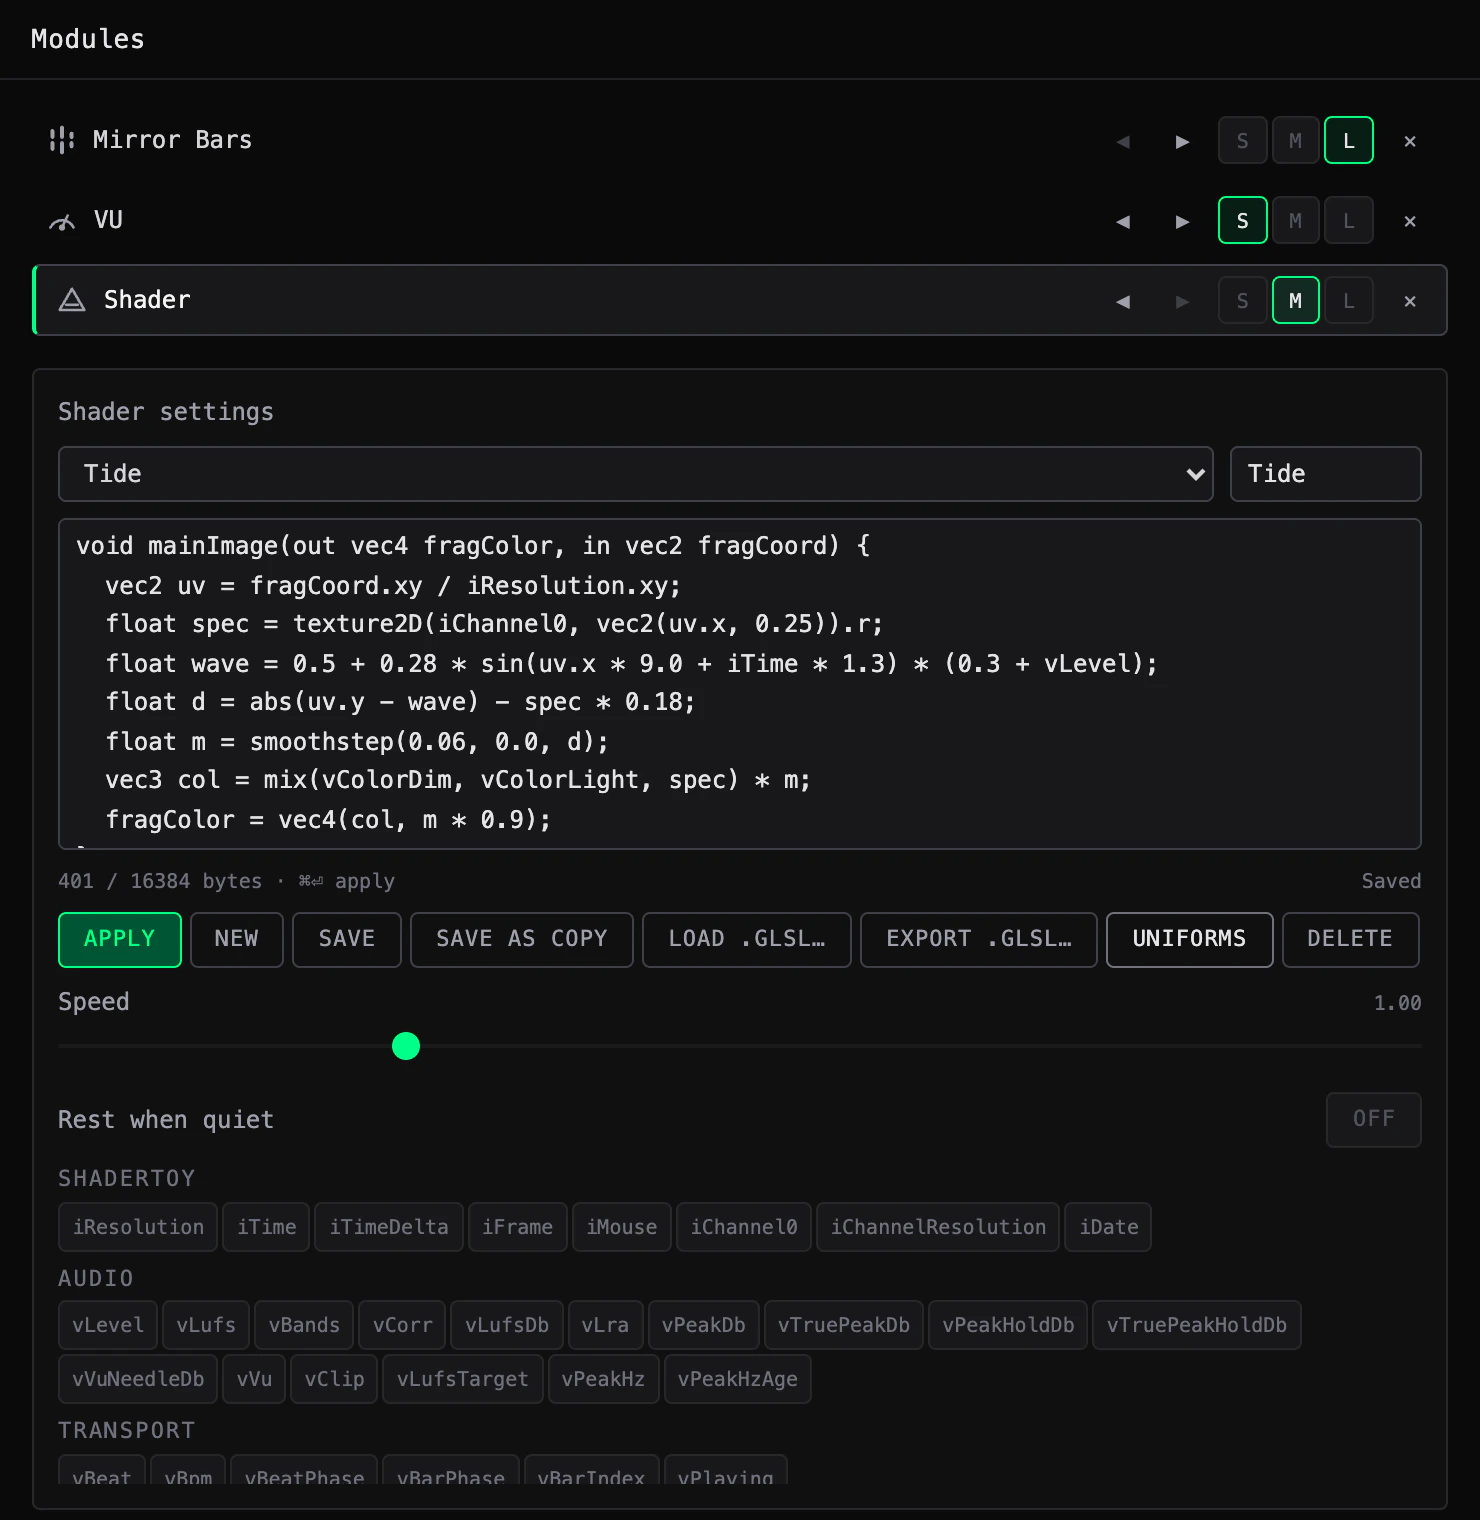
- 01ShaderThe list has two groups: Starters and Mine, your library. Choosing a shader puts it on the tile at once.
- 02NameThe name of your shader. A starter's name cannot be changed.
- 03SourceThe code. Tab inserts two spaces; ⌘ or Ctrl with Enter applies.
- 04Size and statusThe size of the source against the limit, and beside it what the last action did, such as Applied or Saved.
- 05APPLYCompiles the source, shows it on the tile and saves it.
- 06UNIFORMSShows or hides the list of values a shader can read. Click a name to insert it at the cursor; rest the pointer on it for its type and range. The list scrolls.
- APPLY saves as well. A shader of your own is overwritten. A starter that you have edited is saved as your own copy, named after the starter with (edited) added, and the tile switches to the copy. The starter itself stays as it was. Two things are shown but not saved: a source over the size limit, and an edited starter while the library is full.
- NEW adds a blank shader to your library and opens it. It starts with a comment that lists the uniforms, all but those of the TEXTURES group.
- SAVE saves a shader of your own with the name in the field; it is not available for a starter. SAVE AS COPY saves the source as a second shader with copy added to the name.
- LOAD .GLSL… reads a file into the editor and applies it. EXPORT .GLSL… writes the source to a file.
- DELETE removes a shader of your own, after a confirmation. The tile goes back to Aurora.
Under the buttons are two settings of the tile. Speed runs the shader from 0, standing still, to 4, four times as fast; the default is 1. With Rest when quiet on, the picture slows to a stop when the input falls silent, stays as it is until sound comes back, and then starts again. A resting tile does not redraw. It is off for a new Shader tile and on in the PhaseCvlt preset.
If the source does not compile, the errors are listed in red under it, each with its line number in your source. Click one to select that line. The tile keeps showing the last shader that worked, and the source is saved all the same, so nothing you typed or pasted is lost.
The Shaders section of the Options window is the library: every shader of your own, with its size and the time it was last saved. The starters are not listed there.
FIG.49AUGVR / Shaders
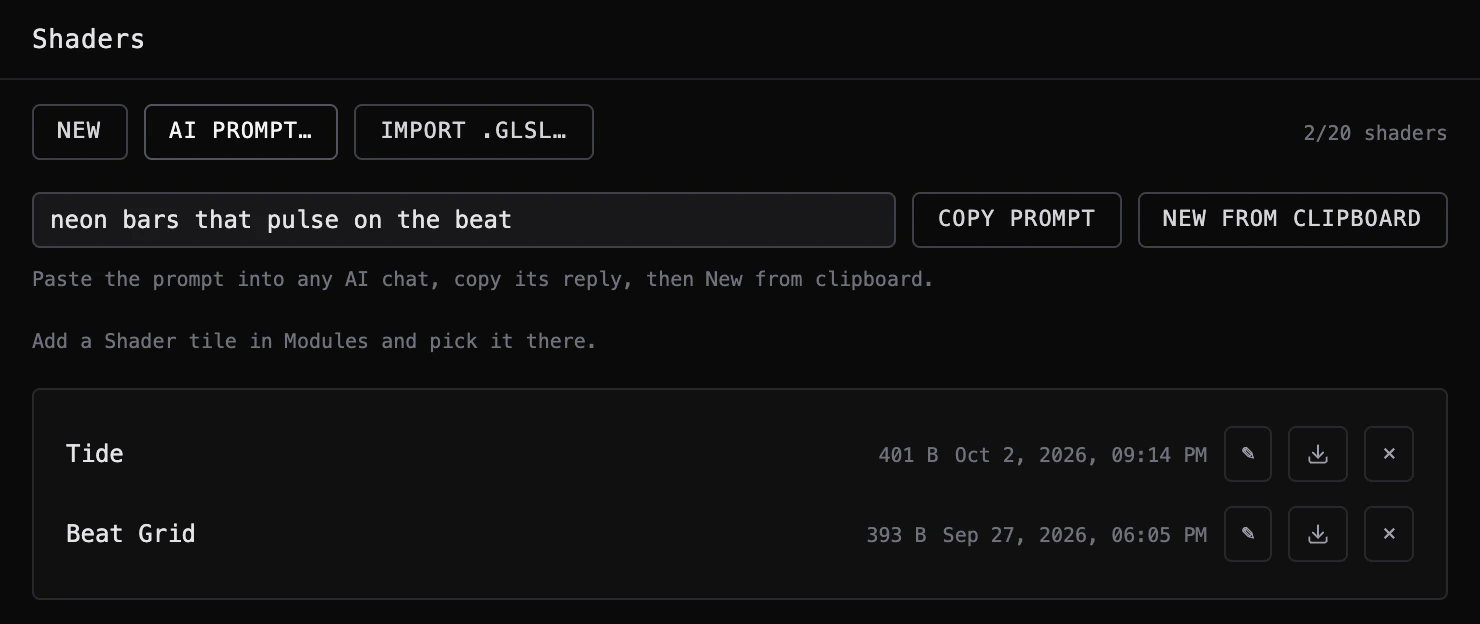
- 01AddNEW adds a blank shader, AI PROMPT… opens the row below it, IMPORT .GLSL… adds a shader from a file.
- 02IdeaOne line that says what the shader should look like.
- 03COPY PROMPTPuts a complete prompt on the clipboard: the rules, the uniforms and your idea.
- 04NEW FROM CLIPBOARDTurns a shader on the clipboard into a new shader in the library.
- 05LibraryFor each shader: Rename, Export .glsl and Delete, which asks once.
A shader in the library does nothing until a tile or the Shader view uses it: add a Shader tile, or select one, and pick the shader in its list; in the full window, pick it in the list of the Shader view's toolbar, under My shaders.
AI PROMPT… is a way to have a shader written for you by an AI chat of your choice.
- Open Shaders and click AI PROMPT… to show its row.
- Type your idea in the field, for example neon bars that pulse on the beat.
- Click COPY PROMPT. The line under the buttons reads Prompt copied.
- Paste the prompt into any AI chat, and copy the shader from its reply.
- Back in AUGVR, click NEW FROM CLIPBOARD. The shader joins the library, under the name the reply gave it or as AI shader with a number.
- In Modules, pick it in the list of a Shader tile.
Nothing is sentAUGVR does not send your idea, the prompt or your shaders to any AI service. It writes the prompt to your clipboard and reads the answer from your clipboard. You carry both to and from the chat yourself.
If the clipboard holds no usable shader, a red line says so: Clipboard has no mainImage() shader.
Shadertoy. The editor accepts code written for the Image tab of Shadertoy. Paste it in and apply.
- The shader defines
void mainImage(out vec4 fragColor, in vec2 fragCoord). - It does not declare the uniforms, and has no
#versionorprecisionline. Bothtextureandtexture2Dwork. iChannel0is the only channel, and it holds the live audio, not a picture. There are no other channels, no buffers or further passes, and no#include. The textures of the TEXTURES group in the table below come in their place:vPrevFrame, the shader's own last frame, does the work of a feedback buffer.iMouseis always zero.- Alpha counts. Where the shader writes alpha 0, the tile is transparent: the background of the strip shows, so with CUSTOM or CHROMA a shader keys out with the rest. Six of the ten starters are written this way; Plasma, Phosphor, Horizon and Flyover fill their tile.
| Name | Type | Range | What it carries |
|---|---|---|---|
| Shadertoy | |||
| iResolution | vec3 | pixels | The size of the tile, or of the Shader view, as (width, height, 1). |
| iTime | float | seconds | The time since the shader started, at the pace of its Speed. It stands still while the strip or the view is frozen. |
| iTimeDelta | float | 0 to 0.1 s | The time since the previous frame. |
| iFrame | int | from 0 | A counter of frames. |
| iMouse | vec4 | always zero | There for Shadertoy code. A tile takes no pointer input. |
| iChannel0 | sampler2D | 0 to 1 | The live audio as a texture; read its red channel. The row at v = 0.25 is the spectrum, with the low frequencies at x = 0. The row at v = 0.75 is the oscilloscope of the left channel, stored as 0.5 + 0.5 × sample. |
| iChannelResolution | vec3[4] | constant | The size of each channel. Only iChannel0 holds anything. |
| iDate | vec4 | date and time | Year, month, day, and the seconds since midnight. |
| Audio | |||
| vLevel | vec2 | 0 to 1 | Peak level, left and right, on the scale of the strip's level bars. |
| vLufs | vec3 | 0 to 1 | Momentary, short-term and integrated loudness, scaled for drawing. |
| vBands | vec3 | 0 to 1 | The level of three bands: 20 to 200 Hz, 200 Hz to 2 kHz, 2 to 20 kHz. |
| vCorr | float | -1 to 1 | Stereo correlation, from out of phase to in phase. |
| vLufsDb | vec3 | -100 to 0 LUFS | Momentary, short-term and integrated loudness in LUFS. |
| vLra | float | 0 to about 20 LU | Loudness range. |
| vPeakDb | vec2 | -100 to 0 dBFS | Peak level, left and right. |
| vTruePeakDb | vec2 | -100 to about +3 dBTP | True peak, left and right. It can pass 0 on peaks between samples. |
| vPeakHoldDb | vec2 | -100 to 0 dBFS | The held peak, left and right, as the strip's level bars hold it. |
| vTruePeakHoldDb | vec2 | -100 to about +3 dBTP | The held true peak, left and right. |
| vVuNeedleDb | vec2 | -100 to +12 dBFS | The needle of a VU meter, left and right, moving the way the needle of the VU tile does. It reads the level of a sine that would hold the needle there. |
| vVu | vec2 | 0 to 1 | VU level, left and right. |
| vClip | float | 0 or 1 | 1 while the clip indication of either channel is on, otherwise 0. |
| vLufsTarget | float | -27 to -8 LUFS, or 0 | The loudness target of the meters. 0 while the target is Off. |
| vPeakHz | float | 0, or 20 to 20000 Hz | The frequency of the strongest peak of the spectrum. It glides with a note and jumps to a new peak only once that one has clearly taken the lead. 0 when the spectrum is close to silent. |
| vPeakHzAge | float | 0 to 60 s | How long the peak of vPeakHz has led, in seconds. It starts again from 0 at every jump. |
| Transport | |||
| vBeat | float | 0 to 1 | A pulse on every beat while the transport runs and the tempo is known. Otherwise it pulses with the audio. |
| vBpm | float | 0 to 300 BPM | The tempo, rounded. 0 when it is not known. |
| vBeatPhase | float | 0 to 1 | The position inside the current beat while the transport runs and the tempo is known. Otherwise 0. |
| vBarPhase | float | 0 to 1 | The position inside the current bar, once the bar is known. Otherwise 0. |
| vBarIndex | float | from 0 | The number of the current bar, counted from 0, once the bar is known. Otherwise 0. With vBarPhase it follows the phrases of a song. |
| vPlaying | float | 0 or 1 | 1 while the transport runs. |
| Theme | |||
| vColor | vec3 | 0 to 1 | The Main colour of the theme, as red, green and blue from 0 to 1. |
| vColorDim | vec3 | 0 to 1 | The Dim colour. |
| vColorLight | vec3 | 0 to 1 | The Light colour. |
| vColorAccent | vec3 | 0 to 1 | The Accent colour. |
| vPaletteLow | vec3 | 0 to 1 | The colour of the palette at the lows. With THEME, the Main colour. |
| vPaletteMid | vec3 | 0 to 1 | The colour of the palette in the mids. |
| vPaletteHigh | vec3 | 0 to 1 | The colour of the palette at the highs. |
| vPaletteBands | float | 0 or 1 | 1 while the palette is BANDS, otherwise 0. |
| vPaletteAt(t) | vec3 | t 0 to 1 | A function, not a value: the colour of the palette at t, where 0 is 20 Hz and 1 is 20 kHz on a log scale. With THEME it returns vColor. |
| Textures | |||
| vSpectrum | sampler2D | 0 to 1 | The spectrum on a logarithmic scale, as on the Spectrum view: 20 Hz at x = 0, 20 kHz at x = 1. Read its red channel at y = 0.5. |
| vSpectrumHistory | sampler2D | 0 to 1 | The same spectrum over the last few seconds, one row at a time: the newest row at v = 0, older ones above it. |
| vMeterHistory | sampler2D | 0 to 1 | The meters over a longer stretch: momentary and short-term loudness, peak, true peak, correlation and the three bands, one row each, with now at x = 0. |
| vHistoryAge | vec2 | 0 to 0.25 s | How long ago the newest row of each history arrived. Offset a scrolling chart by it and it moves on every frame instead of row by row. |
| vScope | sampler2D | 0 to 1 | The oscilloscope of both channels: the left in the row at v = 0.25, the right at v = 0.75, the oldest sample at x = 0. Stored as 0.5 + 0.5 × sample. |
| vStereoXY | sampler2D | 0 to 1 | A picture of the stereo image, as on the Lissajous view: a mono signal is a vertical line, a signal out of phase a horizontal one. |
| vPrevFrame | sampler2D | the size of the picture | The shader's own last frame, for trails and feedback. Read it at fragCoord / iResolution.xy. It is empty after a resize or a change of shader. Scale a fade by iTimeDelta, since the frame rate varies. |
| vFont | sampler2D | 0 to 1 | A monospace font, one character code in each cell of a grid of 16 × 16, for writing text. |
| vGlyph(p, c) | float | 0 to 1 | A function, not a value: how much of character c covers the point p of its cell, where (0, 0) is the lower left corner of the cell. The easy way to write text with vFont. |
Three limits are shown on screen where they apply.
- Shaders in the library
- 20
- Source of one shader
- 16384 bytes
- Shader tiles in a strip
- 3
The library counts its shaders as 2/20 shaders. The editor counts the bytes of the source, and the count turns red past the limit. A fourth Shader tile, which a preset can bring in, shows GPU budget reached (max 3 shader tiles) instead of a picture.
Windows and workspaces
The app can show AUGVR in several windows at once, each with its own input, its own view and its own look. A workspace saves such a set of windows and brings it back in one step. All of this belongs to the app; the plugin has none of it.
More than one window
New instance opens another AUGVR window. It is in three places:
- the header, as the button whose tooltip reads New instance (⌘N) on macOS and New instance (Ctrl+N) on Windows;
- the keyboard: ⌘N on macOS, where the command is also Instance > New Instance in the menu bar, and Ctrl+N on Windows;
- in mini mode, the Instance section of the Options window.
On Windows, starting the app again while it is running does the same: one more window opens in the app that is running. On macOS, opening the app again from the Dock or the Finder brings it to the front, and brings back the window used last if every window is minimized.
The new window opens a little below and to the right of the one it came from, and starts as a copy of it: the same audio input, the same view, the same theme and modules, the same size, and the same mode, full or mini.
From then on the windows are separate. Each has its own input, its own view, its own look and its own size and position, each can be a full window or a strip, and a change made in one is not followed by the others. That is how a full window on one display and a strip on another are set up, or two windows that listen to two inputs. Two windows can also listen to the same input: see Getting sound in.
All the windows belong to one app. On macOS it has one icon in the Dock and one menu bar, and the commands of the menus act on the window in front. The first window is named AUGVR and the others AUGVR (2), AUGVR (3) and so on, which is how notices refer to them. Up to 16 windows can be open at once; asking for one more shows a notice instead: Couldn't open a new instance: AUGVR can have up to 16 windows open at a time.
To close one window on macOS, choose Instance > Close Window or press ⌘W. On Windows, click Close at the right end of the header or press Alt+F4. In mini mode, Quit this instance in the Options window does the same, after you confirm with Quit. Closing the last window ends the app.
Workspaces
A workspace is a saved set of windows. For each window it keeps:
- whether it is a full window or a mini strip;
- its position and size, and the display it was on;
- its view and its look: the theme, the modules and the appearance of the strip, and whether the meter panel is shown or collapsed;
- Always on top and, for a strip, Pin and Opacity;
- its audio input, with the channels chosen;
- on Windows, whether it was maximized.
The list of workspaces opens from the Workspaces button in the header. Esc or a click outside the list closes it. On macOS the same commands are in the Workspaces menu, where Manage Workspaces… opens the list.
FIG.50AUGVR / Workspaces
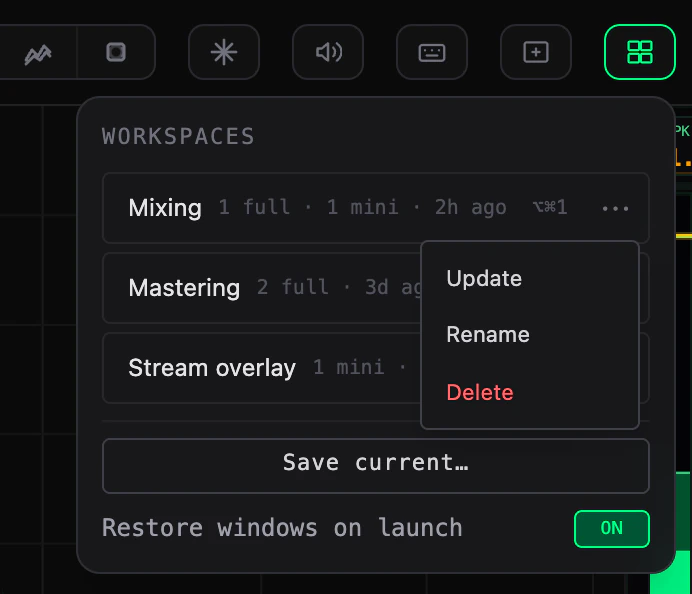
- 01WorkspacesThe header button with four squares. Opens and closes the list.
- 02WorkspaceClick a row to recall it.
- 03ContentsHow many full windows and mini strips it holds, and how long ago it was saved: 1 full · 1 mini · 2h ago.
- 04ShortcutShown for the first nine workspaces.
- 05ActionsThe three dots open Update, Rename and Delete for that row.
- 06Save current…Saves every open window as a new workspace.
- 07Restore windows on launchON or OFF. It has its own heading below.
A strip has no header. In mini mode the same list is the Workspaces section of the Options window, and on macOS Manage Workspaces… opens it there. For the Options window, see Mini mode.
FIG.51AUGVR / Workspaces in the Options window
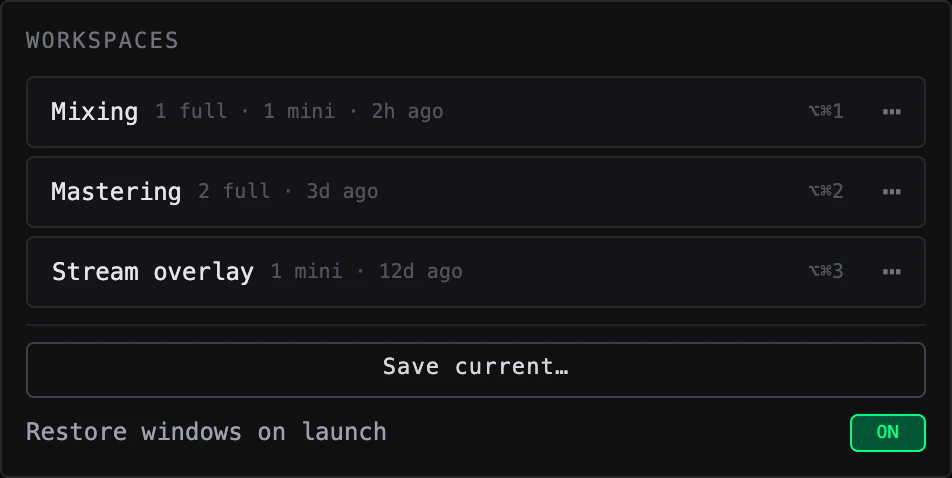
The same list, for use from a mini strip.
Saving. Set the windows up the way you want them, then click Save current… at the bottom of the list. A name field appears, filled with Workspace and the next number. Type a name of your own if you like, then press SAVE or Enter. CANCEL or Esc leaves without saving. A workspace always holds every AUGVR window that is open.
On macOS, ⌥⌘S or Workspaces > Save Workspace… saves from any window, a mini strip included. It opens a small prompt titled Save Workspace with one field, Name:, already filled in and selected, and two buttons, Save and Cancel. Enter saves and Esc cancels. If the field is left empty, the suggested name is used.
Recalling. Click a workspace in the list, choose it in the Workspaces menu on macOS, or use its shortcut. AUGVR then makes the open windows match the workspace.
- Windows that are already open are reused where they fit. They take the saved input, look, mode, position and size.
- Windows that are missing are opened.
- Windows that the workspace does not hold are closed, without asking.
A recall replaces what is openWindows that are not part of the workspace close without a question. To keep the arrangement you have now, save it as a workspace first.
The first nine workspaces in the list have shortcuts: ⌥⌘1 to ⌥⌘9 on macOS, Ctrl+Shift+1 to Ctrl+Shift+9 on Windows. On Windows they work while an AUGVR window is in front.
A workspace can outlive the setup it was saved on. If the display a window was on is no longer connected, the window opens on a display that is. If its audio input is gone, the window keeps the input it has, and a notice says so.
FIG.52AUGVR / A notice after a recall

- 01NoticeWhat could not be brought back. It goes away by itself after a few seconds.
- 02DismissCloses the notice at once.
A missing input gives a notice with the name of the saved input in the quotes: Audio input "…" isn't available, so this window kept its current input. If the input is there and cannot be opened, the notice says so.
Choose another input for that window in the usual way: see Getting sound in. On a mini strip the notice is one line at the top of the strip. Each window shows the notices about itself. The window you recalled from also lists those of the other windows, each one starting with the name of its window, for example AUGVR (2).
Update, Rename, Delete. The three dots at the end of a row open its actions.
- Update replaces the workspace with the windows that are open now.
- Rename turns the name into a field. Enter or OK confirms, Esc cancels.
- Delete asks once, with DELETE and CANCEL.
None of the three moves or closes a window.
Restore windows on launch
Restore windows on launch is the switch at the bottom of the Workspaces list. On macOS it is also in the Workspaces menu, as Restore Windows on Launch, ticked while it is on. It is on by default.
While it is on, quitting AUGVR keeps every open window for the next launch, with its place, mode, input and look. Closing a window is a different command: a window you close does not come back. The last window is the exception: closing it ends the app, and that window opens again at the next launch.
| Command | macOS | Windows |
|---|---|---|
| Quit, every window | PhaseCvlt AUGVR > Quit PhaseCvlt AUGVR (All Windows), ⌘Q | Quit All at the bottom of the Workspaces list, Ctrl+Q |
| Close, one window | Instance > Close Window, ⌘W | Close in the header, Alt+F4 |
If the app ends without being quit, for example when it is forced to quit, the windows that were open come back as well.
To start once without the windows of last time, hold Shift while you start the app. It opens one window, the restore is skipped for that launch and the switch stays as it is. With the switch off, the app always starts with one window.
Always on top
Always on top keeps an AUGVR window above every other window. It is in Config, in the DISPLAY section (FIG.34): ON or OFF, and off by default. Each window has its own setting; a workspace keeps it for each window, and so do the windows that come back at the next launch.
The switch is for the full window. A mini strip has its own Pin, which is on by default and counts only while the window is a strip: see Mini mode.
Shortcuts and menus
AUGVR has a short list of keys. Press ?, or click the keyboard button in the header, to see it in the window. Close the list with its x, with Esc or by clicking outside it.
FIG.53AUGVR / Keyboard Shortcuts
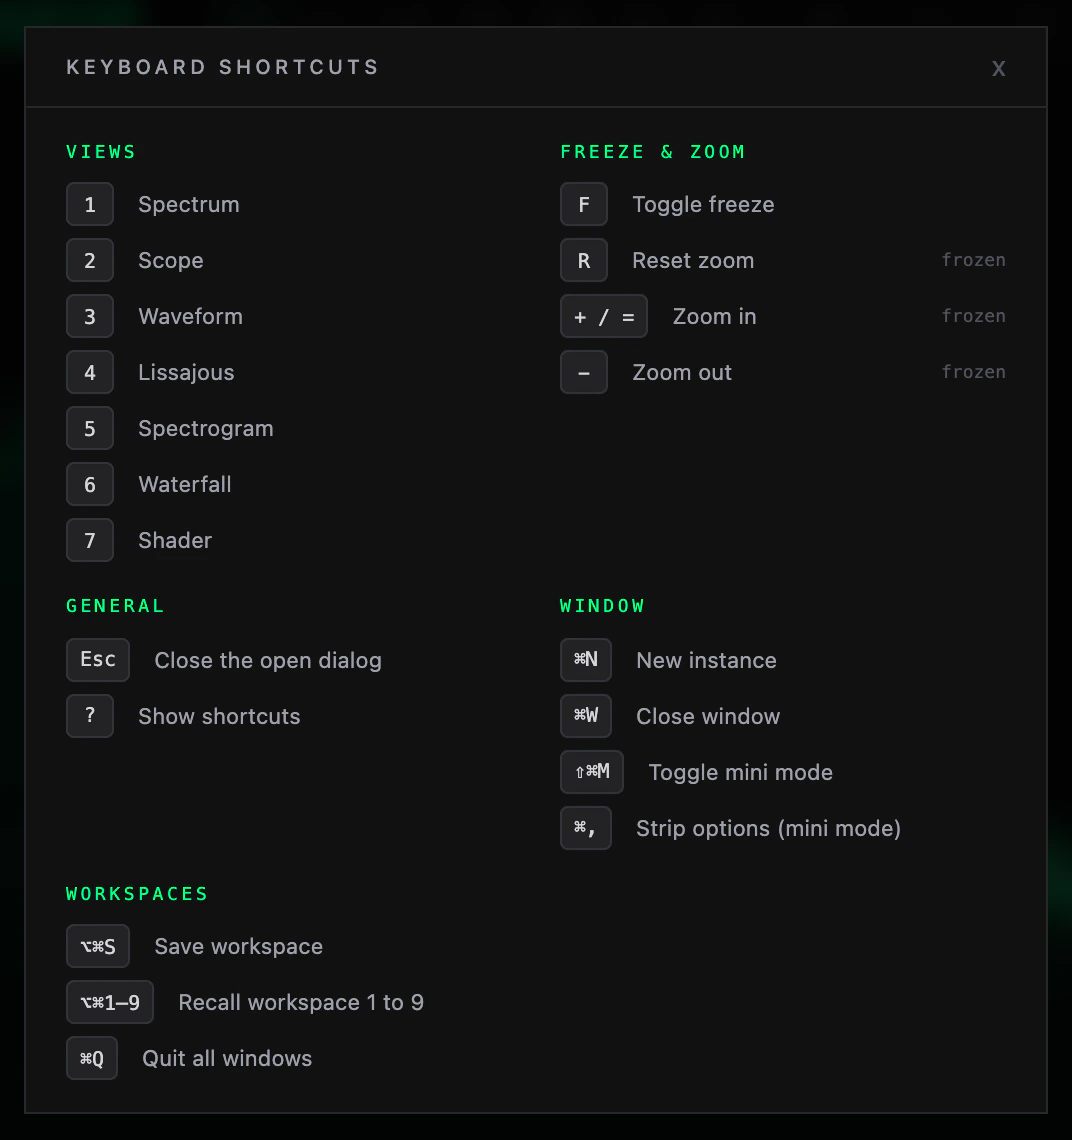
The dialog in the app on macOS. The keys tagged frozen act only while a view is frozen. The groups WINDOW and WORKSPACES are shown in the app only, with the keys of the system it runs on. In the plugin, GENERAL lists Esc as Release focus to DAW.
A key acts on the window that has the keyboard focus. The single keys are ignored while a text field, a drop-down or a slider has the focus, and while Config or a dialog is open. If a key does nothing after you have moved a slider, click on the view first.
| Key | Does | When |
|---|---|---|
| 1 | Shows the Spectrum. | |
| 2 | Shows the Scope. | |
| 3 | Shows the Waveform. | |
| 4 | Shows the Lissajous. | |
| 5 | Shows the Spectrogram. | |
| 6 | Shows the Waterfall. | |
| 7 | Shows the Shader view. | |
| F | Freezes the views, or lets them run again. | |
| R | Resets the zoom. | While frozen |
| + or = | Zooms in. | While frozen |
| − | Zooms out. | While frozen |
| Esc | Closes the open dialog. With none open, in the plugin, gives the keyboard focus back to the DAW. | |
| ? | Shows the shortcuts. |
The zoom keys act on the view that is on screen; Freeze and zoom has the rest. In a DAW, a key reaches the plugin only while its window has the keyboard focus, and Esc gives the focus back to the DAW.
In the app, the mini strip has its own keys. The view keys and the zoom keys do nothing there.
| Key | Does |
|---|---|
| F | Freezes every tile of the strip, or lets them run again. |
| A | Switches Arrange on or off. |
| Esc | Deselects the selected overlay. With none selected, leaves Arrange. |
| Delete | Deletes the selected overlay. Backspace does the same. |
In the Options window, Esc closes the window. If a field or a slider has the focus, the first Esc only leaves it. Mini mode covers Arrange and the overlays.
The keys for windows and workspaces belong to the app. On macOS they are the shortcuts of its menus.
| Command | macOS | Windows |
|---|---|---|
| Open another window | ⌘N | Ctrl+N |
| Switch mini mode on or off | ⇧⌘M | Ctrl+Shift+M |
| Open the strip's Options window | ⌘, | The gear on the strip |
| Close this window | ⌘W | Alt+F4 |
| Quit all windows | ⌘Q | Ctrl+Q |
| Save a workspace | ⌥⌘S | Save current… in the Workspaces list |
| Recall workspace 1 to 9 | ⌥⌘1 to ⌥⌘9 | Ctrl+Shift+1 to Ctrl+Shift+9 |
On Windows these keys work while an AUGVR window is in front. Only the first nine workspaces have a key. Holding Shift while the app starts skips the return of the last windows once; see Windows and workspaces.
The macOS menus
On macOS the app adds five menus to the menu bar, Instance, Audio, View, Workspaces and Help, and puts its Quit item in the PhaseCvlt AUGVR menu. Their commands act on the window in front. The plugin has no menus.
| Item | Shortcut | What it does |
|---|---|---|
| PhaseCvlt AUGVR | ||
| Quit PhaseCvlt AUGVR (All Windows) | ⌘Q | Quits every AUGVR window. With Restore Windows on Launch on, they all return at the next launch. |
| Instance | ||
| New Instance | ⌘N | Opens another window, with the input and the settings of this one. |
| Close Window | ⌘W | Closes the window in front and no other. With an Options window or a dialog in front, closes only that. |
| Audio | ||
| Audio Input… | Opens the Choose Audio Input window. See Getting sound in. | |
| Audio Diagnostics… | Opens Audio Diagnostics in this window. | |
| Copy Diagnostics Report | Copies the diagnostics report, ready to paste into a message to support. See If nothing shows. | |
| Save state…, Load state… | Save the settings of this window to a file you choose, and load them back. | |
| Reset to Default State | Asks first, then puts the look and the view settings of this window back to their defaults, as RESET DEFAULTS in Config does, and shows the Spectrum with Freeze off. The audio input, the size, position and mode of the window, the other windows, the workspaces and your presets and shaders are kept. | |
| View | ||
| Mini Mode | ⇧⌘M | Switches between the full window and the mini strip. Ticked while the window is a strip. |
| Strip Options… | ⌘, | Opens the Options window of the strip. Available in mini mode only. |
| Workspaces | ||
| Save Workspace… | ⌥⌘S | Asks for a name, then saves every open AUGVR window as a workspace. |
| The saved workspaces, by name | ⌥⌘1 to ⌥⌘9 | Recalls that workspace. The first nine have a shortcut. With none saved, the menu reads No Saved Workspaces. |
| Manage Workspaces… | Opens the list of workspaces: the Workspaces popover in the full window, the Workspaces section of the Options window in mini mode. | |
| Restore Windows on Launch | Ticked when on. Choose it to switch it on or off. | |
| Help | ||
| AUGVR User Guide | Opens this guide in your browser. About has the same link, User guide: see Updates, About and help. | |
Windows has no menu bar. There, another window, Workspaces and mini mode are buttons in the header; the input and Audio Diagnostics are in Config under INPUT, and Copy report in Audio Diagnostics copies the report; Quit All is at the foot of the Workspaces list, and this guide opens from User guide in About.
If nothing shows
When the display stays still, work through these checks in order.
- Is anything playing? With system audio as the input, the sound has to be playing through the computer's default output. Check too that Freeze in the header is not lit.
- The input. In the app, click Input Source in the window that stays still and look at what is selected: each window has an input of its own. See Getting sound in.
- The stereo pair. On an interface with more than two inputs, tick the pair that carries what you hear. The first pair is usually not it.
- The permission, on macOS. If a card titled System audio recording is off is on the display, click Open System Settings on it, switch PhaseCvlt AUGVR on under System Audio Recording Only on the page that opens, Screen & System Audio Recording, then select Desktop Audio (System) again.
- In a DAW. Audio has to reach the track AUGVR is inserted on, and the plugin's window has to be open.
- AUGVR Server. Its window should read Connected to AUGVR Standalone, and only one Server should be in use.
In the app, Audio Diagnostics opens from Config, with OPEN beside Diagnostics in the INPUT section, from the View diagnostics link on the card in FIG.4, and on macOS also from the Audio menu. Copy report, or the macOS menu item Copy Diagnostics Report, puts a report on the clipboard to send to PHASECVLT support.
FIG.54AUGVR / Audio Diagnostics
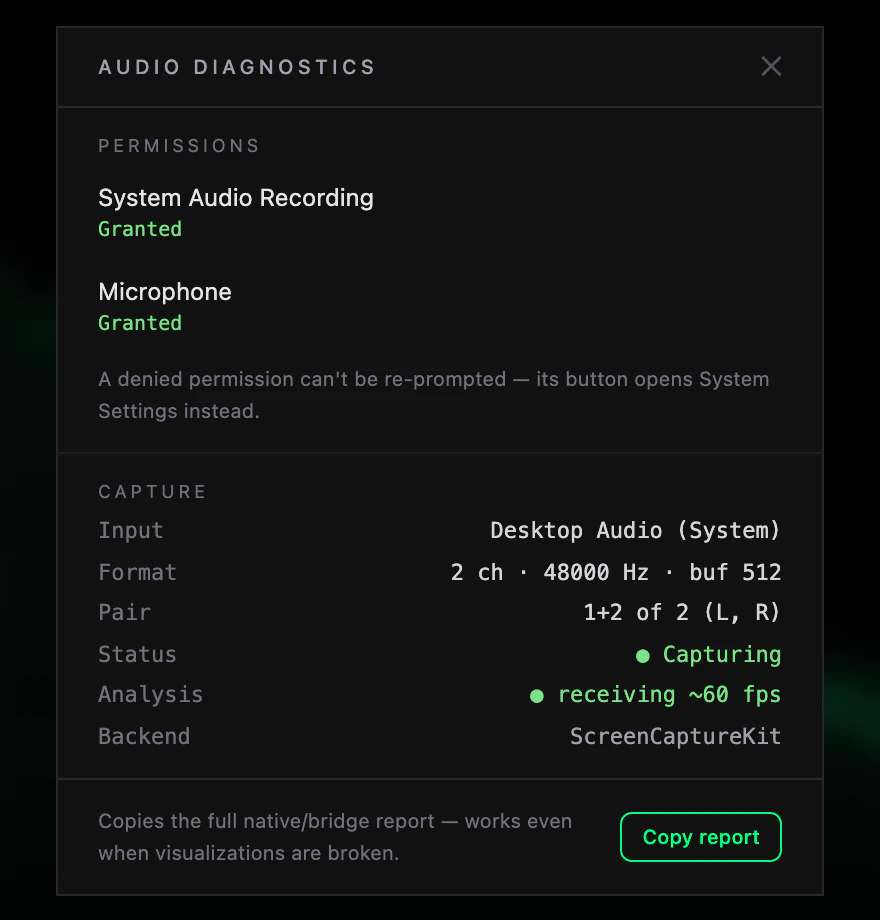
- 01Copy reportCopies the report. The button reads Copied ✓ for a moment when it has.
Updates, About and help
Click the PHASECVLT mark at the left of the header to open About. It shows what is installed and leads to everything else in this section.
FIG.55AUGVR / About
- 01Version and buildThe installed version and, under it, the date and the identifier of the build. Quote both when you write to support.
- 02What's newOpens the changelog. The link reads What's new in v followed by the installed version. While an update with notes is waiting it reads See what's in the next update → instead.
- 03phasecvlt.comOpens the website in your browser.
- 04User guideOpens this guide in your browser.
- 05Report a BugOpens the form described below.
- 06Share anonymous usage statsA tick box: ticked is on. Its tooltip says what is sent: Sends the plugin version, OS, DAW name and an anonymous install ID. No audio, no names, no files.
Close About with Esc or with a click outside it. In mini mode the mark is not on screen: About opens from the full window.
Updates
When a newer version of AUGVR is available, a strip along the bottom of the window says so. In the app this news appears in the first window, the one named AUGVR.
FIG.56AUGVR / An update is available

- 01VersionUpdate available: and the number of the new version.
- 02What's newOpens the changelog, with the notes of the new version first. It is there when that version has notes.
- 03DownloadOpens the download in your browser. Install it as you did the first time; the Quick Start has the steps.
- 04Dismiss× hides the strip.
A required update carries a red tag, REQUIRED UPDATE, in front of the text. Its strip has no × and cannot be dismissed.
About carries the same news under the version: Update available: with the new version and a Download link.
Mini mode has no room for this strip. There, an available update shows as a small pill, Update to and the version, in the menu of the mini strip. Click it to open the download. A required update also lays a thin red bar along the bottom of the mini strip, with a Download link of its own. See Mini mode.
What's new
The changelog lists what changed in a version, under headings such as Features and Bug Fixes. It opens only when you ask for it, from the link in About or from What's new on the update strip.
With no update waiting it has one block, WHAT'S NEW, for the installed version. While an update with notes is waiting, the block IN THE NEXT UPDATE comes first and is open, and the installed version is folded below it, under CURRENT and its version number. Click the title of a block to open or close it. Close the dialog with its ×, with Esc, or with a click outside it.
News from PhaseCvlt
Now and then PhaseCvlt has something to tell you about AUGVR: a new version, a new feature, a change worth knowing about. The plugin and the app show these items in a quiet way, and they can be turned off.
A new item puts a small dot on the Config gear in the header, and in mini mode on the gear of the strip's menu. The dot goes once you have looked at the list.
FIG.57AUGVR / Something new
The dot on the upper right corner of the gear: there is an item you have not seen yet. It takes the main colour of the theme.
To read the items, open Config and the NEWS section at its foot, which carries the same dot after its title. In mini mode they are in the Options window, under News. The newest item comes first.
FIG.58AUGVR / News in Config
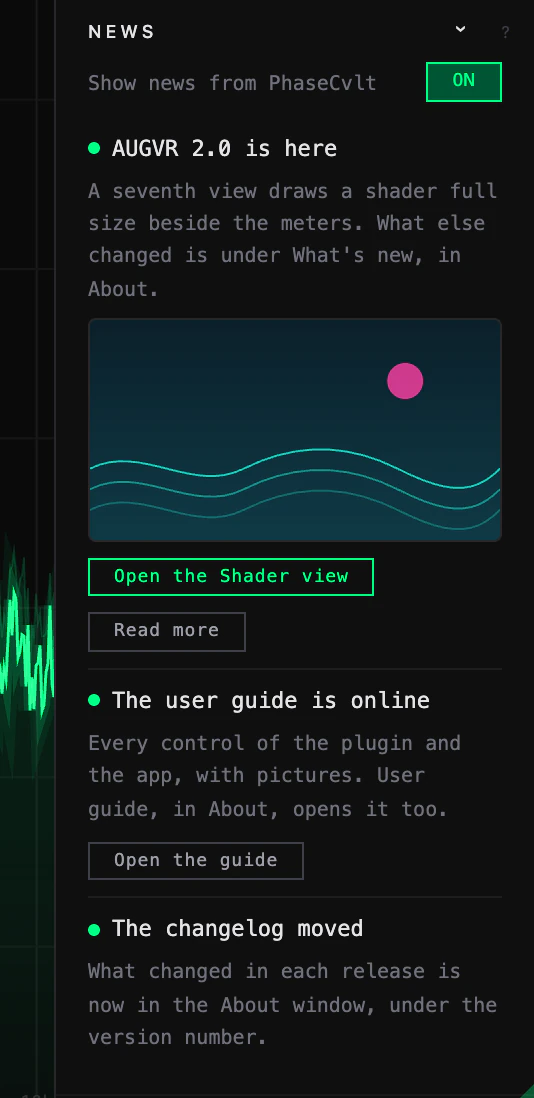
- 01Show news from PhaseCvltThe switch, ON or OFF. On by default.
- 02Not seen yetA dot before the title. It stays while the list is open.
- 03PictureSome items have a picture or a short clip.
- 04A button into AUGVRIt takes you to what the item is about, here the Shader view.
- 05LinkOpens a web page in your browser.
An important item can also show once as a card, in the lower right corner of the display, beside the meter panel. It only appears when a window of AUGVR has just opened and no sound has come in yet, so it never lands in the middle of a session. It stays until you close it with its × or use one of its buttons, and it is not shown again.
FIG.59AUGVR / A news card
- 01TitleWith the start of the text under it. The whole text is in the list.
- 02PictureWhen the item has one.
- 03ButtonsThe same as in the list. Either one closes the card.
- 04Close× closes the card. The item stays in the list.
In mini mode the same item runs along the bottom of the strip, as one line. A strip tall enough to hold the card shows the card instead, at its lower left.
FIG.60AUGVR / News on the mini strip

- 01NEWAnd the title of the item.
- 02ViewOpens News in the Options window.
- 03Close× takes the line away.
Until such an item has been seen, the menu of the strip also carries a New button that opens News.
- To turn news off, switch Show news from PhaseCvlt to OFF, in Config or in the Options window. There is then no dot, no card and no New button, the list reads News is off., and AUGVR stops looking for news. Switch it on again at any time.
- Which items you see is decided on your computer: an item can be meant for the app or the plugin only, or for one system or version.
- What is counted. AUGVR counts how often an item was shown, read in the list or clicked, with nothing that identifies you or your computer. It sends these counts only while Share anonymous usage stats is ticked in About, and never while news is off.
Report a Bug
Report a Bug in About opens a form inside AUGVR. All three fields are needed.
FIG.61AUGVR / Report a Bug
- 01DESCRIPTIONWhat went wrong.
- 02STEPS TO REPRODUCEWhat you did, one step to a line, so that it can be repeated.
- 03EMAIL (FOR FOLLOW-UP)Where the reply should go. It has to be a complete address.
- 04SUBMITSends the report to PHASECVLT. It becomes available once all three fields are filled in.
The report carries what you typed, the version of AUGVR and details of the system it ran on: the operating system, an identifier of the computer, its processor and memory, the host, and the audio settings and state of AUGVR at that moment. When it has been sent, the form confirms it. If it could not be sent, the form says why. CANCEL, Esc or a click outside the form closes it without sending.
Getting help
For help with AUGVR, go to phasecvlt.com. The Quick Start covers downloading and installing. This guide is there too: User guide in About opens it, and so does Help > AUGVR User Guide in the app's menu bar on macOS.
When you write about a problem, quote the version and build from About. If the problem is that the app shows nothing, add the report from Audio Diagnostics. See If nothing shows.
Reference
The parameters a host sees, the modules of the mini strip and the main facts in one place. The loudness targets and their values are listed under Choosing a target, in The meters.
Host parameters
The plugin gives the host two parameters. Both can be automated, and both move in whole steps.
| Control | Host name | Range | Default | Values |
|---|---|---|---|---|
| View selector | View | 0 to 6 | 0 | 0 Spectrum, 1 Scope, 2 Waveform, 3 Lissajous, 4 Spectrogram, 5 Waterfall, 6 Shader |
| Freeze | Freeze | 0 to 1 | 0 | 0 running, 1 frozen |
Freeze is always off when a project is loaded, whatever it was when the project was saved. Everything else, the settings in Config and in the view toolbars, is saved with the project and changed only in the window.
Mini mode modules
The eighteen modules a strip can be built from, in the groups of the Add module list, each with the description the app gives it. Mini mode covers their settings.
| Module | In the app's words |
|---|---|
| Visualizers | |
| Spectrum | FFT spectrum analyser |
| Scope | Triggered oscilloscope |
| Waveform | Scrolling waveform history |
| Lissajous | Stereo vectorscope |
| Spectrogram | Time / frequency heatmap |
| Waterfall | 3D spectral waterfall |
| Bars | Chunky spectrum bars |
| Mirror Bars | Spectrum mirrored on centre |
| Ring | Radial spectrum ring |
| Meters | |
| Peak / True Peak | Peak / RMS / true-peak bars |
| Loudness | Momentary / short / integrated |
| Correlation | Stereo phase correlation |
| History | Loudness history graph |
| Beat | Beat / transient pulse |
| VU | Analogue VU needle |
| Balance | Left / right balance |
| Custom | |
| Custom | Your own text or image |
| Shader | |
| Shader | GLSL shader canvas |
The first six can be in a strip once each. The others can be added more than once, Shader up to three times.
At a glance
- Plugin formats
- AU and VST3 on macOS, VST3 on Windows
- App
- PhaseCvlt AUGVR, on macOS and Windows
- Companion plugin
- AUGVR-Server, in the same formats
- Channels
- Mono or stereo
- Sidechain
- Optional, mono or stereo, in the plugin
- Latency
- None. The audio passes through unchanged
- Window
- 990 × 600 to 4096 × 2560 px
- Windows of the app
- Up to 16 open at once
- Mini strip
- 360 × 64 to 4096 × 400 px
- Views
- 7
- Meter modes
- 5
- Loudness
- ITU-R BS.1770-4 / EBU R128
- Loudness targets
- 14, and Off
- Themes
- 11, and custom colours
- Frame rate
- 12 to 60 fps
- Host parameters
- 2
- Requirements
- macOS 13 Ventura or later, Universal (Apple silicon and Intel); Windows 10 or later, 64-bit
- System audio, in the app
- macOS 14.4 or later; Windows 10 or later